A Warm Kitchen and a Good Story
My kitchen smells like spiced wine and memories today. I am making my layered gingerbread dessert. It is not a fussy thing. It is layers of soft cake, sweet pears, and cool custard.
I first made this for my book club years ago. My friend Margaret said it tasted like a hug. I still laugh at that. Food should feel that good. That is why this matters. It turns a simple treat into a happy moment.
The Magic of Simmering Pears
Let’s start with the pears. You simmer them in red wine with sugar and spice. The kitchen fills with a sweet, spicy smell. Doesn’t that smell amazing? The pears soak up all that lovely color and flavor.
They turn a beautiful ruby red. You must let them get completely cold in the liquid. Patience makes them perfect. This step matters because it gives the dessert its deep, fruity heart. What is your favorite fruit to cook with? I would love to know.
Building Your Sweet Tower
Now for the fun part. You layer everything in a big glass bowl. First, gingerbread chunks. Then, those wine-kissed pears. A big swoosh of custard comes next. You do it again and again.
It is like building a sweet tower. I save the prettiest pear slices for the sides. You press them gently to make a fan. It looks so fancy, but it is so easy. Fun fact: gingerbread was once used to make decorative houses because it gets firm when baked.
Why We Layer Food
This dessert is all about the layers. Each bite has soft cake, juicy pear, and smooth custard. You get a little bit of everything. It is much more fun than eating them separately.
That is the second reason this matters. Layering flavors and textures makes food special. It is a small act of care. Do you prefer desserts with lots of layers or one simple flavor? Tell me in the comments.
A Dessert That Waits for You
The best part? You can make it hours before your guests arrive. Just pop it in the fridge. The flavors become even better friends as they sit. It chills and waits for you.
No last-minute panic. This is a dessert made for sharing and talking. When you bring it to the table, everyone will “ooh” and “aah.” What is your go-to dessert for a party? I am always looking for new ideas to try.
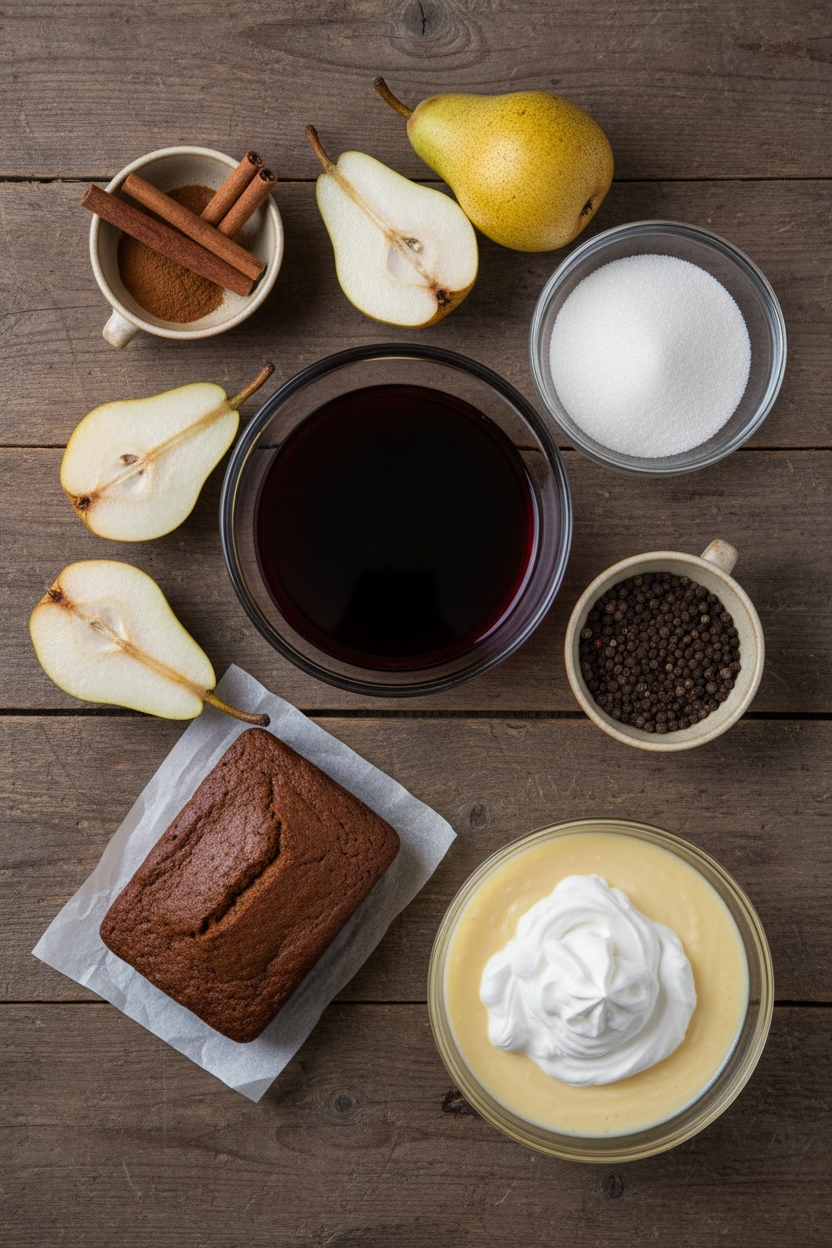
Ingredients:
| Ingredient | Amount | Notes |
|---|---|---|
| Red wine | 3 cups | |
| Sugar | 1 cup (7 oz / 198g) | |
| Cinnamon stick | 1 | |
| Black peppercorns | 1 tablespoon | |
| Firm pears (e.g., Bosc) | 4 lbs (1.81 kg) | Peeled, halved, and cored |
| Bold and Spicy Gingerbread cake | 1 cake | |
| Vanilla custard | 3 cups | Chilled |
| Whipped cream | 2 cups | Lightly sweetened |
Instructions
Step 1: Let’s start with the pears. Put wine, sugar, cinnamon, and peppercorns in a big pot. Heat it until it boils and the sugar melts. Turn the heat down low. Now, gently add your pear halves. Put the lid on and let them cook softly for about 10 minutes. They should be almost soft. (A hard-learned tip: Use firm pears so they don’t turn to mush!)
Step 2: Take the pot off the stove. Let those pears cool right in that lovely red liquid. Once they’re cool, tuck them into the fridge. They need to get nice and cold for at least two hours. This makes them so flavorful. I always think the waiting is the hardest part. What’s your favorite part of cooking—the making or the eating? Share below!
Step 3: Time to get everything ready. Take the cold pears out with a spoon. Slice them thinly. Save the five prettiest slices from each wide end. Chop the rest into little chunks. Now, slice your gingerbread into slabs. Carefully split each slab to make two thin layers. Save the top pieces. Chop the rest into cake chunks. Doesn’t that smell amazing?
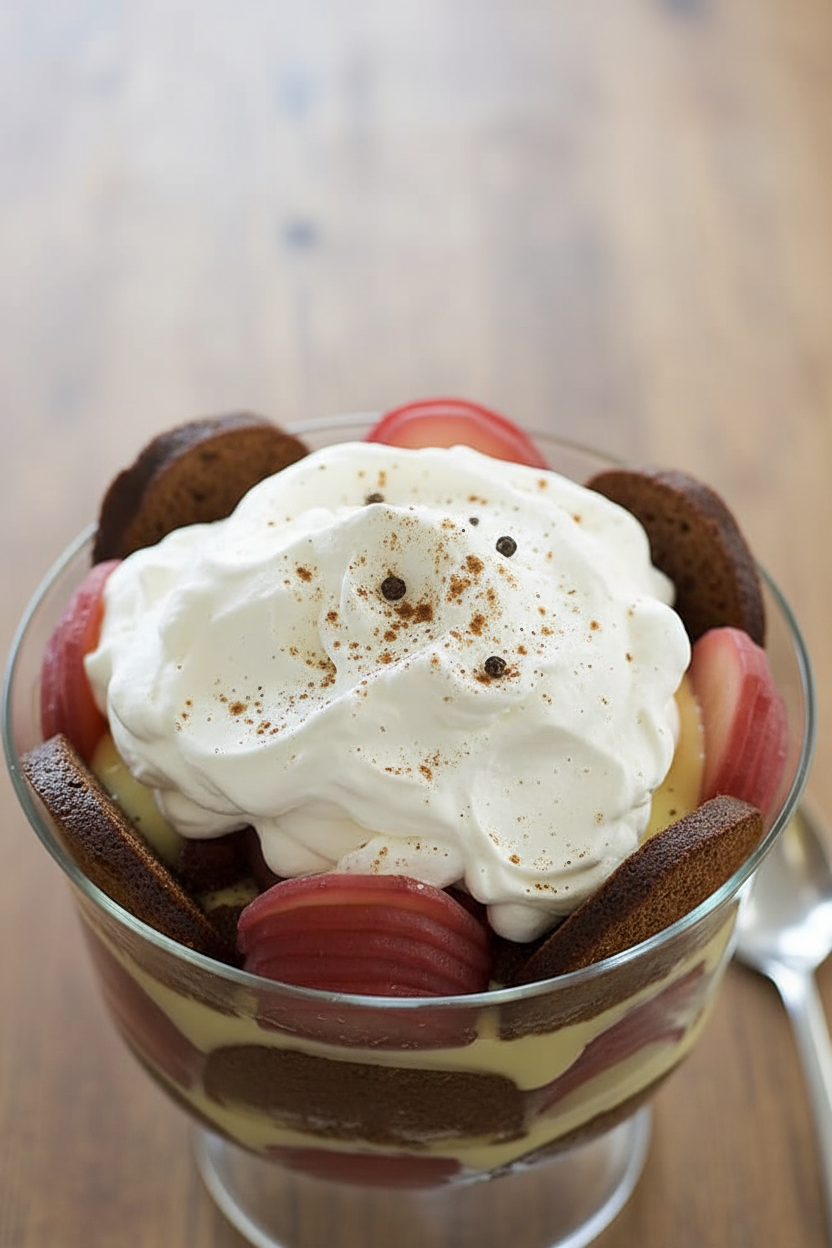
Step 4: Let’s build our dessert! Press your saved pear slices with your palm to fan them out. Place these fans and your saved cake layers around the dish’s bottom edge. It looks so pretty already. Now, make a layer of gingerbread chunks in the middle. Add a layer of chopped pears on top. Cover it all with a big, creamy blanket of custard. I still laugh at how messy my first try was!
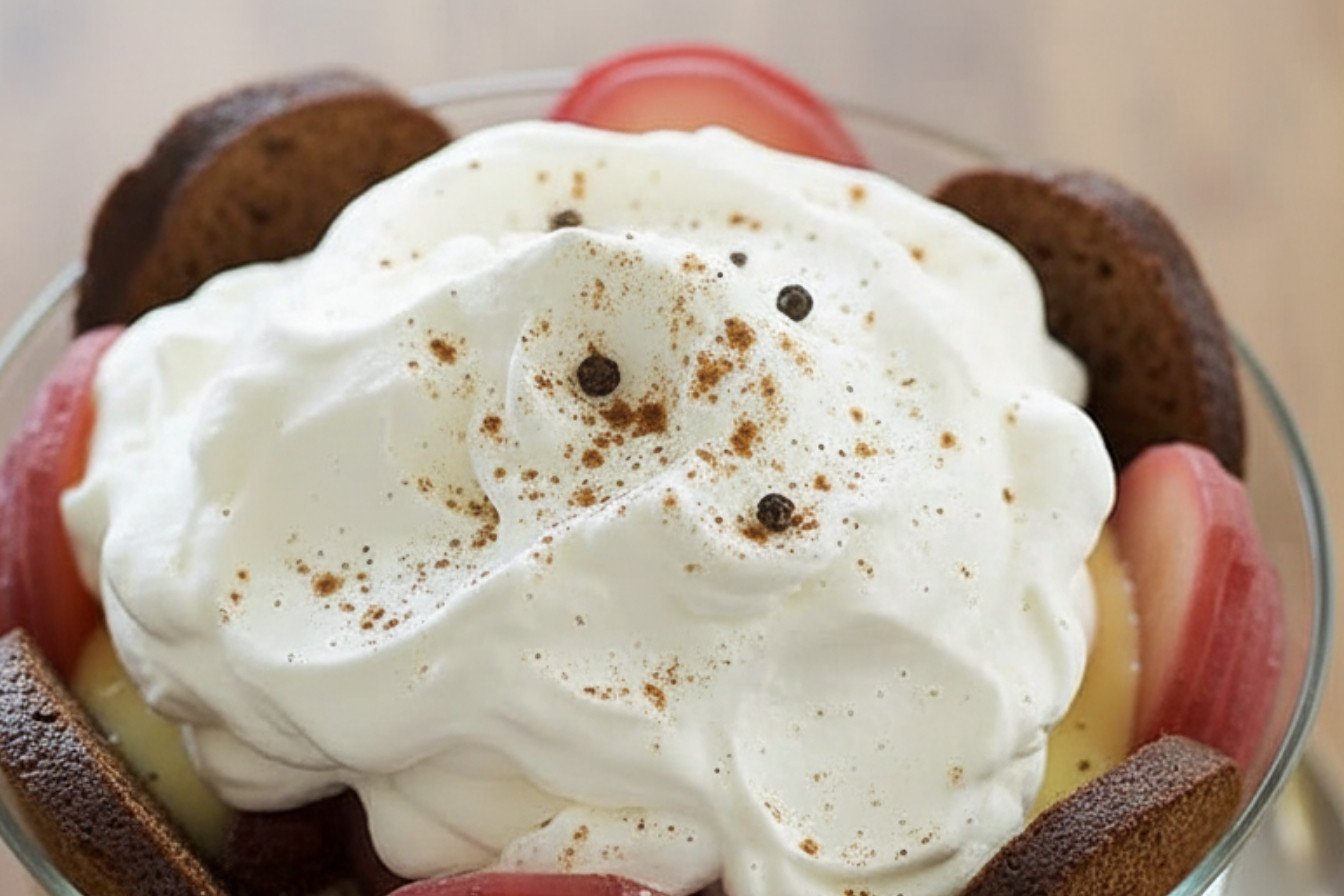
Step 5: Repeat your layers one more time. Cake chunks, pears, custard. For the grand finish, top it with your last cake pieces, pear fans, and any leftover chunks. Now, pile on all the whipped cream! You can serve it right away. Or, chill it for a few hours to let the flavors hug. (This makes it even better, trust me.)
Creative Twists
This recipe loves to play dress-up. Try using apple cider instead of wine for the pears. It gives a cozy, autumn feel. Use store-bought ginger snaps if you’re short on time. Just layer them right in. For a fun surprise, mix a little orange zest into the whipped cream. It adds a bright, sunny note. Which one would you try first? Comment below!
Serving & Pairing Ideas
This dessert is a celebration all by itself. Serve it in pretty glasses for a special touch. A little sprinkle of cinnamon on top looks lovely. For drinks, a small glass of sweet sherry is a classic friend to gingerbread. For the kids, a steaming mug of spiced apple cider is perfect. The warm spices just sing together. Which would you choose tonight?
Keeping Your Gingerbread Dessert Happy
This dessert is best eaten the day you make it. The gingerbread stays nice and soft. You can chill it for up to six hours before serving.
I do not recommend freezing it. The custard and cream will get watery. The lovely texture will be lost.
You can batch-cook the pears, though. Poach a big pot of them on a Sunday. Store them in their liquid in the fridge for three days.
I learned this the hard way. I once froze a similar dessert for a surprise guest. It was a soggy surprise for us all! Batch cooking the pears saves precious time later. It means dessert is almost ready on a busy night. Have you ever tried storing it this way? Share below!
Simple Fixes for Common Hiccups
First, your pears must be firm. Soft pears will turn to mush when poached. Use Bosc or Bartlett pears for the best result.
Second, do not rush the cooling. Let the pears get cold in the liquid. This helps them soak up all the spicy, sweet flavor.
Third, be gentle when fanning the pear slices. Press with a flat palm. I remember tearing a slice when I used my fingers. Being patient here makes a beautiful presentation.
Getting the texture right matters. It makes every bite perfect. Fixing small problems builds your cooking confidence, too. You learn that mistakes have easy answers. Which of these problems have you run into before?
Your Quick Questions, Answered
Q: Can I make this gluten-free?
A: Yes! Use a gluten-free gingerbread cake. Check all your other labels, too.
Q: How far ahead can I make it?
A: Assemble it up to 6 hours before serving. Keep it chilled in the fridge.
Q: I don’t have red wine. What can I use?
A: Use cranberry juice or strong black tea. They give nice color and flavor.
Q: Can I make a smaller version?
A: Absolutely. Just halve all the ingredients. Use a smaller dish for layering.
Q: Any optional tips?
A: A little orange zest in the custard is lovely. *Fun fact: Gingerbread was once used to make fancy party invitations!* Which tip will you try first?
From My Kitchen to Yours
I hope you love making this special dessert. It always feels like a celebration to me. The smells in your kitchen will be wonderful.
I would love to hear about your cooking adventure. Tell me how it went for you. Have you tried this recipe? Your stories are my favorite thing to read.
Happy cooking!
—Fiona Brooks.
Gingerbread and Pear Layered Dessert
Description
A stunning layered trifle featuring spiced wine-poached pears, bold gingerbread, and creamy custard, finished with whipped cream.
Ingredients
Instructions
- For the Pears: In a large pot, combine the wine, sugar, cinnamon stick, and peppercorns. Bring to a boil, stirring until the sugar dissolves. Reduce the heat to low and add the pear halves. Cover and simmer until the pears are almost tender, approximately 10 minutes. Take the pot off the heat and allow the pears to cool completely in the liquid. Once cool, refrigerate for at least 2 hours until cold.
- Remove the pears from the liquid with a slotted spoon and slice them thinly crosswise. Set aside one 5-slice section from the wide end of each pear half. Chop the remaining pear into ½-inch pieces.
- For the Cake: Slice the gingerbread into ½-inch thick slabs. Carefully split each slab horizontally into two layers. Set the top layers aside for garnish. Cut the remaining cake into ½-inch chunks.
- To Assemble: Take the reserved pear slices and gently press them with your palm on a clean surface to fan them out. Arrange these pear fans and the reserved cake layers around the bottom edge of a 3-quart trifle dish.
- Place a layer of the gingerbread chunks in the center of the dish and cover with a layer of the chopped pears. Spread 1½ cups of custard over the pears. Repeat these layers one more time.
- Finish with a final layer of the reserved cake layers, pear fans, gingerbread chunks, and chopped pears. Top the entire trifle with the whipped cream. It is ready to serve, or can be chilled for up to 6 hours.
Notes
- Ensure the pears are completely cold before assembling to prevent the custard from becoming runny. The trifle can be assembled a few hours ahead, making it a perfect make-ahead dessert for entertaining.


Leave a Reply