My First Kitchen Fire
I almost set off the smoke alarm the first time I made crème brûlée. I was so nervous. I used the broiler instead of a torch. The sugar burned black in one spot! I still laugh at that.
But you know what? We ate it anyway. The burnt bit tasted a little bitter. But underneath was the smoothest, richest custard. That’s why this matters. Even a small kitchen mistake can still taste wonderful. Have you ever had a cooking mishap turn out okay?
Why We Bake It in Water
This recipe uses a water bath. You put the dish inside a bigger pan of hot water. It sounds fussy. But it’s like a warm hug for the custard.
The water keeps the heat gentle. It stops the eggs from scrambling. You want a silky pudding, not sweet scrambled eggs! That gentle heat is the secret. Fun fact: This method is called a “bain-marie.” It’s French for “Mary’s bath.”
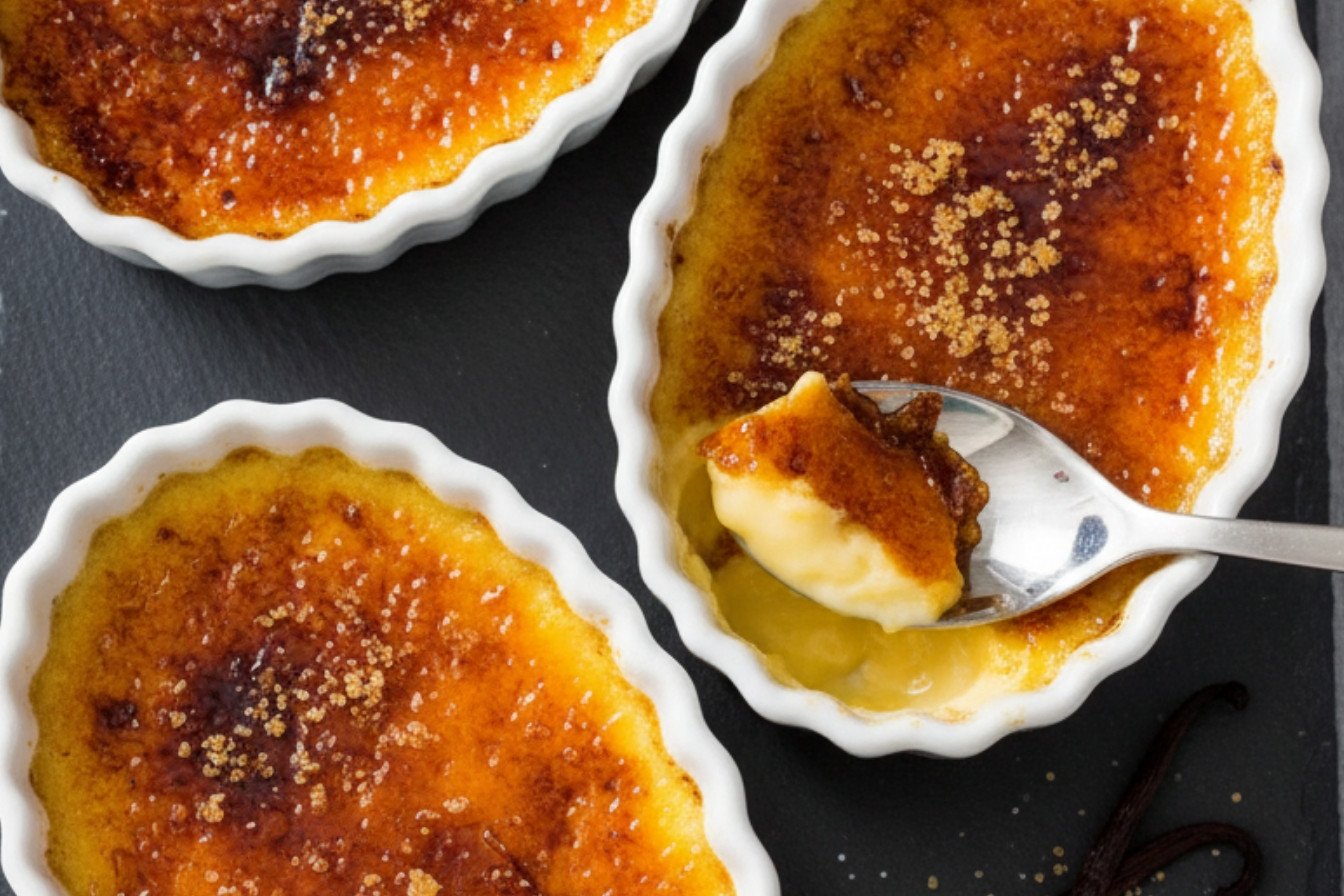
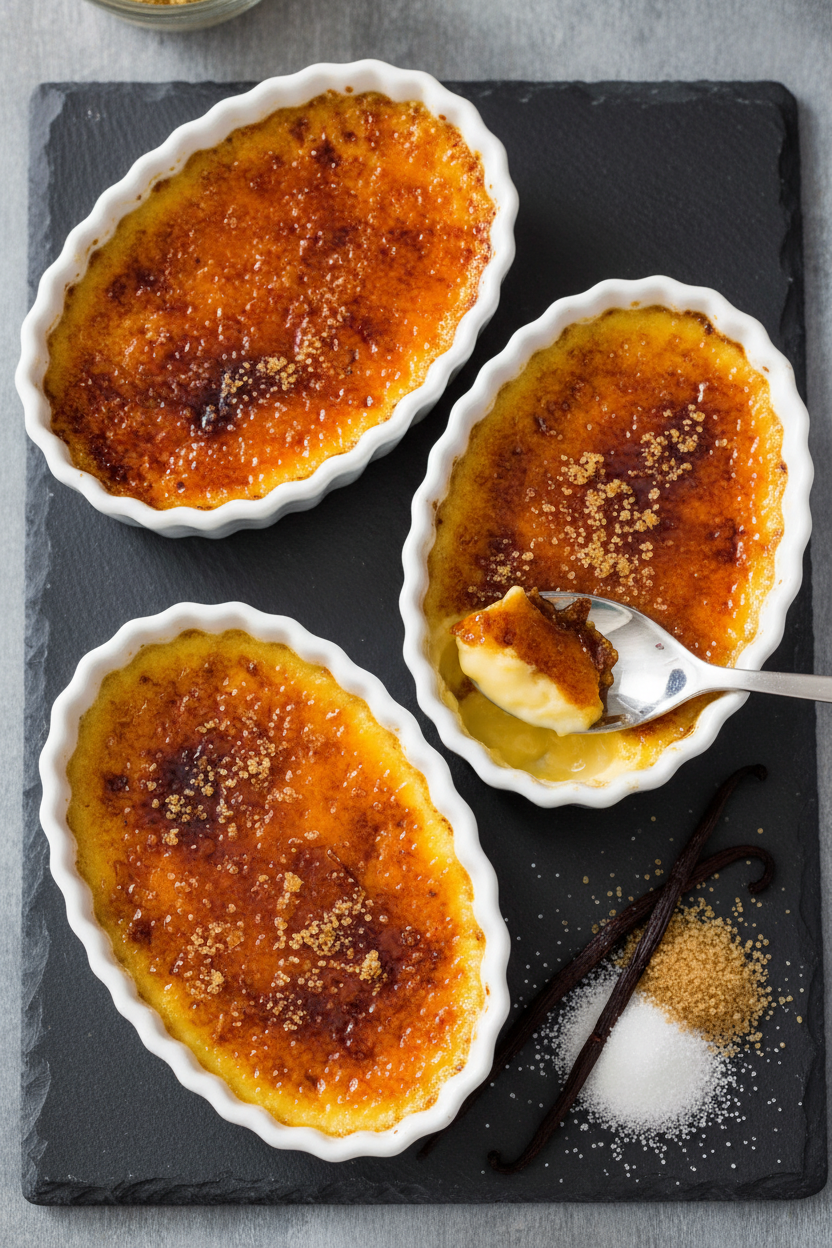
The Magic of That Crack
The best part is the top. You sprinkle sugar and melt it into glass. Then you tap it with a spoon. Crack! That sound is pure joy.
It’s the mix of textures I love. The hard, sweet shell. Then the cool, soft custard underneath. Doesn’t that sound amazing? Which do you like more, the crack or the first creamy bite?
A Dish for Sharing
This is a family-style recipe. You make one big dish for everyone. No little ramekins needed. It feels old-fashioned and cozy.
You scoop it right from the dish at the table. That’s why this matters. Some foods are about fancy presentation. This one is about sharing. It brings people together around one sweet, simple thing.
Your Turn in the Kitchen
Don’t let the fancy name scare you. It’s just sweet cream and eggs. The steps are simple if you take them slow. The hardest part is waiting for it to chill!
Trust your nose and eyes. When the cream and vanilla bean heat up, the kitchen smells like heaven. When the custard is done, the center will wiggle just a bit. What’s a dessert you’d love to try making but think is too hard?
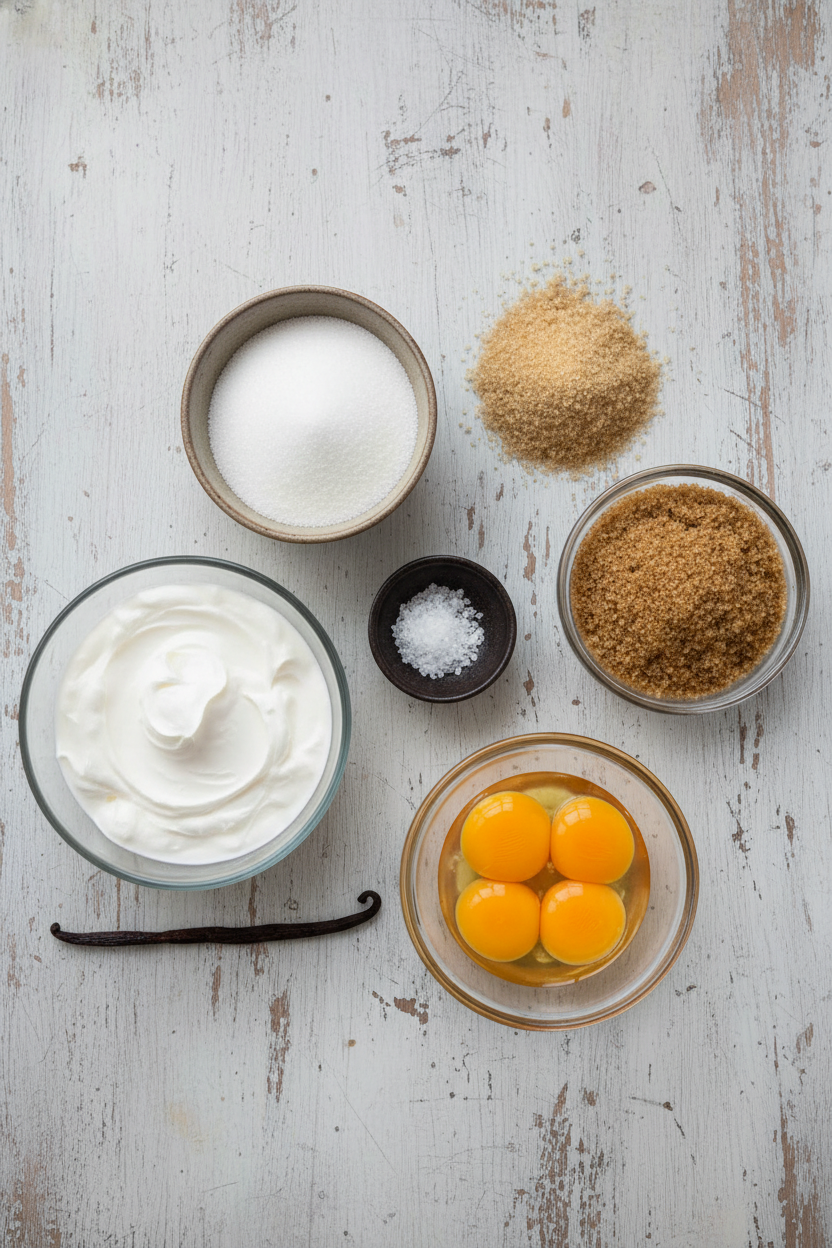
Ingredients:
| Ingredient | Amount | Notes |
|---|---|---|
| Heavy cream | 4 cups | Chilled |
| Granulated sugar | ⅔ cup | |
| Table salt | 1 pinch | |
| Vanilla bean | 1 | Halved lengthwise, seeds scraped |
| Large egg yolks | 12 | |
| Turbinado or Demerara sugar | 8-12 teaspoons | For caramelizing the top |
Instructions
Step 1: First, move your oven rack down. Preheat your oven to 300°F. This gentle heat is key for a smooth custard. I always do this first thing. It gives the oven time to get just right.
Step 2: Now, let’s make the vanilla cream. Mix 2 cups cream, sugar, and salt in a pan. Split the vanilla bean and scrape out the tiny seeds. Add both seeds and pod to the pan. Heat it until it just boils, stirring so the sugar melts. Turn it off and let it sit for 15 minutes. Doesn’t that smell amazing? This lets the vanilla flavor bloom.
Step 3: Time to get your baking dish ready. Place your casserole dish inside a bigger pan, like a roasting pan. This is called a water bath. Now, heat a full kettle of water to boiling. (A hot water bath prevents cracks, trust me!). What do we call this set-up? Share below!
Step 4: Pour the last 2 cups of cold cream into your warm vanilla mix. This cools it down. In a big bowl, whisk your egg yolks until they’re smooth. Slowly whisk in some of the warm cream. Then whisk in the rest. Strain it all into a pitcher to catch the vanilla pod. Pour this lovely custard into your empty dish.
Step 5: Carefully slide the pans onto your oven rack. Pour the hot water into the big pan. Fill it about two-thirds up the side. Bake for 40 to 50 minutes. The center should be set, not sloshy. I still laugh at the time I checked it too early. Start checking a few minutes early, just to be safe.
Step 6: Take the custard dish out of the water. Let it cool on the counter for hours. It needs to be room temperature. Then, cover it tightly with plastic wrap. Chill it in the fridge for at least 4 hours. This waiting is the hardest part, I think.
Step 7: Finally, the fun part! Pat the top dry with a paper towel. Sprinkle a thin, even layer of turbinado sugar. Use a kitchen torch to melt it into a golden crust. It will sizzle and smell like caramel. Chill it again for 30 minutes so the top gets crisp. Then, serve with a big smile.
Creative Twists
This recipe is a wonderful blank canvas. You can make it your own with little changes. My grandkids love helping me dream up new versions. It feels like a kitchen experiment. Here are a few of our favorite ideas to spark your own.
Orange Dream: Add a strip of orange zest to the cream while it heats.
Berry Surprise: Place a few fresh raspberries in the dish before pouring the custard.
Chocolate Chip: Sprinkle mini chocolate chips on top before the final sugar layer.
Which one would you try first? Comment below!
Serving & Pairing Ideas
This dessert feels so fancy but is so simple. I love serving it in my old floral casserole dish. A bowl of fresh berries on the side is perfect. Their tartness balances the sweet, rich custard. A little mint leaf on top makes it look like it’s from a bakery.
For drinks, a small glass of sweet dessert wine is a classic pairing. For the kids and me, I make a pot of decaf vanilla tea. It’s a cozy end to any meal. Which would you choose tonight?
Keeping Your Creme Brulee Happy
This dessert loves a cold fridge. Once chilled, cover it tightly with plastic wrap. It will keep for up to four days. I do not recommend freezing it. Freezing changes the custard’s lovely texture.
You make the whole custard days before your party. This is called batch cooking. It saves you time and stress later. I remember my first big dinner party. Having the dessert ready was a lifesaver.
Why does this matter? Planning ahead lets you enjoy your own gathering. You can focus on your guests, not the oven. Have you ever tried storing it this way? Share below!
Simple Fixes for Common Troubles
First, a watery custard. This happens if the eggs cook too fast. The tempering step in the recipe prevents this. It gently warms the eggs.
Second, a soggy sugar top. You must dab the custard dry first. Any moisture will make the sugar melt. I once forgot this step. We had a sticky, sweet soup on top!
Third, uneven baking. The water bath is key. It gives the custard a gentle, even heat. Why does this matter? Fixing small problems builds your kitchen confidence. It also guarantees that perfect, silky bite. Which of these problems have you run into before?
Your Quick Questions, Answered
Q: Is this gluten-free? A: Yes, it is naturally gluten-free.
Q: Can I make it ahead? A: Absolutely! Chill it for up to four days. Caramelize the sugar just before serving.
Q: What if I don’t have a vanilla bean? A: Use two teaspoons of real vanilla extract. Add it with the cold cream.
Q: Can I make smaller portions? A: You can use small ramekins. Just reduce the baking time. Start checking at 25 minutes.
Q: Any optional tips? A: A tiny pinch of salt makes the vanilla flavor sing. Fun fact: The name “creme brulee” just means “burnt cream” in French! Which tip will you try first?
From My Kitchen to Yours
I hope you try this family-style treat. It is simpler than it looks. The crack of the sugar top is pure joy.
I love hearing your stories. Tell me about your kitchen adventures. Have you tried this recipe? Let me know how it went in the comments.
Happy cooking!
—Fiona Brooks.
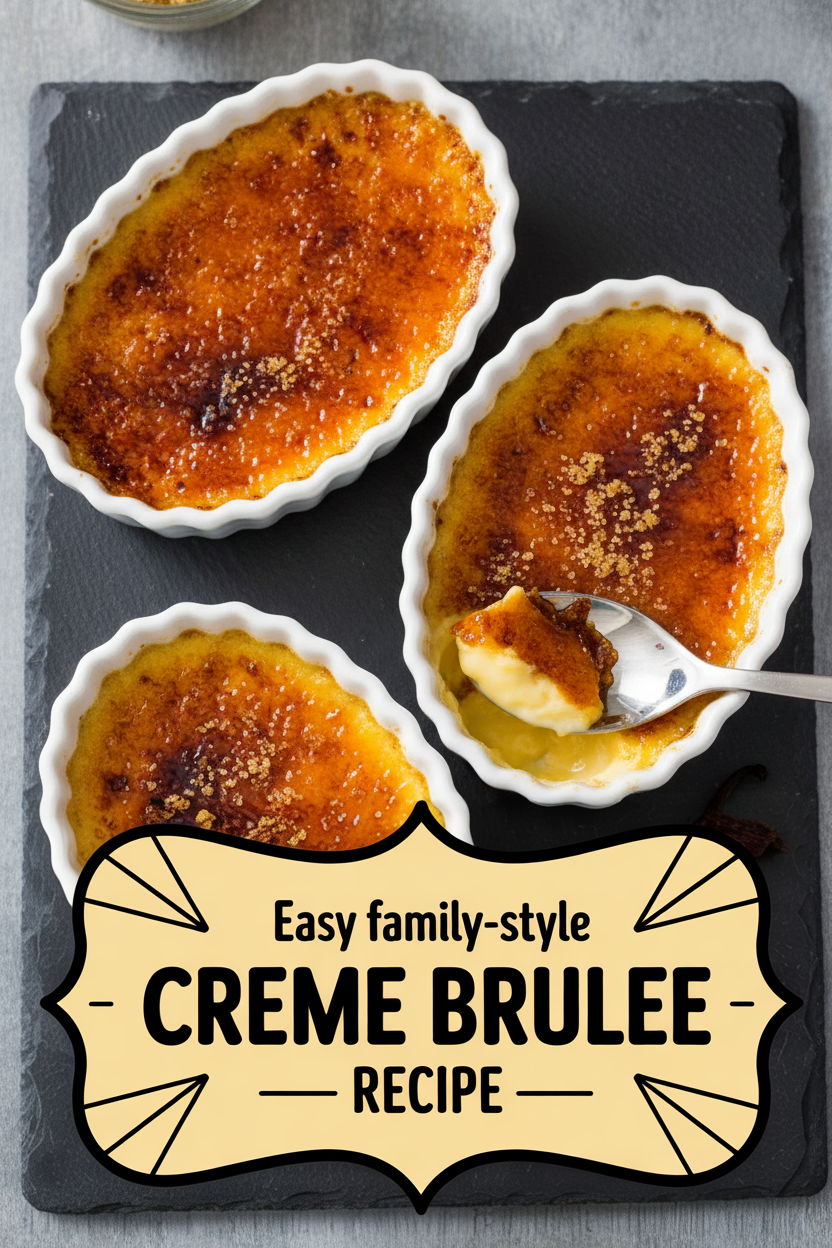
Easy Family-Style Creme Brulee Recipe
Description
A rich and creamy classic dessert made easy in a family-sized dish, featuring a perfectly caramelized sugar top.
Ingredients
Instructions
- Set your oven rack to the lower-middle position and preheat the oven to 300°F.
- In a medium saucepan, mix 2 cups of the cream with the sugar and salt. Slice the vanilla bean lengthwise, scrape the seeds into the pan, and add the pod. Bring to a boil over medium heat, stirring now and then until the sugar dissolves. Remove from heat and let it infuse for 15 minutes.
- While the cream steeps, place your 1 1/2-quart casserole or baking dish inside a larger pan, like a roasting pan. Heat a kettle or large saucepan of water until boiling.
- Once steeped, stir the remaining 2 cups of cold cream into the saucepan to cool it. In a large bowl, whisk the egg yolks until blended. Gradually whisk in about 1 cup of the cream mixture to temper the yolks, then add another cup. Pour in the rest of the cream and whisk until fully combined and uniform. Strain this custard through a fine-mesh strainer into a large measuring cup or pitcher, discarding any solids. Pour it into the empty casserole dish; it should be about 1 to 1 1/4 inches deep.
- Carefully place the nested pans on the oven rack. Pour the boiling water into the outer pan until it comes about two-thirds up the side of the custard dish, avoiding splashes. Bake until the center is just set (not sloshy) and an instant-read thermometer shows 170–175°F, about 40–50 minutes. Start checking a few minutes early.
- Move the custard dish to a wire rack and let it cool completely, about 2 1/2 to 3 hours. Then, place it on a rimmed baking sheet, cover tightly with plastic wrap, and refrigerate until thoroughly chilled, at least 4 hours or up to 4 days.
- Before serving, remove the wrap. Dab any moisture from the surface with a paper towel. Sprinkle an even layer of turbinado sugar over the top. Use a kitchen torch to melt and caramelize the sugar. Return the crème brûlée to the refrigerator, uncovered, to re-chill for 30–45 minutes, then serve.
Notes
- For the best texture, ensure the custard is completely chilled before caramelizing the sugar. If you don’t have a kitchen torch, you can caramelize the sugar under a broiler for 1-2 minutes, watching carefully to avoid burning.


Leave a Reply