A Sweet Start
Let’s talk about chocolate swirl bread. My grandkids call it “fancy chocolate bread.” I just call it wonderful. Making it is a small adventure. You mix a soft, rich dough first. The secret is letting it rest. That rest makes all the difference later.
I add a bit of orange zest to my dough. It’s optional, but try it. The orange and chocolate sing together. Doesn’t that smell amazing? It makes the kitchen feel happy. This matters because cooking should engage all your senses. Joy starts with a good smell.
The Patient Part
After the dough rises a little, it goes in the fridge. This might seem strange. Why chill it? A cold dough is much easier to handle. It won’t stick as much when you roll it. You can even leave it overnight. I often make the dough after dinner. Then, the fun part waits for morning.
This waiting teaches a good lesson. Good things need time. Rushing bread just leads to a mess. I still laugh at the time I tried to skip the chill. What a sticky situation! Do you prefer baking projects you can finish fast, or ones you can spread over a day?
The Swirl Magic
Now for the best step: the chocolate filling. You melt butter and chocolate together. Stir in cocoa and sugar. It becomes a shiny, spreadable paste. You cover the rolled-out dough with it. Then you roll it up into a long log.
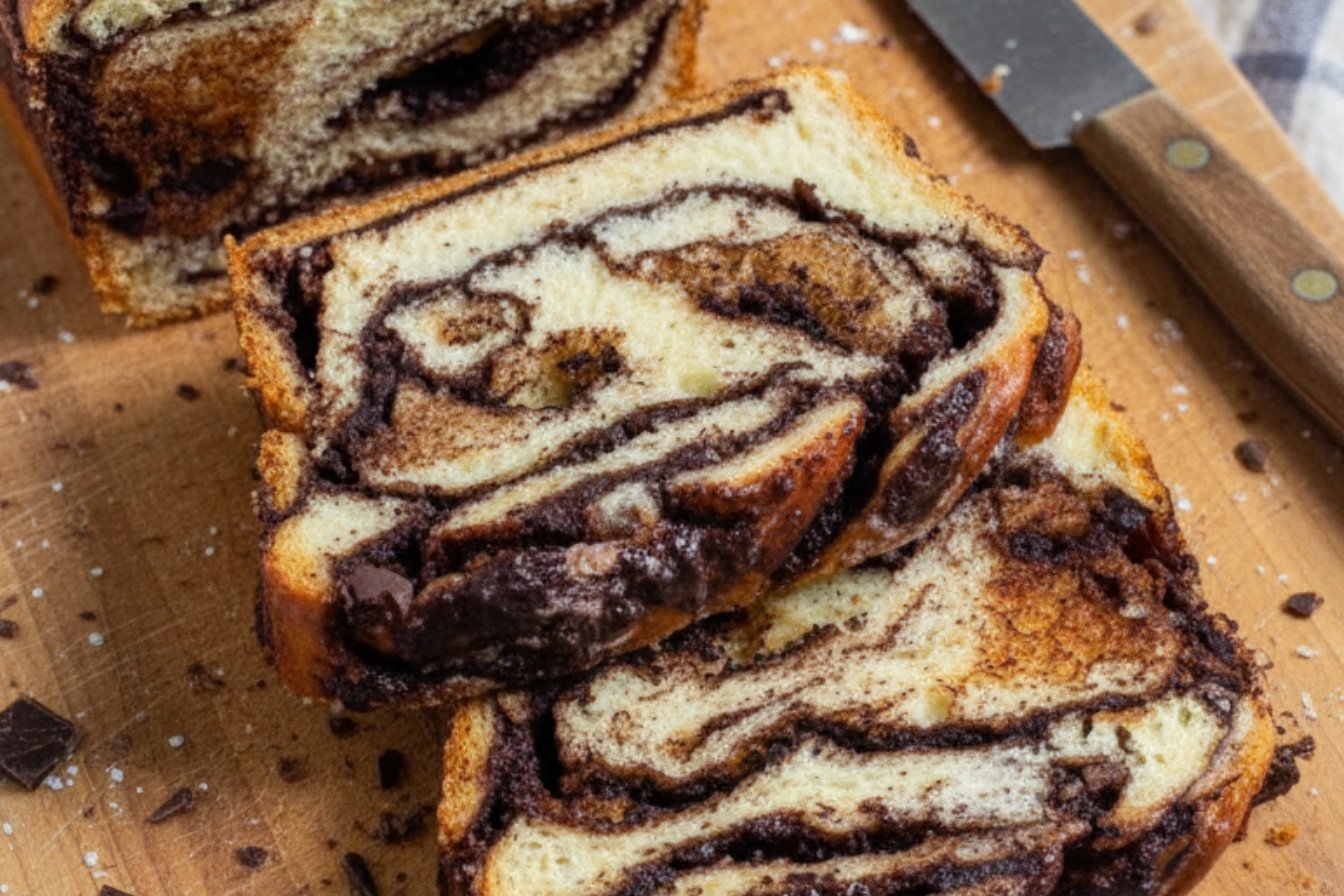
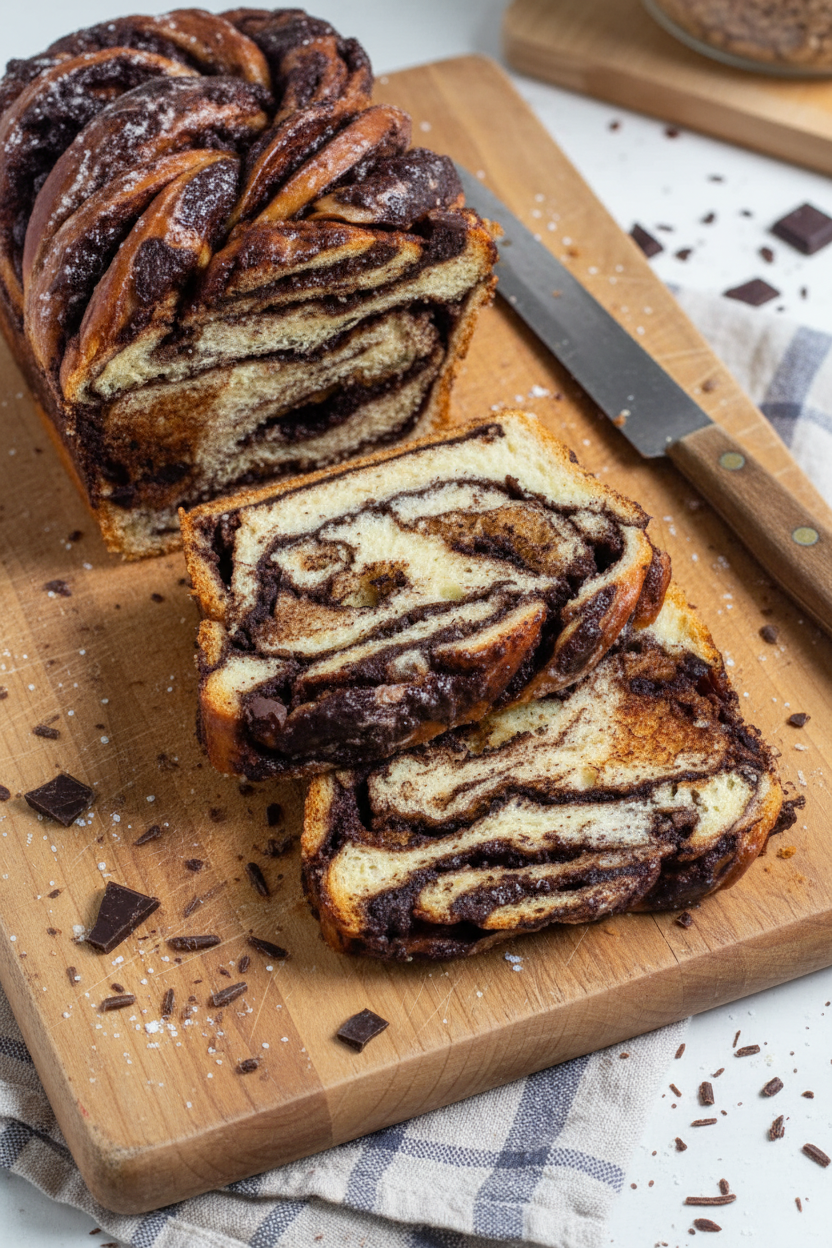
Here comes the magic trick. You slice the log right down the middle. You get two long pieces. Their beautiful swirls are now visible. You twist them together, like a sweet rope. Fun fact: This twisted bread is called a babka. It has roots in Eastern European kitchens. Seeing those layers appear never gets old.
Baking & The Sweet Soak
The twisted dough bakes low and slow. You cover it with foil partway through. This keeps the top from getting too dark. The real secret is the syrup. You make a simple sugar-water mix.
As soon as the bread comes out, you brush it all over with the hot syrup. It sizzles and soaks in. This gives the bread a lovely shine and a moist bite. This matters because that syrup seals in goodness. It’s the final, glossy hug for your loaf. What’s your favorite sweet glaze or syrup on baked goods?
The Hardest Part
You must let it cool completely. I know, it’s torture. The chocolate smell fills the whole house. But if you slice it warm, it will be gooey inside. Letting it cool sets the swirls perfectly.
Once cool, slice it thick. You will see every beautiful chocolate layer. It’s a treat for a special weekend. Share it with someone you love. That first bite is pure reward. Tell me, who would you share a loaf of this chocolate swirl bread with?
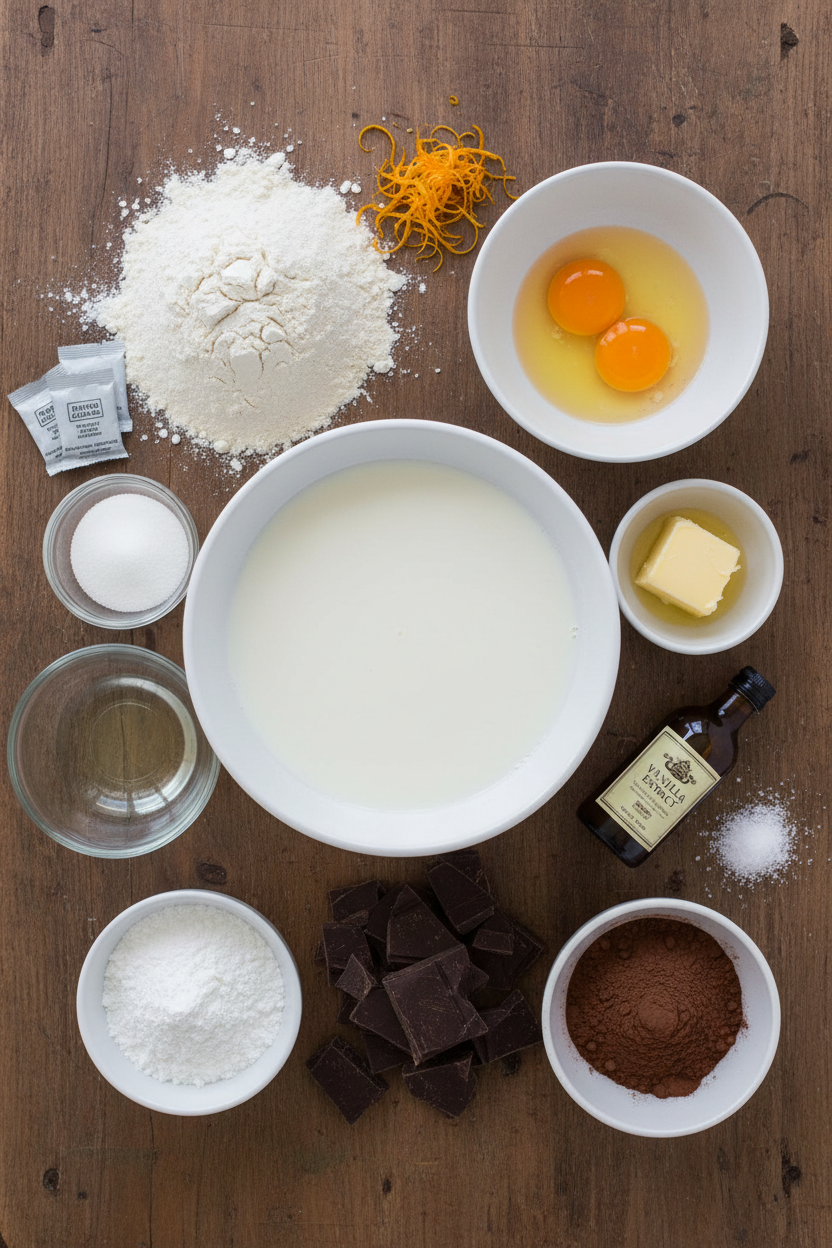
Ingredients:
| Ingredient | Amount | Notes |
|---|---|---|
| Bread flour | 2 ¼ cups (350g) | For the dough |
| Instant or rapid-rise yeast | 1 ½ teaspoons | For the dough |
| Whole milk | ½ cup | For the dough |
| Large eggs | 2 | For the dough |
| Orange zest | 1 tablespoon | Optional, for the dough |
| Vanilla extract | 1 teaspoon | For the dough |
| Granulated sugar | ¼ cup (50g) | For the dough |
| Table salt | ½ teaspoon | For the dough |
| Unsalted butter | 6 tablespoons + 1 tbsp | 6 tbsp softened for dough, 1 tbsp for pan |
| Bittersweet chocolate | 8 ounces (227g) | Chopped fine, for filling |
| Unsalted butter | 8 tablespoons | Cut into pieces, for filling |
| Confectioners’ sugar | ½ cup (57g) | Sifted, for filling |
| Table salt | ½ teaspoon | For filling |
| Unsweetened cocoa powder | ½ cup (43g) | Sifted, for filling |
| Granulated sugar | ½ cup (99g) | For syrup |
| Water | ¼ cup | For syrup |
Instructions
Step 1: Let’s make the dough. First, mix the flour and yeast in your mixer bowl. Pour in the milk, eggs, orange zest, and vanilla. Use the dough hook on a slow speed. Mix until it looks shaggy and messy. Then, let the dough rest for fifteen minutes. It needs a little nap. (A shaggy dough just means no dry flour is left.)
Step 2: Now, add the sugar and salt to your rested dough. Mix it for about thirty seconds. Turn the speed up to medium-high. Add the soft butter, one piece at a time. Wait for each piece to disappear into the dough. Keep mixing until the dough is smooth and stretchy. This takes about ten minutes. It will pull away from the bowl sides. Why do we add butter slowly? Share below!
Step 3: Put your smooth dough in a greased bowl. Cover it tightly with plastic wrap. Let it rise at room temperature for one hour. It will puff up a bit. Then, pop the whole bowl into the fridge. Leave it there for at least two hours. You can even leave it overnight. Chilled dough is much easier to handle later.
Step 4: Time for the chocolate filling. Melt the chocolate and butter together. I use the microwave at half power. Stir it often until it’s glossy. Stir in the powdered sugar, cocoa, and salt. Set this lovely bowl aside. Your kitchen will smell wonderful. Now, preheat your oven to 325°F. Generously butter your loaf pan.
Step 5: Take your cold dough from the fridge. Roll it out on a floured surface. Make a big rectangle, about 18 by 12 inches. Spread the chocolate filling all over it. Leave a tiny bare strip at the top. Roll it up tightly from the bottom edge. Pinch the seam to seal it shut. I still laugh at how messy my fingers get.
Step 6: Here comes the fun part. Carefully slice the roll in half lengthwise. Use a greased serrated knife. You’ll see all the beautiful layers. Place the two halves side-by-side, cut sides up. Twist them together like a braid. Pinch the ends. Gently lift your twist into the buttered pan. Give the pan a light tap on the counter. This helps it settle in. (Greasing the knife prevents the dough from sticking.)
Step 7: Place your loaf pan on a wire rack. Put the rack on a rimmed baking sheet. This catches any drips. Bake for 30 minutes. Then, loosely cover the top with foil. Bake for another 50 to 60 minutes. It’s done when the center is 200°F. Doesn’t that smell amazing? While it bakes, make a simple syrup. Just heat sugar and water until the sugar melts.
Step 8: As soon as the bread comes out, brush it with all the syrup. Do this while it’s still hot in the pan. The syrup makes it shiny and sweet. Let it cool in the pan for one hour. Then, take it out to cool completely. This wait is the hardest part. Slice it thick, about an inch per piece. Enjoy your masterpiece.
Creative Twists
You can make this bread your own. Try adding a half cup of chopped toasted hazelnuts to the filling. It gives a lovely crunch. For a winter spice, mix a teaspoon of cinnamon into the cocoa powder. My grandkids love a surprise inside. Tuck small caramel pieces into the filling before rolling. Which one would you try first? Comment below!
Serving & Pairing Ideas
This bread is a treat all by itself. For a special breakfast, toast a slice lightly. Serve it with fresh berries on the side. A dollop of whipped cream makes it a dessert. For drinks, a cold glass of milk is always perfect. Grown-ups might enjoy a small glass of cherry port. It sips nicely with the dark chocolate. Which would you choose tonight?
Keeping Your Swirl Bread Perfect
This bread is best fresh. But it keeps well for two days. Just wrap it tightly at room temperature. For longer storage, freeze it. Slice it first and wrap slices individually. This way you can grab one piece anytime.
To reheat, use your toaster or a warm oven. It brings back that soft, just-baked feel. I once froze a whole loaf for my grandson’s visit. He loved the warm, chocolatey surprise for breakfast.
Batch cooking matters. It saves you time for future treats. A little planning makes happy moments easier. Have you ever tried storing it this way? Share below!
Simple Fixes for Common Hiccups
Is your dough too sticky? Do not add more flour right away. Chill it first. A cold dough is much easier to handle. I remember when my dough stuck to everything. A little fridge time saved the day.
Is the filling leaking out? Your dough might be rolled too thin. Aim for that 18-by-12-inch rectangle. A good thickness holds the chocolate inside. This matters for a beautiful, neat swirl.
Is the bread dry? You might have over-baked it. Use the temperature check. It guarantees a perfectly moist loaf. Getting it right builds your cooking confidence. Which of these problems have you run into before?
Your Quick Questions, Answered
Q: Can I make this gluten-free? A: I have not tried it. A good gluten-free bread flour blend might work.
Q: Can I make it ahead? A: Yes! The dough can rest in the fridge for a full day. This is a great make-ahead step.
Q: What if I don’t have orange zest? A: Just leave it out. The vanilla and chocolate give wonderful flavor on their own.
Q: Can I make a smaller loaf? A: You can halve the recipe. Use a smaller loaf pan. Baking time will be less.
Q: Is the syrup necessary? A: It adds shine and a little sweetness. I think it’s worth it! *Fun fact: This syrup keeps the bread wonderfully moist.* Which tip will you try first?
From My Kitchen to Yours
I hope you love making this special bread. The smell in your kitchen will be amazing. Share it with someone you care about. It makes any day feel like a celebration.
I would love to hear about your baking adventure. Tell me how it turned out for you. Have you tried this recipe? Please leave a comment below with your story.
Happy cooking!
—Fiona Brooks.
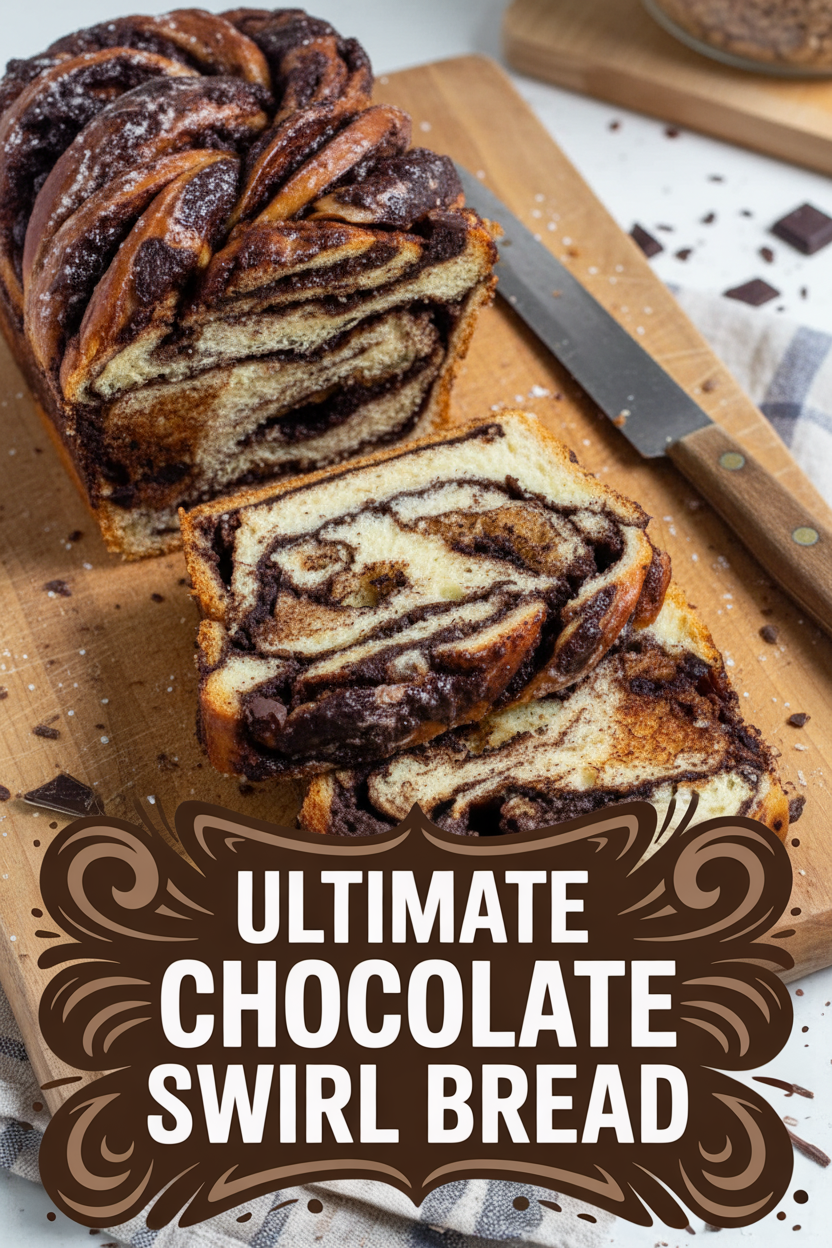
Ultimate Chocolate Swirl Bread
Description
A rich, buttery, and beautifully twisted bread filled with a decadent chocolate swirl, finished with a sweet syrup glaze.
Ingredients
Dough:
Filling:
Syrup:
Instructions
- Dough Preparation: In the bowl of a stand mixer, combine the flour and yeast. Pour in the milk, eggs, optional orange zest, and vanilla. Using the dough hook attachment, mix on medium-low until a shaggy dough forms and no dry flour is visible, about 2 minutes. Cover the bowl and let the dough rest for 15 minutes.
- To the rested dough, add the sugar and salt. Knead on medium speed until combined, about 30 seconds. Increase the mixer speed to medium-high. With the mixer running, add the softened butter one piece at a time, waiting for each addition to be absorbed before adding the next. This should take about 3 minutes. Continue kneading on medium-high until the dough becomes smooth, cleans the sides of the bowl, and is very elastic, 7 to 10 minutes more.
- Place the dough into a greased large bowl. Seal tightly with plastic wrap and let it rise at room temperature until it has expanded slightly, about 1 hour. Then refrigerate the dough until it is firm, for at least 2 hours or up to a full day.
- Filling and Shaping: Shortly before taking the dough from the refrigerator, make the filling. Melt the chocolate and butter together in a microwave at half power, stirring frequently until smooth, about 2 minutes. Stir in the confectioners’ sugar, cocoa powder, and salt until fully blended. Set aside.
- Preheat your oven to 325°F (163°C) with a rack in the middle. Generously butter a loaf pan. On a lightly floured surface, roll the chilled dough out into an 18-by-12-inch rectangle.
- Spread the chocolate filling evenly over the dough, leaving a ½-inch bare strip along the top long edge. Starting from the long edge closest to you, roll the dough tightly into a 12-inch log. Pinch the seam to seal.
- With a greased serrated knife, carefully slice the log in half lengthwise to expose the layers. Place the two halves side-by-side with the cut sides facing up. Twist them together neatly, crossing one over the other about five times, trying to keep the cut layers visible. Pinch the ends together and gently place the twist into the prepared loaf pan. Lightly tap the pan on the counter to settle the dough.
- Baking and Finishing: Place the loaf pan on a wire rack set inside a rimmed baking sheet. Bake for 30 minutes, then cover the top loosely with aluminum foil. Continue baking until the internal temperature at the center reaches 200–205°F (93–96°C), about 50 to 60 minutes more.
- While the babka bakes, prepare a syrup by heating the sugar and water in a small saucepan until the sugar dissolves. Remove from heat.
- As soon as the babka comes out of the oven, brush the entire hot surface with all of the syrup while it is still in the pan. Let it cool in the pan on a rack for 1 hour. Then, carefully remove the babka from the pan and let it cool completely on the rack, about 2 hours. Slice into 1-inch pieces to serve.
Notes
- For best results, ensure the dough is well-chilled before rolling and shaping. The syrup is essential for a beautiful, glossy finish and added moisture. This bread keeps well for a few days wrapped at room temperature.


Leave a Reply