The Heart of the Meal
This roast is for special days. It feels like a celebration on a plate. I love making it for my family on snowy winter evenings. The smell fills the whole house with warmth.
It looks fancy, but the idea is simple. You are just giving the meat lots of time and gentle heat. This matters because good food is about patience, not hurry. What’s your favorite meal for a big family celebration? I’d love to hear.
A Little Secret for Big Flavor
Let me tell you about the salt. You rub it all over days before cooking. Then you let the roast sit in the fridge. This is called dry-brining.
I still laugh at that. It sounds complicated. But it just means the salt slowly works its way deep inside. This makes every single bite taste perfect and juicy. That’s the “why” that matters. It turns good meat into something magical.
The Slow Dance in the Oven
We start with a quick sizzle in a hot pan. This gives us a beautiful brown color. Then comes the slow roast. The oven is set very low, like a cozy blanket.
You let it cook until it’s just warm inside. Then you turn the oven off! The meat keeps cooking gently in the leftover heat. Doesn’t that smell amazing? This gentle method keeps the roast so tender. Fun fact: This low-and-slow method is sometimes called “carryover cooking.” The heat from the outside slowly moves to the center.
The Grand Finale
After its long rest, we give it one last treat. We pop it under the broiler for just a minute. This is for the crispy, crackly fat on top.
The sound is wonderful. It sizzles and pops. That crispy fat is the best part, in my opinion. Do you like crispy edges on your meat, or do you prefer it all soft and tender?
Slicing and Serving With Love
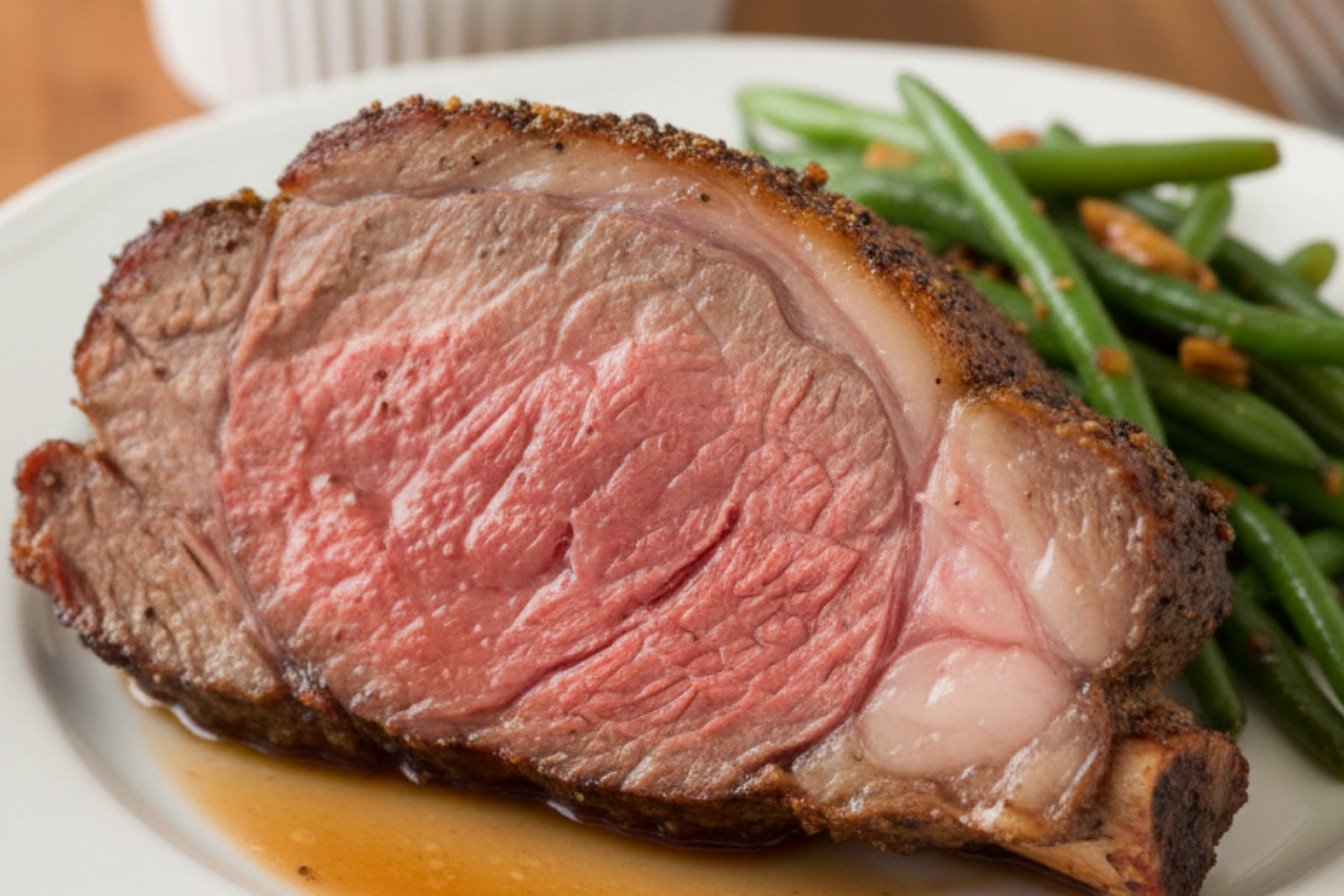
Now, you take it off the bones. Those bones make a wonderful soup later. Then you slice the meat. You’ll see a beautiful pink color from edge to edge.
A final sprinkle of coarse salt makes the flavor sing. This matters because the little details show your care. Sharing this roast feels like sharing a hug. Tell me, what side dish do you think goes best with a juicy slice of roast?
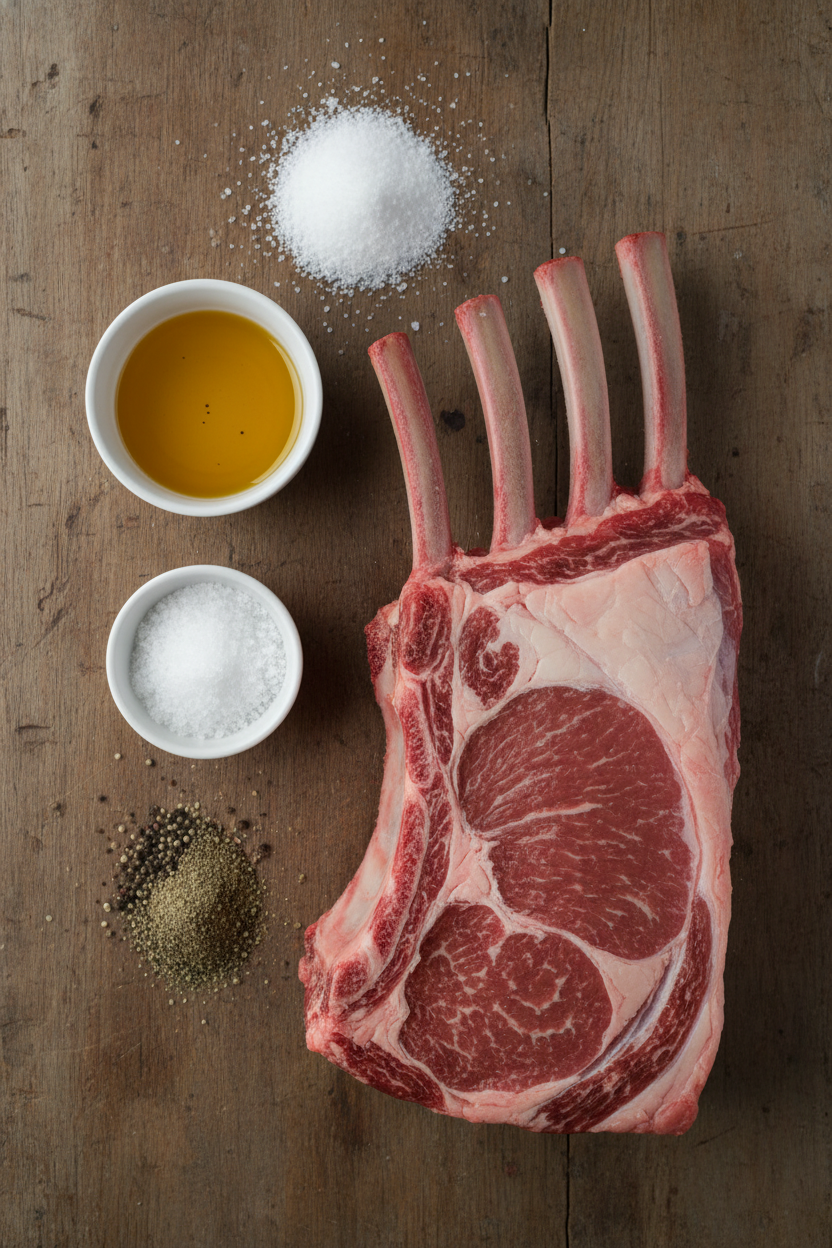
Ingredients:
| Ingredient | Amount | Notes |
|---|---|---|
| First-cut beef standing rib roast | 1 (7-pound) roast (3 bones) | Bones detached and used as a rack |
| Kosher salt | As needed | For thorough initial seasoning and dry-brining |
| Ground black pepper | As needed | For seasoning before roasting |
| Vegetable oil | 2 teaspoons | For searing the roast |
| Coarse salt | As needed | For final seasoning after slicing |
Instructions
Step 1: First, ask your butcher to detach the bones. Keep them! Score the fat on top in a criss-cross pattern. Rub salt everywhere, even in the cuts. This makes it so flavorful. Put the meat back on its bones and leave it in the fridge, uncovered, for a few days. (This drying step is the secret to a perfect crust.)
Step 2: Now, let’s sear. Heat oil in a big pan until it’s very hot. Brown every side of the roast except the boneless part. Let it cool a bit on the bones. Then, tie the roast to the bones with kitchen string. It looks like a little present!
Step 3: Season with pepper. Roast it in a very low oven, just 200°F. We wait until a thermometer says 110°F inside. Then, turn the oven off. Don’t open the door! Let the roast sit inside until it reaches 120°F for rare. What’s your family’s favorite doneness? Share below!
Step 4: Take the roast out and let it rest, loosely covered with foil. This keeps the juices in. For the magic finish, turn on the broiler. Prop the roast up so the fatty top faces the heat. Broil until it’s wonderfully crispy and brown. Doesn’t that smell amazing?
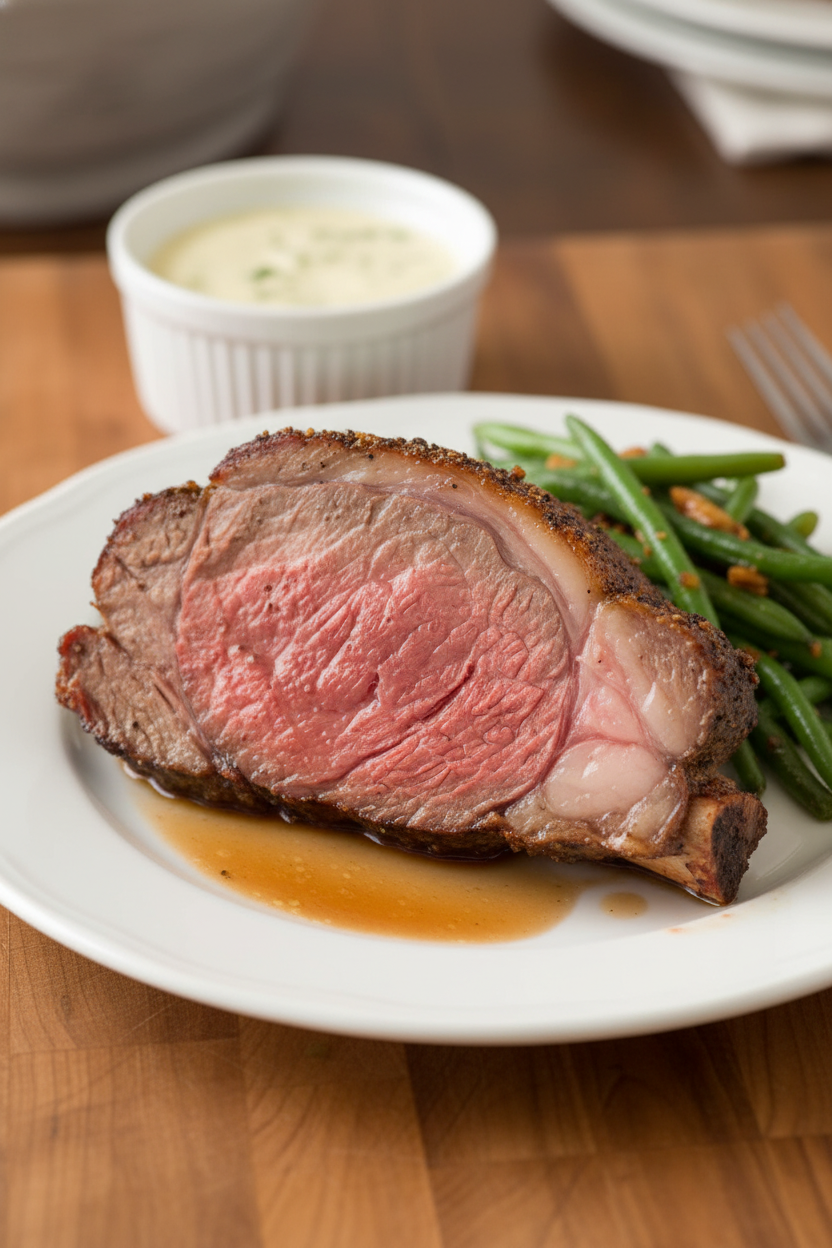
Step 5: Time to serve! Cut the strings and lift the roast off the bones. Slice it thick. Sprinkle each piece with a pinch of coarse salt. I still laugh at how my grandkids would sneak bits of the crispy fat. (Save those bones for the best soup you’ll ever make.)
Creative Twists
You can make this recipe your own. Try rubbing the roast with crushed garlic and rosemary before it goes in the fridge. The smell will fill your kitchen. Or, add a spoonful of mustard to the salt rub for a little zing. My favorite is a coffee-and-brown-sugar rub. It sounds funny, but it’s so good. Which one would you try first? Comment below!
Serving & Pairing Ideas
This roast deserves great friends on the plate. Creamy mashed potatoes are a must. They soak up the juices so well. I also love simple roasted carrots with a little honey. For a drink, a glass of bold red wine is classic. The kids always get sparkling apple cider in fancy glasses. It makes dinner feel like a party. Which would you choose tonight?
Storing Your Prime Rib for Later
Let’s talk about saving your beautiful roast. First, let it cool completely. Wrap it tightly in foil, then plastic. It will keep in the fridge for three to four days. For the freezer, slice it first. Wrap each slice well. It will be good for two months.
To reheat, use a low oven. Place the slices in a pan with a little broth. Cover it with foil. Warm at 275°F until just heated through. This keeps it tender. I once reheated it too fast and it got tough!
Batch cooking saves time and money. A big roast gives you many meals. You can use leftovers for sandwiches or salads. Planning ahead makes weeknights easier. It turns one special dinner into many. Have you ever tried storing it this way? Share below!
Fixing Common Prime Rib Hiccups
Even grandmas have kitchen troubles. Your roast might not brown well. The fix is simple. Make sure the surface is very dry before searing. A wet roast steams instead of browns. I remember when my first roast was pale. I learned the dry lesson!
The meat might be overcooked. This happens if you don’t trust the thermometer. Always use one. It tells the true story inside the oven. This matters because perfect doneness means juicy, tender meat. It builds your cooking confidence.
The fat cap might not get crispy. Just pop it under the broiler at the end. Watch it closely. It will bubble and turn golden. This final step adds amazing flavor and texture. Which of these problems have you run into before?
Your Quick Questions, Answered
Q: Is this recipe gluten-free?
A: Yes, it is. The ingredients are naturally gluten-free. Just check your seasoning labels.
Q: Can I make it ahead?
A: You can salt it up to four days early. Cook it the day you want to eat.
Q: What if I don’t have vegetable oil?
A: Any neutral oil works. Try canola or grapeseed oil. You need one with a high smoke point.
Q: Can I make a smaller roast?
A: Absolutely. Use the same steps. Just cook for less time. Always use your thermometer.
Q: Any optional tips?
A: Add herbs like rosemary to the salt rub. Fun fact: Letting it sit in the fridge drys the surface. This helps the skin get extra crispy later. Which tip will you try first?
A Final Word from My Kitchen
I hope you feel ready to try this recipe. It is a celebration meal. Sharing good food is a special joy. Remember, cooking is about love, not perfection. I would love to hear about your cooking adventure.
Tell me all about it in the comments below. Have you tried this recipe? I read every note from my kitchen friends. Thank you for letting me share my table with you.
Happy cooking!
—Fiona Brooks.
The Ultimate Prime Rib Roast Guide
Description
A detailed guide to preparing the perfect prime rib roast, featuring a crispy, seasoned crust and perfectly cooked, tender meat.
Ingredients
Instructions
- **Preparation:** Detach the bones from the roast, keeping them. Score the fat cap in a 1-inch crosshatch pattern, cutting down to the meat without piercing it. Massage salt thoroughly over the entire roast, including into the slits. Place the meat back onto its bones and refrigerate, uncovered, for 1 to 4 days.
- **Cooking:** Sear all sides of the roast (except the boneless side) in very hot oil until browned. Let it cool briefly on the bones, then tie it securely to them. Season with pepper and roast at 200°F until the internal temperature reaches 110°F. Turn the oven off, but leave the roast inside with the door closed until it reaches your desired doneness (120°F for rare, 125°F for medium-rare).
- **Finishing:** Let the roast rest, tented with foil. Before serving, prop the roast up and broil it until the fat cap is crispy and deeply browned. Remove the roast from the bones, slice, and season with coarse salt.
Notes
- Nutrition information is an estimate per 3-ounce cooked serving. Sodium content will vary based on the amount of salt used during preparation and finishing.


Leave a Reply