My First Cookie Disaster
I once forgot the sugar in a cookie recipe. Can you believe it? They tasted like little bricks. My grandson still teases me about it. I learned to measure carefully that day.
That’s why I love this recipe. It is very clear. You mix wet things and dry things separately first. This matters because it makes sure every bite is perfect. No brick cookies here!
Why These Cookies Feel Special
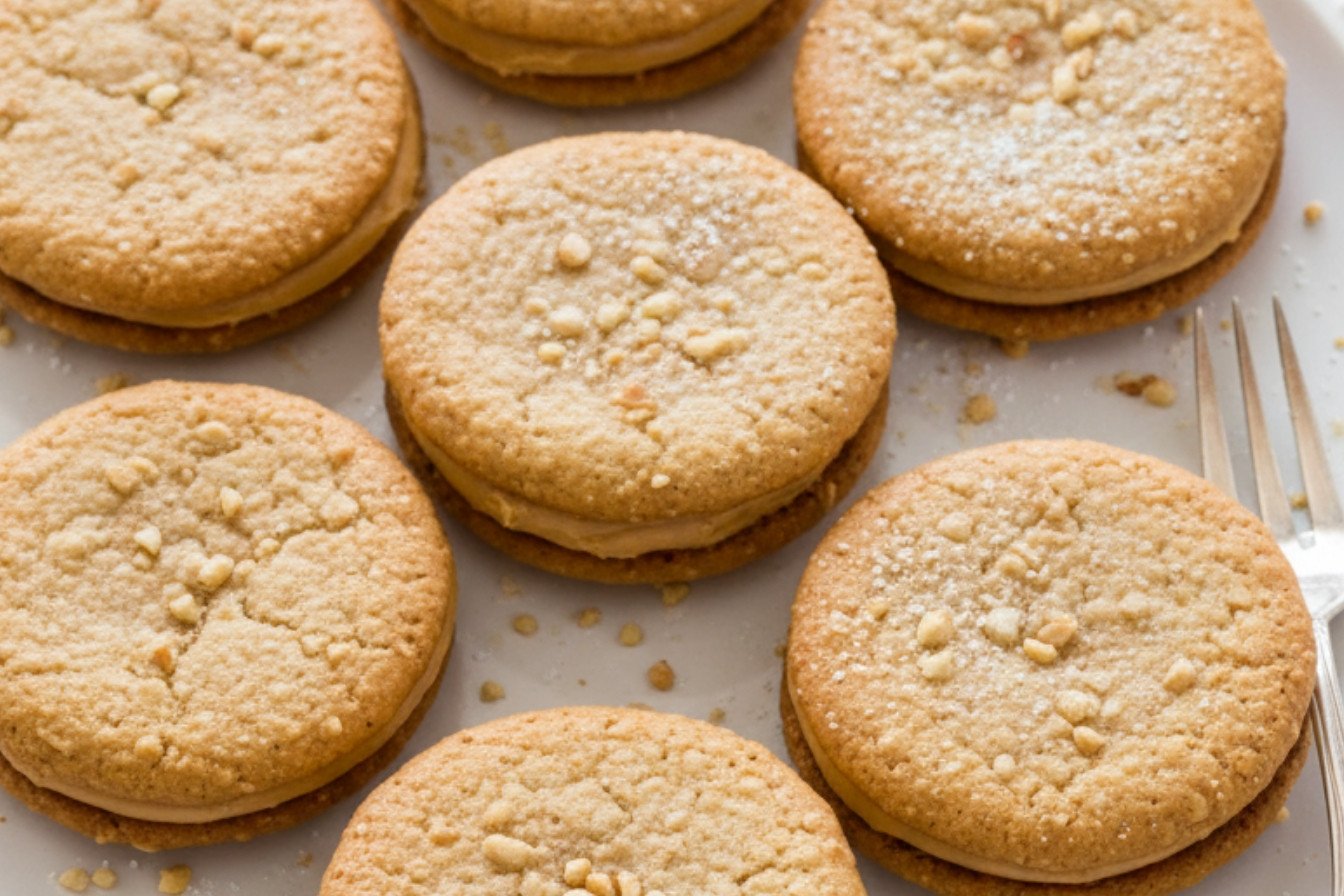
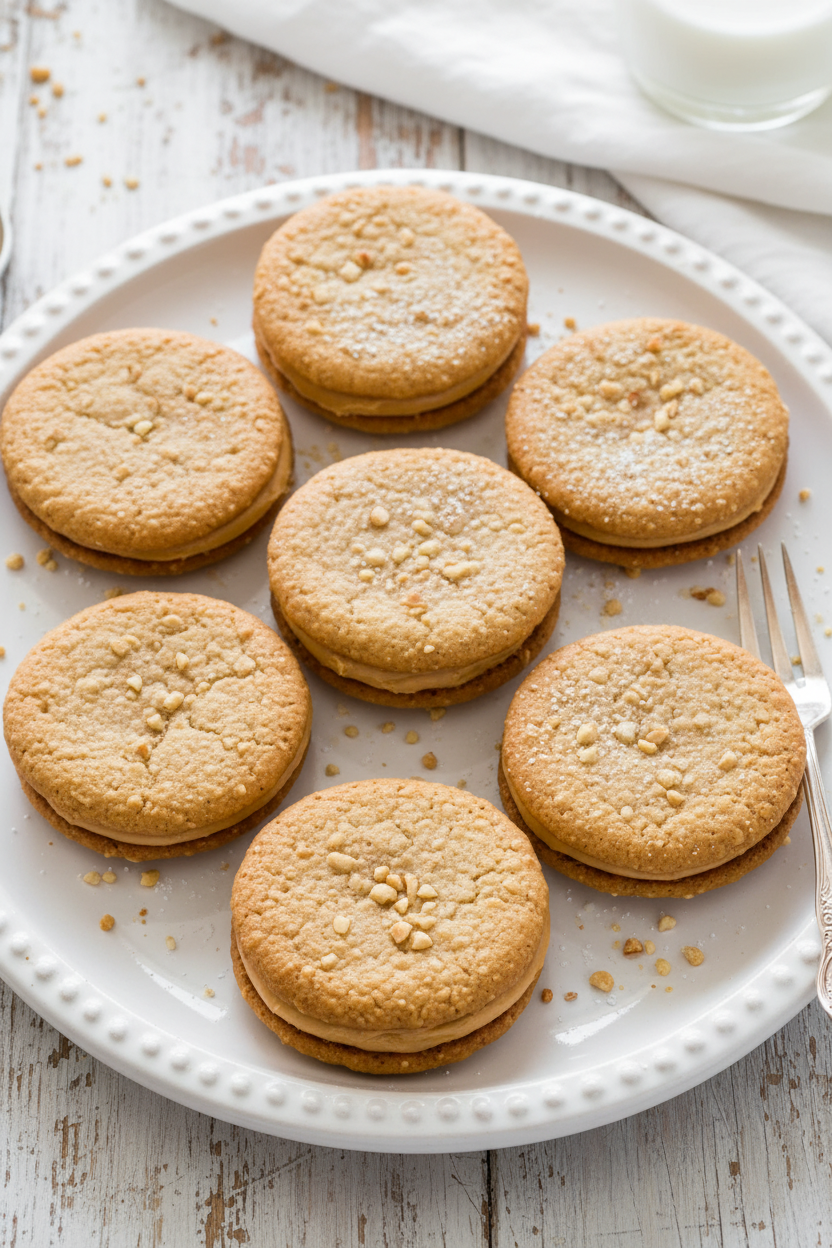
These are sandwich cookies. That means double the fun. You bake two little cookies. Then you glue them together with sweet filling. Doesn’t that sound wonderful?
The dough needs a little nap before baking. Let it rest for 30 minutes. This matters for gluten-free flour. It helps the cookies hold their shape. So be patient. Good things come to those who wait.
The Secret is in the Peanuts
You chop up peanuts right into the dough. This gives you a lovely little crunch. It makes the cookie feel homemade and hearty. *Fun fact:* Peanuts are not really nuts. They are legumes, like beans!
Use salted peanut butter. That is the important tip. The salt makes all the sweet flavors pop. It is the magic trick. Do you have a favorite brand of peanut butter? I always use the one from the big blue jar.
Putting Them Together
The filling is warm and gooey. You just melt peanut butter and butter together. Then stir in the sugar. It smells amazing. You spread it on the bottom of a cookie.
Then you press another cookie on top. Gently now. You watch the filling squish to the edges. I still laugh at how satisfying that looks. Then you must wait one whole hour for them to set. It is the hardest part!
Your Turn in the Kitchen
Baking is about sharing. These cookies are perfect for a lunchbox. Or for a friend who needs a smile. Who will you make these for first?
Remember to swap the baking sheets halfway. This makes all the cookies bake evenly. No burnt bottoms! What is your biggest baking challenge? Is it waiting for things to cool, like me?
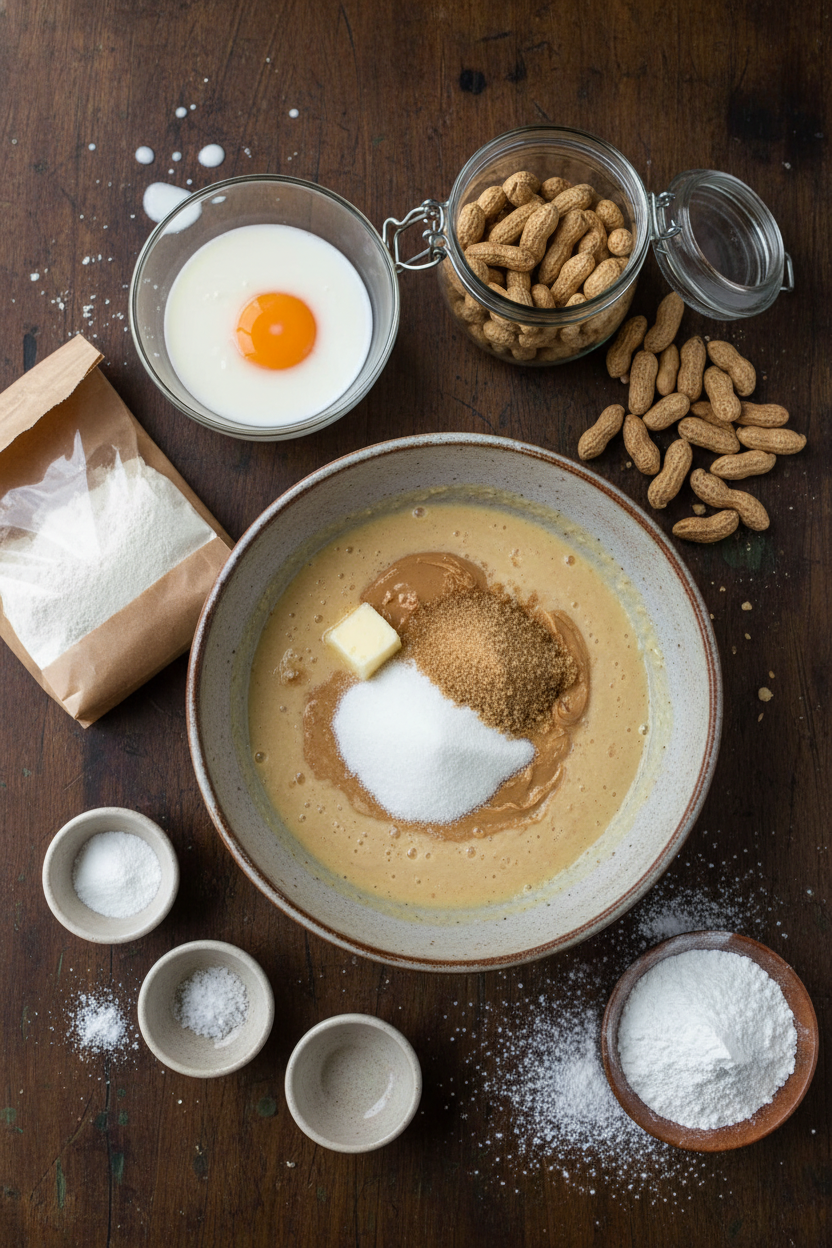
Ingredients:
| Ingredient | Amount | Notes |
|---|---|---|
| dry-roasted, unsalted peanuts | 1 ¼ cups | For the cookie dough |
| America’s Test Kitchen All-Purpose Gluten-Free Flour Blend | 4 oz (¾ cup + 2 tbsp) | For the cookie dough |
| baking soda | 1 teaspoon | For the cookie dough |
| salt | ½ teaspoon | For the cookie dough |
| xanthan gum | ¼ teaspoon | For the cookie dough |
| unsalted butter, melted | 3 tablespoons | For the cookie dough |
| creamy peanut butter | ½ cup | For the cookie dough; use salted |
| granulated sugar | 3 ½ oz (½ cup) | For the cookie dough |
| light brown sugar, packed | ½ cup (3 ½ oz) | For the cookie dough |
| whole milk | 3 tablespoons | For the cookie dough |
| large egg | 1 | For the cookie dough |
| creamy peanut butter | ¾ cup | For the filling; use salted |
| unsalted butter | 3 tablespoons | For the filling |
| confectioners’ sugar | 3 oz (¾ cup) | For the filling |
Instructions
Step 1: First, let’s chop those peanuts. Pulse them in your food processor until they’re nice and fine. In another bowl, whisk your gluten-free flour, baking soda, salt, and xanthan gum. This keeps our cookies together. (A good whisk now means no flour lumps later!)
Step 2: Grab a big bowl for the wet stuff. Whisk the melted butter, peanut butter, both sugars, milk, and egg. Doesn’t that smell amazing? Now, gently mix your dry ingredients into this wet, sticky goodness. Finally, fold in your chopped peanuts. The dough will be soft and lovely.
Step 3: Cover the bowl with plastic wrap. Let the dough rest on the counter for 30 minutes. This helps the flour blend in perfectly. While you wait, you can wash a few dishes. What’s your favorite kitchen chore? Share below!
Step 4: Time to heat things up! Preheat your oven to 350°F. Put one rack high and one low. Line two baking sheets with parchment paper. (This little paper saves so much scrubbing later.) Your dough is ready now. It will be easier to handle.
Step 5: Scoop a heaping 2-teaspoon bit of dough. Roll it into a ball. Place balls 3 inches apart on your sheets. Now, wet your hands with water. Gently flatten each ball into a 2-inch round. This keeps the dough from sticking to you!
Step 6: Bake for 12 to 15 minutes. Halfway through, swap the sheets between racks. Also, turn them front-to-back. They’re done when golden brown and firm. Let them cool on the sheets for 5 minutes. Then move them to a wire rack to cool completely.
Step 7: For the filling, melt the peanut butter and butter together. Stir in the confectioners’ sugar until it’s smooth. Turn half your cookies upside down. Place a tablespoon of warm filling on each. Gently press a second cookie on top. I still laugh at how messy my fingers get.
Step 8: Let your sandwich cookies sit for about an hour. This lets the filling set nicely. Then, they are ready to share! Or, you can sneak one early. I won’t tell. (Using salted peanut butter makes all the flavors sing.)
Creative Twists
These cookies love a little change. You can make them your own. Try one of these fun ideas next time you bake. They are all simple and delicious.
Chocolate Drizzle: Melt some chocolate chips. Drizzle it over the assembled cookies.
Jam Surprise: Add a tiny spoonful of strawberry jam in the center of the filling.
Salty Sweet: Press a few flakes of sea salt on top of the filling before sandwiching.
Which one would you try first? Comment below!
Serving & Pairing Ideas
These cookies are a treat all by themselves. But sometimes, it’s fun to make a little moment. Serve them on a pretty plate. Maybe with a doily underneath. It feels so special. A cold glass of milk is the classic friend. It’s perfect for dunking.
For a cozy evening, try them with a cup of chai tea. The spices are so nice with peanut butter. Grown-ups might like a glass of creamy bourbon. It sips slowly with each sweet bite. Which would you choose tonight?
Keeping Your Cookie Jars Full
These cookies keep well for days. Store them in a sealed container at room temperature. They stay chewy and perfect for a week. You can also freeze them for a sweet treat later. Just layer them between parchment paper in a freezer bag. Thaw them on the counter when you’re ready.
I love to bake a double batch. It makes my kitchen smell wonderful for hours. Then I have cookies ready for surprise visitors. My grandson always checks the cookie tin first thing. I once forgot a batch in the freezer for a month. Finding them was like discovering hidden treasure!
Batch cooking matters. It saves you time and energy on busy days. A homemade cookie is a little gift you give yourself. Have you ever tried storing it this way? Share below!
Cookie Troubles? Let’s Fix Them Together
Sometimes cookies spread too much. Your dough might be too warm. Let it rest the full 30 minutes. This lets the flour soak up the moisture. I remember when my first batch ran into one giant cookie. It was delicious but very funny looking!
Your cookies might not turn golden brown. Your oven rack position is key. Swapping them halfway through baking fixes this. This matters because even baking means every cookie is perfect. It builds your confidence in the kitchen.
The filling could be too runny. Make sure your peanut butter is salted. The salt helps the filling set nicely. A good filling holds the cookies together beautifully. This matters for that first satisfying bite. Which of these problems have you run into before?
Your Quick Questions, Answered
Q: Can I use a different gluten-free flour?
A: I recommend the listed blend. Others may change the texture.
Q: Can I make the dough ahead?
A: Yes! Wrap it tightly and refrigerate for up to two days.
Q: What if I only have chunky peanut butter?
A: That’s fine for the dough. Use creamy for the smooth filling.
Q: Can I halve the recipe?
A: You can. Just halve every ingredient carefully. A kitchen scale helps.
Q: Any fun add-ins?
A: A tiny pinch of cinnamon in the dough is lovely. *Fun fact: Peanuts are not nuts. They are legumes, like beans!* Which tip will you try first?
From My Kitchen to Yours
I hope you love baking these cookies as much as I do. The smell of peanuts and brown sugar is pure happiness. It reminds me of my own grandmother’s kitchen. She taught me that sharing food is sharing love.
I would love to hear about your baking adventure. Tell me all about it in the comments. Have you tried this recipe? Your stories are my favorite thing to read. Happy cooking!
—Fiona Brooks.
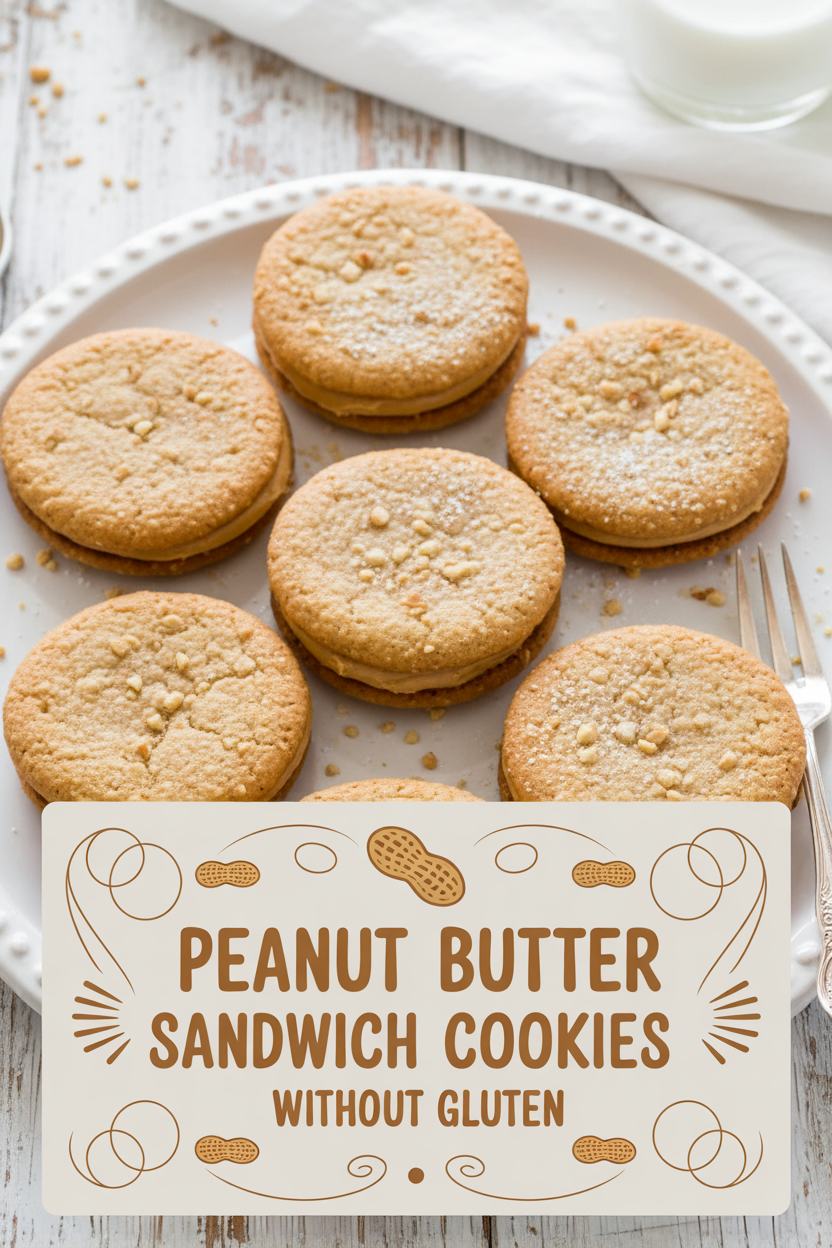
Peanut Butter Sandwich Cookies Without Gluten
Description
Classic, irresistible peanut butter sandwich cookies made without gluten. A perfect balance of crisp cookie and creamy filling.
Ingredients
1 ¼ cups dry-roasted, unsalted peanuts
¾ cup creamy peanut butter
Instructions
- In another bowl, whisk the melted butter, creamy peanut butter, both sugars, milk, and egg until combined. Using a rubber spatula, mix the dry ingredients into the wet ingredients until fully incorporated. Fold in the chopped peanuts.
- Cover the bowl with plastic wrap and allow the dough to rest at room temperature for 30 minutes.
- For each cookie, scoop a heaping 2-teaspoon portion of dough (working with half the dough at a time and keeping the rest covered) and roll it into a ball. Place the balls 3 inches apart on the baking sheets. Moisten your hands with water and gently flatten each ball into a 2-inch round.
- Bake the cookies for 12 to 15 minutes, swapping the sheets between racks and rotating them front-to-back halfway through. They are done when deeply golden brown and firm to the touch.
- Let the cookies cool on the sheets for 5 minutes before transferring them to a wire rack to cool completely.
- While the filling is still warm, turn 24 cookies bottom-side up. Place about 1 tablespoon of filling in the center of each. Gently press a second cookie, right-side up, on top until the filling spreads to the edges.
- Allow the assembled cookies to sit for about 1 hour so the filling can set before serving.
Finely chop the peanuts by pulsing them in a food processor. In a separate bowl, whisk together the gluten-free flour blend, baking soda, salt, and xanthan gum.
While the dough rests, preheat your oven to 350°F. Position one rack in the upper third and another in the lower third of the oven. Line two baking sheets with parchment paper.
For the filling, microwave the peanut butter and butter together until melted and warm. Stir in the confectioners’ sugar until smooth.
Notes
- **Important Tip:** Be sure to use salted peanut butter for this recipe.


Leave a Reply