
The Magic of an Invisible Cake
Have you ever heard of an invisible cake? I hadn’t either. My friend Margot made it for me years ago. She cut a slice. I saw mostly apples. But it was a real cake. I still laugh at that surprise.
This cake is all about the apples. They are the star. A little batter just holds them together. That’s why it’s “invisible.” It matters because it’s not too sweet. You taste the fruit first. What’s the most surprising dessert you’ve ever tried?
A Story About Apples
I use Granny Smith apples here. They are tart and firm. They hold their shape in the long bake. Once, I tried a sweeter apple. The cake turned too soft. It was a good lesson.
Peeling them is the slow part. I think of my grandma’s hands. She taught me to peel in one long ribbon. I try to do it just like her. It makes me feel connected. Fun fact: An apple tree needs four to five years to grow its first fruit.
Why We Let the Batter Rest
The recipe says to let the mix sit for 15 minutes. This is a quiet, important step. The flour soaks up the apple juices. The batter gets thinner. This helps coat every slice.
This matters for the texture. It keeps the cake moist for days. I use this time to clean up. Or I just watch the birds outside my window. Do you have a little kitchen ritual while you wait?
The Special Whipped Cream
Do not skip the brown sugar cream. It makes the cake. The dark brown sugar has molasses. It gives a warm, cozy flavor. The cinnamon is like a friendly whisper.
Whip it until it’s fluffy. Doesn’t that smell amazing? It’s like autumn in a bowl. This topping matters. It turns a simple apple cake into a celebration. It’s a small act of love for your family.
The Patient Wait
This cake asks for patience. It bakes a long time. Then it must cool completely. It will sink in the middle as it cools. That is normal and good.
If you cut it warm, it will be a mess. Waiting lets the structure set. I know it’s hard. But trust me. The clean slices are worth it. What’s the hardest dessert for you to wait to eat?
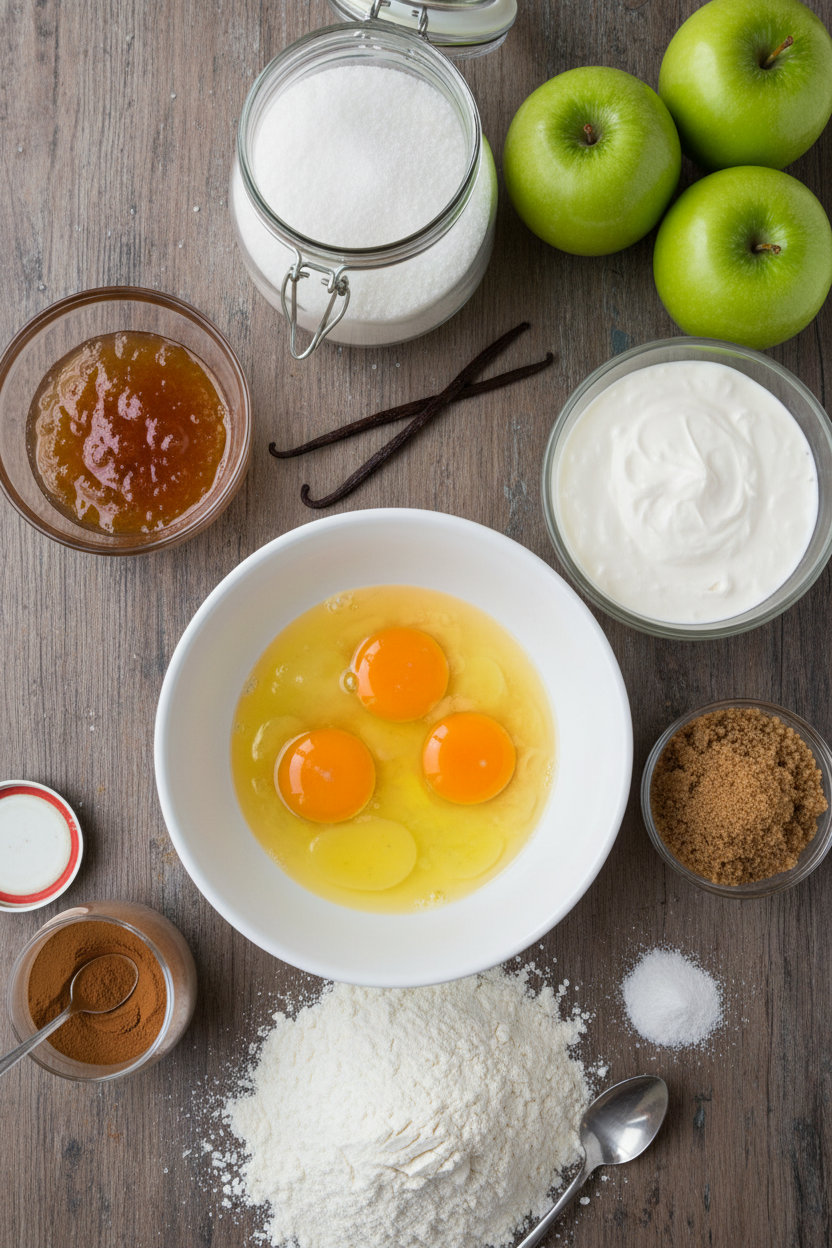
Ingredients:
| Ingredient | Amount | Notes |
|---|---|---|
| Granulated sugar | ⅔ cup (132g) | |
| Vanilla bean | 1 | Seeds scraped |
| Large eggs | 2 | |
| All-purpose flour | ½ cup (71g) | |
| Baking powder | 1 teaspoon | |
| Table salt | ½ teaspoon | |
| Granny Smith apples (peeled) | 2¼–2½ pounds | Thinly sliced, core removed |
| Apple jelly | 2 teaspoons | Melted, for brushing |
| Heavy cream | 1 cup | For whipped cream |
| Dark brown sugar (packed) | 2 tablespoons | For whipped cream |
| Ground cinnamon | ¼ teaspoon | For whipped cream |
Invisible Apple Cake with Brown Sugar Cream
Hello, my dear. Come sit at the table. I want to tell you about my Invisible Apple Cake. The name is funny, isn’t it? You can’t see the cake part, just lovely layers of apple. It’s like magic in a loaf pan. I learned this from a friend many years ago. We laughed so much that first time. The smell in the kitchen is pure happiness. It reminds me of crisp autumn afternoons.
Instructions
Step 1: Let’s start with the sweet batter. Put your sugar in a big bowl. Split a vanilla bean and scrape out the tiny seeds. Whisk them with the sugar. Then whisk in two eggs until it’s nice and smooth. Now add the flour, baking powder, and salt. You’ll get a thick, cozy batter. (A good whisk makes all the difference here.)
Step 2: Time for the apples! Peel them first, then slice thinly. Avoid the core, of course. Save your 18 prettiest slices for later. Gently fold all the other slices into the batter. Make sure each piece gets a hug of batter. Let the bowl rest for 15 minutes. The apples will give off a little juice. This helps the magic happen.
Step 3: While you wait, get things ready. Turn your oven on to 350°F. Put foil on a lower rack to catch drips. Now, prepare your loaf pan. Spray it, then line it with parchment paper. Let the paper hang over the long sides. Give that paper a little spray, too. This trick saves so much trouble later. I still laugh at that time my cake got stuck.
Step 4: Your mixture is ready. Give it a good stir. See how it thinned out? That’s perfect. Now, use a slotted spoon. Scoop the coated apples into your pan. Let extra batter drip back into the bowl. Press the apples down flat as you go. Keep going until you have just a little batter left. What kitchen tool helps you lift and drain food? Share below!
Step 5: The final touch! Dip your reserved apple slices in the leftover batter. Place them batter-side down in neat rows on top. Press everything down firmly. Spread any last bit of batter over the top. Bake it for about 1 ½ hours. It will become deeply golden brown. (Rotate the pan halfway for even baking.) Doesn’t that smell amazing?
Step 6: The cake is done! Let it cool in the pan for an hour and a half. It will sink a little, that’s normal. Then, run a knife along the short ends. Use the parchment paper to lift it out. Let it cool completely on a rack. This takes patience, but it’s worth it. Now, for the cream. Whip the heavy cream, brown sugar, and cinnamon together. Stop when it forms soft, dreamy peaks. Serve a dollop with each slice.
Creative Twists
Pear & Ginger: Use ripe pears instead of apples. Add a teaspoon of grated fresh ginger to the batter.
Nutty Crunch: Sprinkle a handful of chopped toasted pecans between the apple layers as you build the cake.
Orange Zest: Add the zest of one orange to the sugar at the very beginning. It gives a sunny, bright flavor.
Which one would you try first? Comment below!
Serving & Pairing Ideas
This cake is wonderful warm or at room temperature. A scoop of vanilla ice cream melts beautifully on a warm slice. For a fancy touch, dust the plate with a little cinnamon sugar. For drinks, a hot cup of spiced apple cider is perfect. For the grown-ups, a small glass of sweet sherry pairs wonderfully. It tastes like a cozy hug. Which would you choose tonight?

Keeping Your Apple Cake Happy
This cake keeps well on the counter for two days. Just cover it with a dome. For longer storage, the freezer is your friend. Wrap the whole cooled cake tightly in plastic wrap. Then, wrap it again in foil. It will be happy there for a month.
To reheat, let a slice thaw on the counter. Then warm it in a low oven. I once forgot a slice in the freezer for weeks. It tasted just-baked when we found it! Storing food well means less waste and more sweet treats. Have you ever tried storing it this way? Share below!
Simple Fixes for Common Hiccups
Is your batter too thick? The apples will thin it as they rest. Just wait the full 15 minutes. I remember when I rushed this step. My cake was a bit dense.
Are the apples sinking? Press the slices down firmly into the pan. This helps them stay put. Is the top browning too fast? Just lay a piece of foil loosely over it. Fixing small problems builds your cooking confidence. It also makes sure every bite is delicious. Which of these problems have you run into before?
Your Quick Questions, Answered
Q: Can I make this gluten-free? A: Yes! Use a good gluten-free flour blend. It works perfectly.
Q: Can I make it ahead? A: Absolutely. Bake it a day before serving. The flavors get even better.
Q: What if I don’t have a vanilla bean? A: Use two teaspoons of vanilla extract instead. Add it with the eggs.
Q: Can I double the recipe? A: I recommend making two separate loaves. This ensures even baking.
Q: Any optional tips? A: A pinch of nutmeg in the cream is lovely. *Fun fact: This is called an “invisible” cake because the apples are the star!* Which tip will you try first?
From My Kitchen to Yours
I hope you love making this cozy cake. It always makes my kitchen smell like autumn. The whipping of the cream is my favorite part. It feels like a little celebration.
I would love to hear about your baking adventure. Tell me all about it in the comments. Have you tried this recipe? Happy cooking!
—Fiona Brooks.

Invisible Apple Cake with Brown Sugar Cream
Description
A stunning, layered apple cake where thin slices of apple are bound by a light batter, creating a ‘invisible’ effect. Served with a spiced brown sugar whipped cream.
Ingredients
Instructions
- In a large bowl, combine the granulated sugar with the seeds scraped from a split vanilla bean. Whisk in the eggs until smooth. Then, whisk in the flour, baking powder, and salt to form a thick batter.
- Slice the peeled apples thinly, avoiding the core. Keep 18 of the best slices aside for the top. Gently fold the remaining apple slices into the batter until coated. Let this mixture rest for 15 minutes.
- As it rests, preheat your oven to 350°F. Place a foil-lined baking sheet on a lower rack to catch drips. Prepare a loaf pan by spraying it, then lining it with parchment paper so the paper overhangs the long sides; spray the parchment as well.
- Give the apple and batter mixture a good stir; it will have thinned slightly. Ensure every apple piece is lightly covered.
- Using a slotted spoon, transfer the coated apples to the loaf pan, draining excess batter back into the bowl. Arrange them as flat as possible, pressing gently to level. Continue until only about 2-3 tablespoons of batter remain.
- Dip one side of the reserved apple slices in the leftover batter. Place them batter-side down in neat rows on top. Press down firmly to level. Spread any last bit of batter over the top. Bake on the upper rack for 1½ to 1¾ hours, until deeply browned and a skewer pierces the apples easily, rotating the pan halfway through.
- After baking, run a knife along the short ends of the pan. Brush the top with the melted apple jelly. Let it cool in the pan for 1½ hours (it will sink). Then, use the parchment paper to lift the cake out and let it cool completely on a rack for at least 2 hours.
- In a mixer bowl, combine the heavy cream, brown sugar, and cinnamon. Begin whipping on medium-low speed until frothy. Then increase the speed to high and whip until the cream forms soft peaks. Serve alongside slices of the cooled cake.
Notes
- Ensure apples are sliced very thin for the signature ‘invisible’ layers. The cake sinks significantly as it cools—this is normal. For best texture, allow it to cool completely before slicing.


Leave a Reply