My First Biscotti Mistake
I made these cookies wrong the first time. I was in a hurry. I sliced the warm loaf and the pieces crumbled everywhere. I was so disappointed. My kitchen looked like it had snowed cookie crumbs.
Patience is the secret ingredient here. Letting the loaf cool is not a suggestion. It is a rule. That waiting time lets the loaf get strong enough to slice. This matters because good things take a little time. Rushing rarely makes anything better.
Why We Bake Them Twice
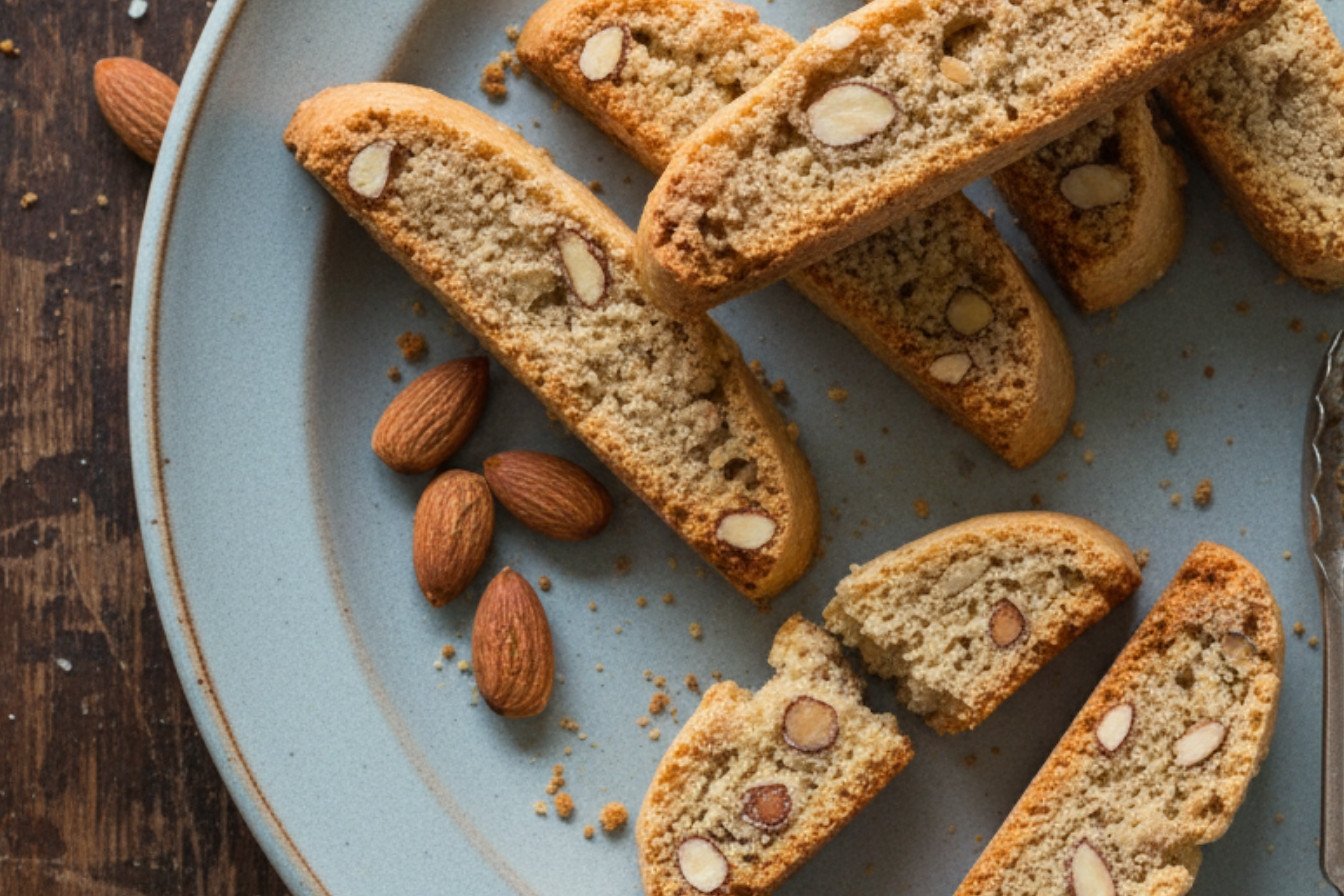
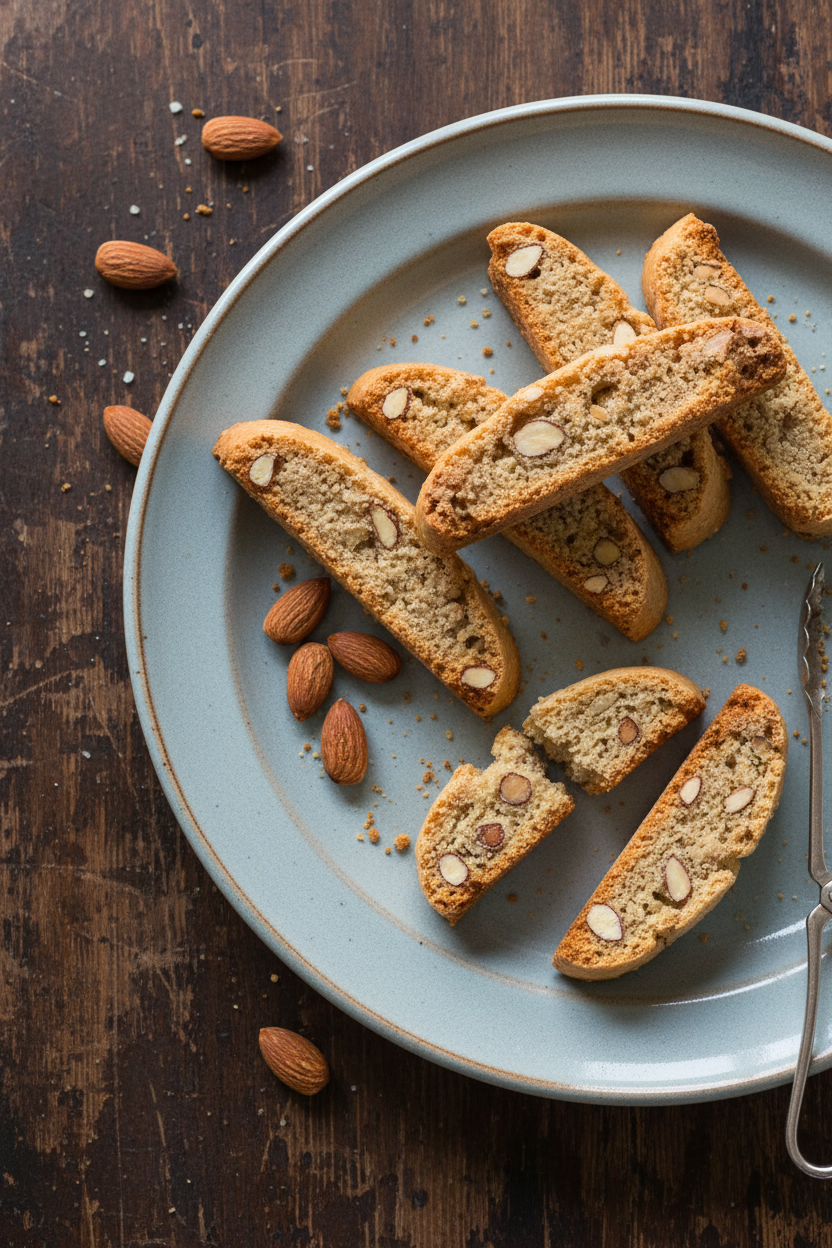
These are called biscotti. That means “twice-cooked” in Italian. The first bake makes a soft loaf. The second bake makes each slice crisp. That crispness is the whole point. It is perfect for dipping.
I love to dunk mine in my afternoon tea. The cookie soaks up just enough. It gets soft but doesn’t fall apart. *Fun fact: Long ago, biscotti were baked twice to last on long ship journeys.* They are travelers’ cookies. Do you prefer to dunk in coffee, tea, or hot chocolate?
The Magic of Almonds
We use lots of almonds here. Some are chopped. Some are ground into powder. This gives two kinds of crunch. The ground almonds make the dough tender. The chopped ones give you a nice little bite.
Toasting the nuts first is very important. It wakes up their flavor. Doesn’t that smell amazing? That warm, nutty smell is the heart of this cookie. It makes your whole kitchen feel cozy.
Shaping the Logs
Do not worry about making the log perfect. My logs are always a little lumpy. I still laugh at that. They bake up just fine. Use the lines on the paper as a gentle guide. Floured hands keep the dough from sticking.
Brushing with egg white gives them a shiny, golden top. It is like putting on a little coat before they go in the oven. This small step makes them look like they came from a bakery. What is your favorite part of baking? Is it mixing, shaping, or the smell?
A Cookie That Waits For You
These cookies get better as they sit. The flavors settle and become friends. They stay crisp for weeks in a tin. This matters because life gets busy. It is nice to have a treat ready for a guest or for yourself.
I always keep a jar of these on my counter. They are for sharing. A cookie with a story tastes sweeter. Tell me, what is a recipe that someone special taught you to make?
Ingredients:
| Ingredient | Amount | Notes |
|---|---|---|
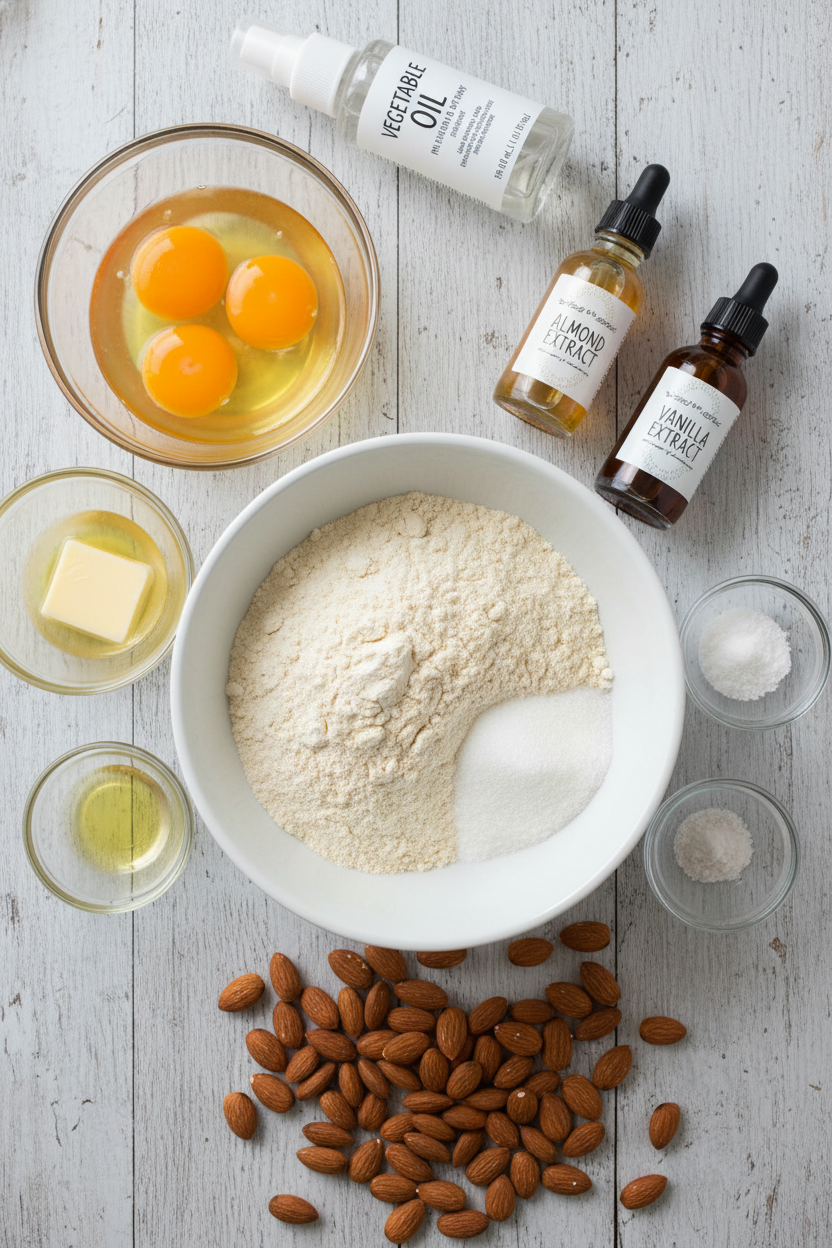
| Whole almonds, lightly toasted | 1 ¼ cups (6 ¼ ounces/177 grams) | |
| All-purpose flour | 1 ¾ cups (8 ¾ ounces/248 grams) | |
| Baking powder | 2 teaspoons | |
| Salt | ¼ teaspoon | Plus an extra pinch for the egg white wash |
| Large eggs | 2 | Plus 1 large egg white (for wash) |
| Sugar | 1 cup (7 ounces/198 grams) | |
| Unsalted butter | 4 tablespoons | Melted and cooled |
| Almond extract | 1 ½ teaspoons | |
| Vanilla extract | ½ teaspoon | |
| Vegetable oil spray | As needed | For shaping and smoothing dough |
Instructions
Step 1: First, get your oven ready. Heat it to 325°F. Find the middle rack. Now, grab some parchment paper. Draw two skinny rectangles on it. They should be 8 inches long. Leave space between them. Lightly grease your baking sheet. Place the parchment on it, drawing-side down. The pencil lines will guide you. (Greasing the sheet first keeps the paper from sliding!)
Step 2: Let’s work on the almonds. Put 1 cup in your food processor. Pulse them until they are coarsely chopped. Set them aside. Now, finely grind the last 1/4 cup of almonds. Add the flour, baking powder, and salt to the processor. Pulse it all together. In the clean processor, whip the two whole eggs. They will get pale and fluffy. Slowly pour in the sugar while it runs. Add the cooled butter, almond extract, and vanilla. Mix it well.
Step 3: Pour that lovely egg mixture into a bowl. Gently fold in half of the flour mix. Then add the rest of the flour and the chopped almonds. Fold just until you see no dry spots. Don’t overmix! Split this dough into two equal parts. With floured hands, shape each part into a log on your parchment lines. Use an oiled spatula to smooth the tops. Brush them with the beaten egg white. This makes them shiny. Bake for 25-30 minutes until golden. Why do we let the butter cool first? Share below!
Step 4: The baked loaves need a nap. Let them cool on the sheet for 30 minutes. Move them to a cutting board. Use a serrated knife, like for bread. Slice each loaf on a diagonal. Make the slices about half an inch thick. I still laugh at my first lopsided slices! Arrange the slices cut-side down on a wire rack. Put the rack over a baking sheet. Bake them again for about 35 minutes. Turn them once. They will become perfectly crisp and golden. Let them cool completely.
Creative Twists
These cookies are wonderful as they are. But sometimes, a little change is fun. My grandkids love these ideas. You can dip one end of the cooled biscotti in melted dark chocolate. Doesn’t that look fancy? Or, add a big handful of dried cranberries to the dough. They give a lovely, chewy surprise. For a cozy flavor, swap the vanilla for a teaspoon of orange zest. It smells like sunshine. Which one would you try first? Comment below!
Serving & Pairing Ideas
These cookies are made for dipping. I love them with a small bowl of sweet dessert wine for dunking. For the kids, a big glass of cold milk is the perfect partner. You could also serve them on a pretty plate with some fresh berries. It makes a simple treat feel special. Sometimes, I just enjoy one with my afternoon tea. The quiet crunch is so satisfying. Which would you choose tonight?
Keeping Your Biscotti Perfectly Crisp
These cookies are made to last. Store them in a tin at room temperature. They stay crisp for a month. You can freeze them for three months. Just thaw them in the tin.
I once gave a tin to my neighbor. She found it six weeks later. The biscotti were still wonderfully crunchy. Batch cooking is a gift to your future self. It means you always have a sweet treat ready.
No reheating is needed. Their double bake makes them sturdy. Have you ever tried storing it this way? Share below!
Biscotti Baking Troubles? Easy Fixes Here
First, if your dough is too sticky, do not worry. Just flour your hands well. This makes shaping the logs much easier.
Second, watch for cracks while baking. Small cracks are perfect. They mean your biscotti are baking just right. I remember when mine came out smooth. They were a bit too soft inside.
Finally, slice with a serrated knife. Saw gently back and forth. A sharp knife prevents crumbling. This matters for pretty cookies. It also builds your kitchen confidence. Which of these problems have you run into before?
Your Quick Questions, Answered
Q: Can I make these gluten-free?
A: Yes. Use a good gluten-free flour blend. The almonds help with texture.
Q: How far ahead can I make them?
A: The whole recipe is a make-ahead dream. They need that month to mellow and get crunchier.
Q: What if I only have vegetable oil?
A: You can swap it for the melted butter. Use 3 tablespoons of oil instead.
Q: Can I halve the recipe?
A: Absolutely. Just make one log instead of two. All other steps stay the same.
Q: Is the second bake really necessary?
A: Yes. This is the secret to their famous crunch. Fun fact: “Biscotti” means “twice-cooked” in Italian! Which tip will you try first?
From My Kitchen to Yours
I hope you love making these. The smell of almonds baking is pure joy. It fills your home with warmth.
Please tell me all about your baking adventure. I read every comment with my morning tea. Have you tried this recipe? Let me know how it went.
Happy cooking!
—Fiona Brooks.
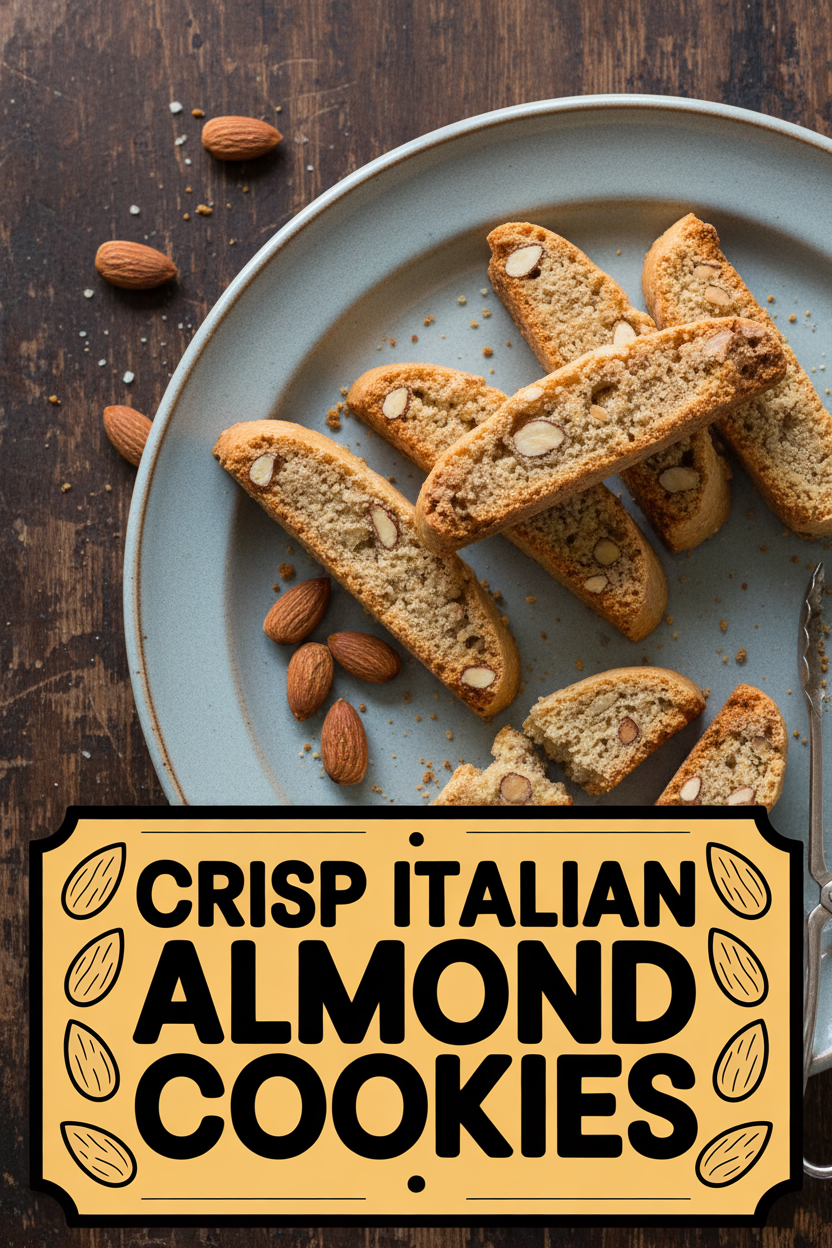
Crisp Italian Almond Cookies
Description
Classic, twice-baked Italian almond cookies (biscotti) with a satisfying crunch and rich almond flavor.
Ingredients
Instructions
- Preheat your oven to 325°F (165°C) and position a rack in the center. On a piece of parchment paper, draw two 8×3-inch rectangles, leaving 4 inches between them. Lightly grease a baking sheet and place the parchment on it with the pencil marks facing down.
- Coarsely chop 1 cup of the almonds in a food processor and set them aside. Process the remaining 1/4 cup of almonds until finely ground. Add the flour, baking powder, and salt to the processor and pulse to blend. In the now-empty processor, whip the 2 whole eggs until pale and voluminous. With the machine running, gradually pour in the sugar. Add the cooled melted butter, almond extract, and vanilla, processing to combine. Transfer this egg mixture to a bowl. Gently fold in half of the flour mixture, then add the remaining flour mixture and the chopped almonds, folding just until incorporated.
- Split the dough into two equal portions. With floured hands, shape each portion into an 8×3-inch log directly on the parchment, using your drawn lines as a guide. Lightly spray each loaf with oil and use an oiled spatula to smooth the surfaces. Brush the tops with the reserved beaten egg white. Bake for 25 to 30 minutes, rotating the pan once, until the loaves are golden and show slight cracks.
- Allow the baked loaves to cool on the sheet for 30 minutes. Move them to a cutting board and, using a serrated knife, slice each loaf diagonally into 1/2-inch pieces. Arrange the slices cut-side down on a wire rack set over a baking sheet, spacing them slightly apart. Bake a second time at 325°F for about 35 minutes, turning the slices once, until they are crisp and golden. Cool completely. The biscotti will keep in an airtight container for one month.
Notes
- For a variation, dip one end of the cooled biscotti in melted dark chocolate. Ensure the loaves are completely cool before slicing to get clean cuts.


Leave a Reply