My First Brownie Disaster
Let me tell you about my first time making brownies. I was so excited. I forgot the baking powder. My brownies came out flat as a pancake. I still laugh at that.
We all have kitchen flops. It’s how we learn. That’s why I love this recipe. It walks you through each step. You won’t forget a thing. What was your funniest kitchen mistake? I’d love to hear it.
Why We Toast the Nuts
Toasting nuts is a small step. But it makes a big difference. It wakes up their flavor. Doesn’t that smell amazing? It fills your kitchen with warmth.
This matters because food should delight all your senses. A good smell means good flavor is coming. Fun fact: Toasting nuts gets rid of any raw taste. It makes them taste nuttier and crunchier.
The Secret to Fudgy Goodness
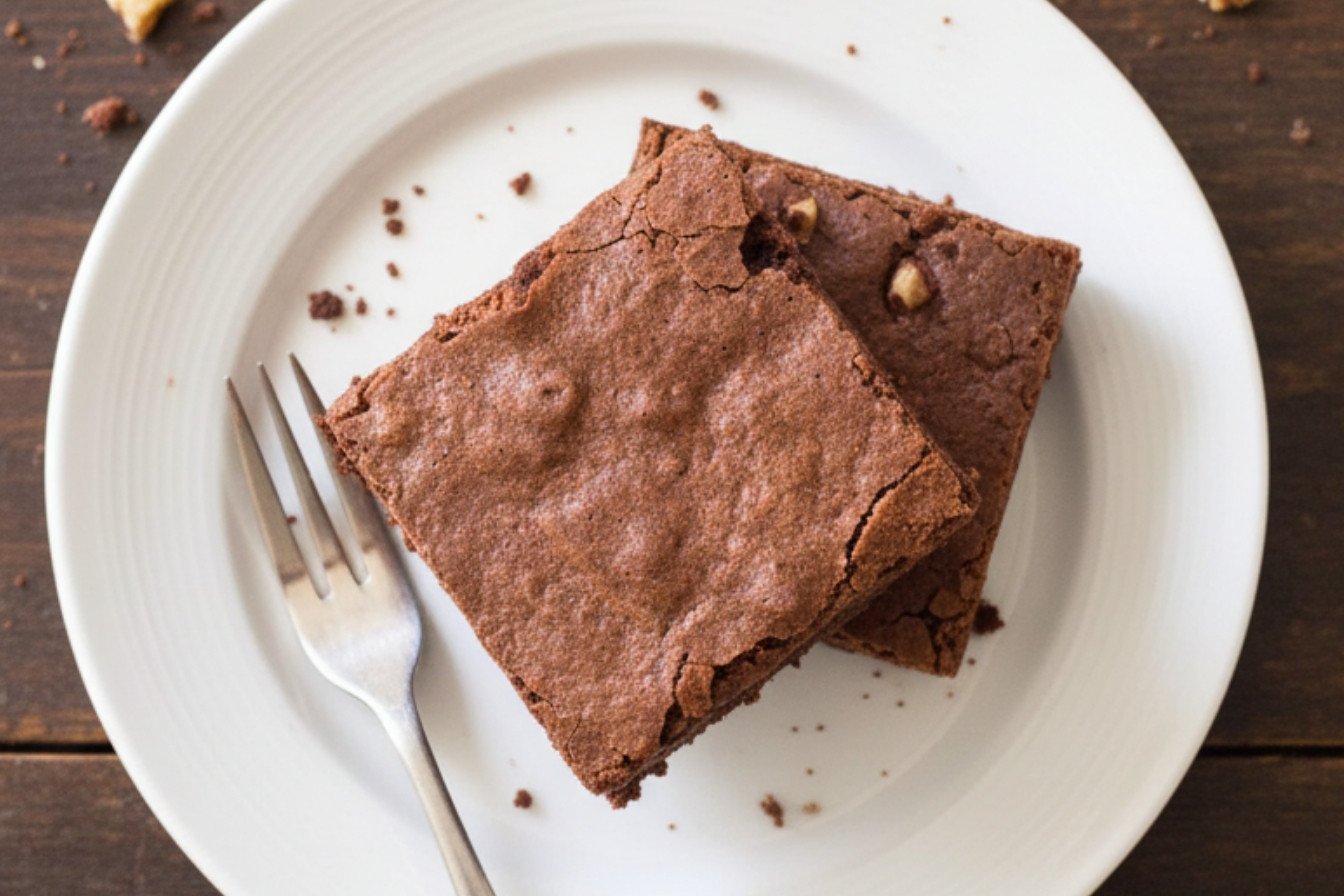
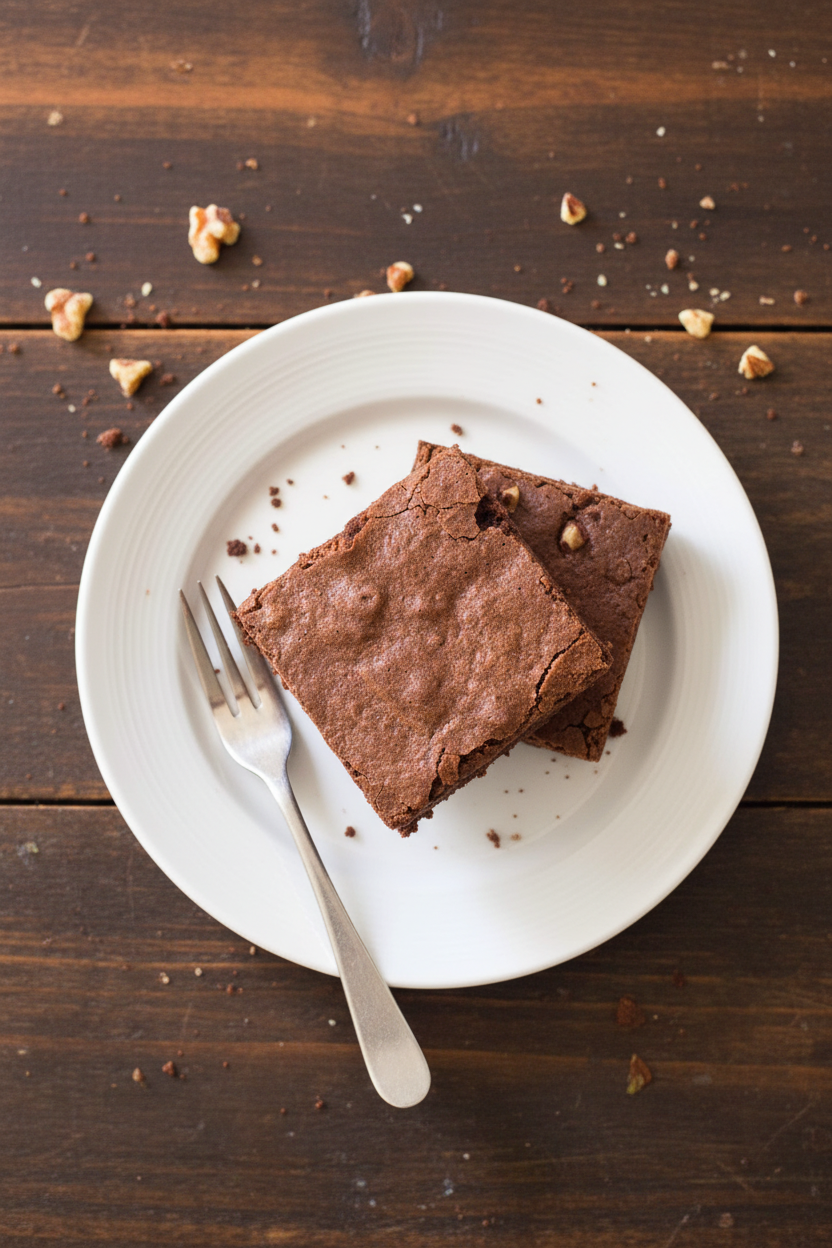
These brownies are wonderfully fudgy. The secret is in the mixing. You fold the dry ingredients in gently. Don’t stir too hard. This keeps them tender.
Also, you take them out when a toothpick has a few crumbs. Not when it’s clean. A clean toothpick means cakey brownies. Do you prefer fudgy or cakey brownies? Tell me your favorite.
A Little Help from the Foil
Lining the pan with foil seems fussy. But trust me, it’s a lifesaver. It lets you lift the whole block out. No more struggling to get the first piece out neatly.
This matters because we eat with our eyes first. A nice, clean square is a joy. It makes sharing feel special. Small tricks make cooking easier and more fun.
The Hardest Part: Waiting
You must let them cool for two hours. I know, it’s the hardest part. The smell is so tempting. But cutting warm brownies makes a mess. They need time to set.
Use this time to wash the bowls. Then find a good book to read. Patience makes the first bite even sweeter. What’s your best trick for waiting on a treat to cool?
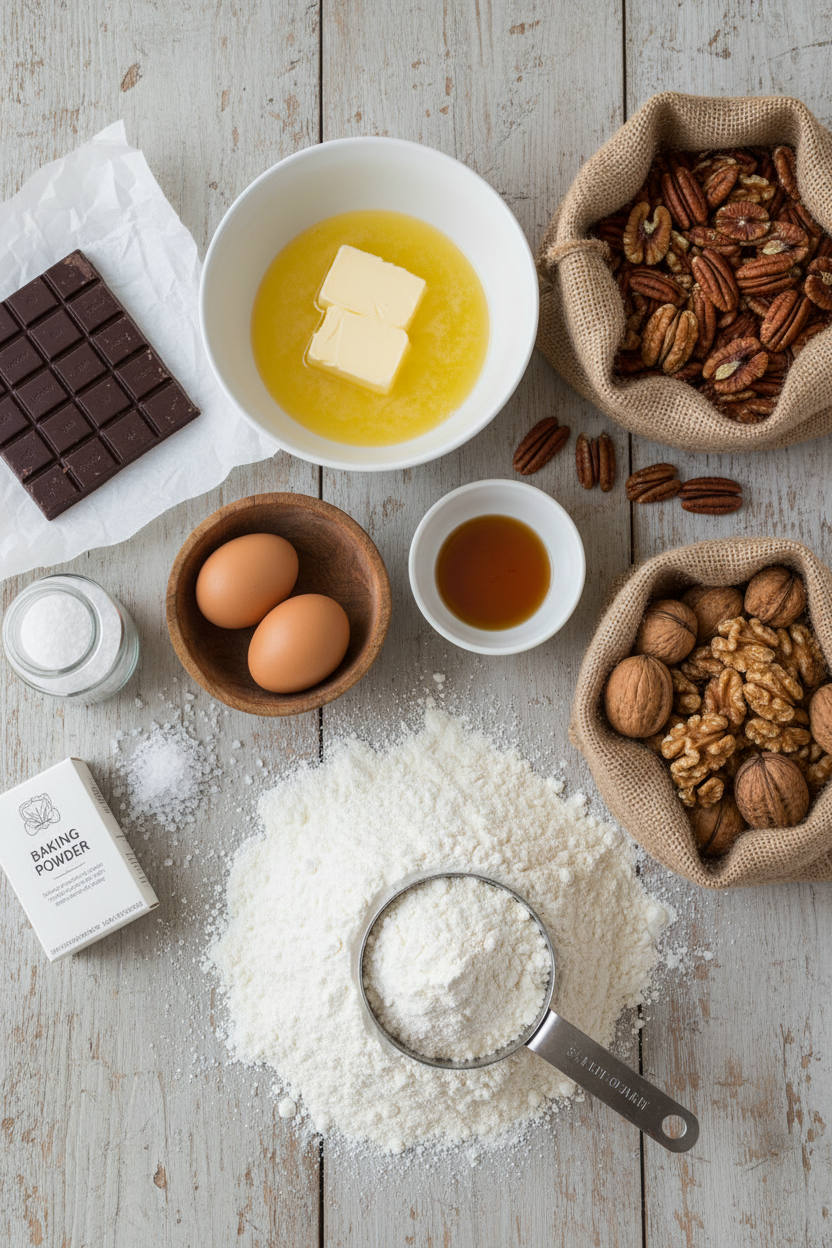
Ingredients:
| Ingredient | Amount | Notes |
|---|---|---|
| Pecans or Walnuts | 1 cup (4 oz / 113g) | Chopped medium; optional |
| Plain Cake Flour | 1 ¼ cups (5 oz / 142g) | |
| Table Salt | ½ teaspoon | |
| Baking Powder | ¾ teaspoon | |
| Unsweetened Chocolate | 6 oz (170g) | Chopped fine |
| Unsalted Butter | 12 tbsp (1 ½ sticks) | |
| Sugar | 2 ¼ cups (15 ¾ oz / 447g) | |
| Large Eggs | 4 | |
| Vanilla Extract | 1 tablespoon |
Instructions
Step 1: First, get your oven ready. Move a rack to the middle and heat it to 325°F. Line your baking dish with foil. Let the extra foil hang over the sides. Give it a quick spray. This makes cleanup so easy later. (A little tip: the foil helps you lift the whole brownie block out!)
Step 2: Now, let’s toast the nuts if you’re using them. Spread them on a baking sheet. Pop them in the hot oven for 5 to 8 minutes. You’ll know they’re done when you smell that wonderful, warm nutty scent. Let them cool completely. Do you like nuts in your brownies? Share below!
Step 3: Grab a medium bowl for your dry stuff. Whisk the flour, salt, and baking powder together. Just set this bowl aside for now. I still laugh at the time I forgot the baking powder. The brownies were like chocolate bricks! (Always whisk your dry ingredients first to avoid lumps.)
Step 4: Time for the chocolate magic. Melt the chopped chocolate and butter together gently. You can use a bowl over simmering water. Or use the microwave in short bursts. Stir until it’s silky smooth. Remove it from the heat. Whisk in the sugar. Then add the eggs, one by one. Finally, stir in the vanilla. Doesn’t that smell amazing?
Step 5: Gently fold your dry mixture into the chocolate batter. Do this in three parts. Mix until it’s just combined. Pour the thick batter into your prepared pan. Spread it to the corners. Sprinkle the cooled nuts on top, if you like. Bake for 30 to 35 minutes. A toothpick should come out with a few moist crumbs. Let them cool completely in the pan. This takes patience, about 2 hours. Then, use the foil to lift them out and cut into squares.
Creative Twists
My grandkids love to help me mix things up. Here are three fun twists on our classic recipe. Sea Salt Sprinkle: After baking, sprinkle a tiny pinch of flaky sea salt on top. It makes the chocolate taste even deeper. Peppermint Patty: Stir in 1/2 cup of crushed peppermint candies or chocolate mint chips. It’s like a holiday in your mouth! Berry Surprise: Gently fold in 1/2 cup of frozen raspberries. They get a little jammy in the oven. Which one would you try first? Comment below!
Serving & Pairing Ideas
A warm brownie is a little piece of happiness. I love serving mine with a scoop of vanilla ice cream. The cold and warm mix is perfect. For a fancy touch, dust the plate with a little powdered sugar. A dollop of whipped cream never hurts either. For drinks, a cold glass of milk is the classic choice. My husband always pairs his with a small glass of port wine. It’s a rich, sweet combination. Which would you choose tonight?
Keeping Your Brownies Happy
Let’s talk about keeping these treats fudgy. Cool them completely first. Then, store them in a tight container at room temperature. They will stay perfect for four days.
You can freeze them for a sweet later. Wrap each brownie in plastic wrap. Then pop them all in a freezer bag. I once forgot a batch in my freezer for a month. It was a lovely surprise on a rainy Tuesday!
To reheat, just warm a square in the microwave for ten seconds. It tastes like it just came from the oven. Batch cooking matters because life gets busy. A homemade treat ready anytime is a little gift to yourself. Have you ever tried storing it this way? Share below!
Brownie Troubleshooting for You
Sometimes brownies don’t turn out right. Here are easy fixes. First, if they are cakey, you may have over-mixed the batter. Just fold the flour in until it disappears. I remember when my grandson mixed it like cake batter. We got fluffy squares instead of fudgy ones!
Second, if they are greasy, your butter might have been too hot. Let the melted chocolate mix cool a bit before adding sugar. This matters for texture. Good technique builds your cooking confidence. Third, if the top is cracked, the oven was likely too hot. Always use an oven thermometer.
An accurate temperature matters for perfect flavor and chew. Which of these problems have you run into before? Don’t worry. Every mistake is a lesson learned in the kitchen.
Your Quick Questions, Answered
Q: Can I make these gluten-free? A: Yes! Swap the cake flour for a gluten-free blend. Use one meant for baking.
Q: Can I make them ahead? A: Absolutely. Bake them a day or two before you need them. They taste even better.
Q: What if I don’t have unsweetened chocolate? A: Use semi-sweet chocolate. Then reduce the sugar by one-quarter cup.
Q: Can I halve the recipe? A: You can. Bake it in an 8-inch square pan. Check for doneness a few minutes early.
Q: Are the nuts optional? A: They are! My family is split. I add nuts to only half the pan. *Fun fact: The first brownies had no chocolate at all! They were molasses cakes.* Which tip will you try first?
From My Kitchen to Yours
I hope you bake a batch of these soon. The smell of chocolate in your kitchen is pure joy. Share them with someone you love. Or keep them all for yourself. I won’t tell!
I would love to hear about your baking adventure. Have you tried this recipe? Tell me all about it in the comments below. Your stories are my favorite thing to read.
Happy cooking!
—Fiona Brooks.

Ultimate Fudgy Chocolate Brownies
Description
Ultimate rich, fudgy, and decadent chocolate brownies, loaded with optional toasted nuts for the perfect texture.
Ingredients
Instructions
- Position an oven rack in the center of the oven and preheat to 325°F. Line a 13×9-inch baking dish with two sheets of foil, one going lengthwise and the other widthwise, allowing the excess to hang over the edges. Lightly coat the foil with nonstick spray.
- If including nuts, toast them on a baking sheet in the preheated oven for 5 to 8 minutes until fragrant. Let them cool.
- In a medium bowl, whisk together the flour, salt, and baking powder. Set this dry mixture aside.
- Gently melt the chopped chocolate and butter together. This can be done in a heatproof bowl set over a pan of barely simmering water, stirring until smooth, or in a microwave using short bursts, stirring frequently to avoid burning. Once smooth, remove from the heat and gradually whisk in the sugar. Whisk in the eggs, one at a time, followed by the vanilla. Using a spatula, gently fold the dry flour mixture into the chocolate batter in three additions until just combined and smooth.
- Pour the batter into the prepared pan, spreading it evenly into the corners. Sprinkle the toasted nuts evenly over the top, if using. Bake for 30 to 35 minutes, until a toothpick inserted into the center comes out with a few moist crumbs. Let the brownies cool completely in the pan on a wire rack, about 2 hours. Then, use the foil overhang to lift the entire brownie block out of the pan. Cut into 2-inch squares. Leftovers can be stored in an airtight container at room temperature.
Notes
- For clean cuts, chill the cooled brownie block before slicing. Store in an airtight container at room temperature for up to 5 days.


Leave a Reply