
A Secret in the Dough
Let me tell you about my secret cookie helper. It is cottage cheese. I know, it sounds funny. My grandson made a face when I told him. But you puree it until it is smooth. Then it adds a wonderful creaminess. It makes the cookie soft and gives it a little protein, too.
That is my mini-anecdote for you. I still laugh at his surprised face. He ate three cookies and asked for the recipe. Why does this matter? It shows that trying new things can lead to happy surprises. What is one food you were surprised to like?
Mixing Up Memories
Creaming the butter and sugar is my favorite step. The mixer makes it light and fluffy. It looks like pale yellow clouds. Then you blend in that secret cottage cheese. Doesn’t that smell amazing already?
Add the eggs and vanilla. The vanilla smell fills the whole kitchen. It reminds me of my mother’s apron. She always had a bottle of vanilla in her cupboard. Cooking connects us to sweet memories. That is why it matters so much.
Chocolatey Goodness
Now for the chocolate part. You whisk the flour with cocoa powder. Use the Dutch-processed kind. Fun fact: Dutch-process cocoa is treated to be less acidic. It gives a deeper, smoother chocolate flavor. It makes these cookies extra rich.
Mix the dry into the wet in batches. The dough becomes thick and dark. It is like edible mud pie. I always sneak a little taste. Do you taste your cookie dough before baking?
Baking with Care
Drop the dough by spoonfuls on your sheet. Give them room to breathe. They will spread a little. Do not crowd them. Halfway through baking, swap the trays. This helps them bake evenly.
You will know they are done when they spring back. Let them cool right on the sheet. This keeps them soft. Waiting is the hardest part. Which is harder for you: the mixing or the waiting?
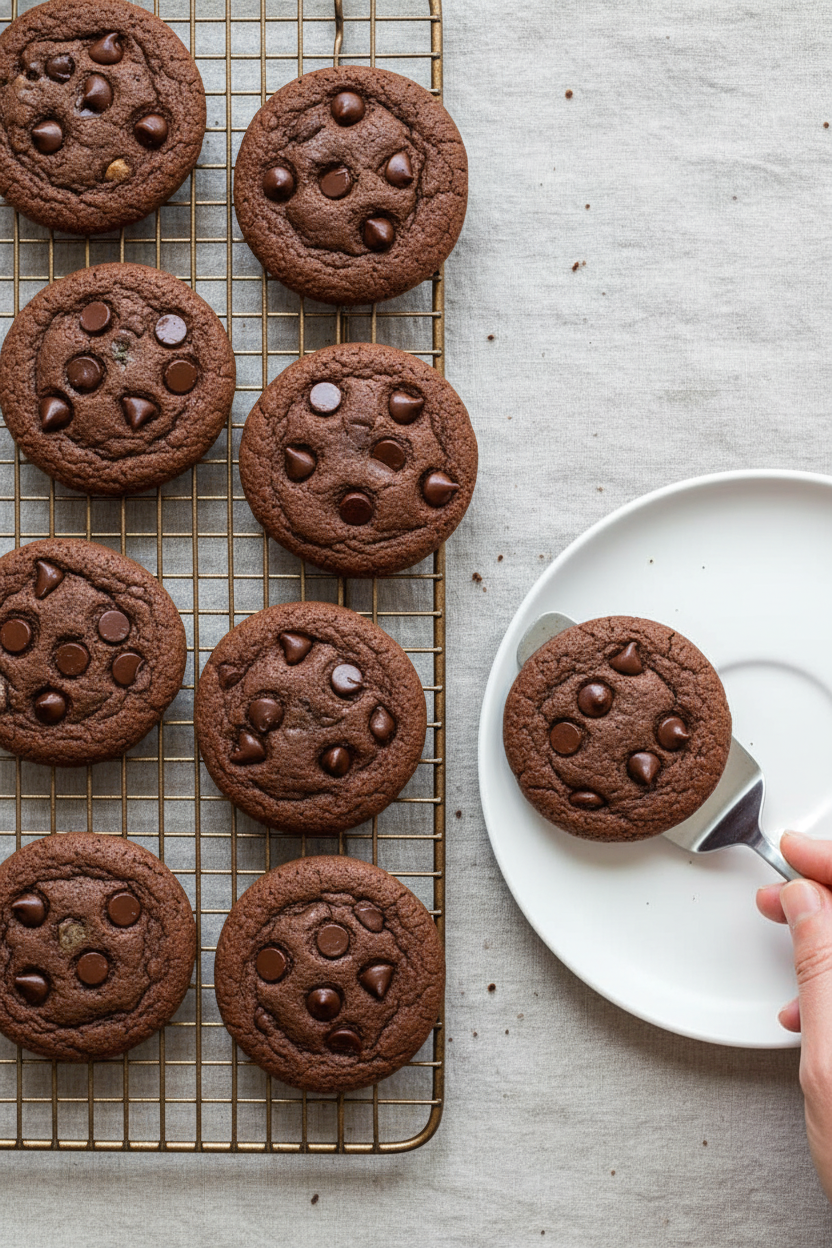
A Warm, Soft Bite
Finally, take a cookie. It is cakey and soft, not crunchy. The chocolate flavor is deep and cozy. You would never guess the cottage cheese is there. It just makes them wonderfully tender.
Each cookie has a little protein from the cottage cheese and eggs. That is a nice bonus. It means you can enjoy a treat that feels a bit more wholesome. Share them with someone you love. That is the best part of baking.
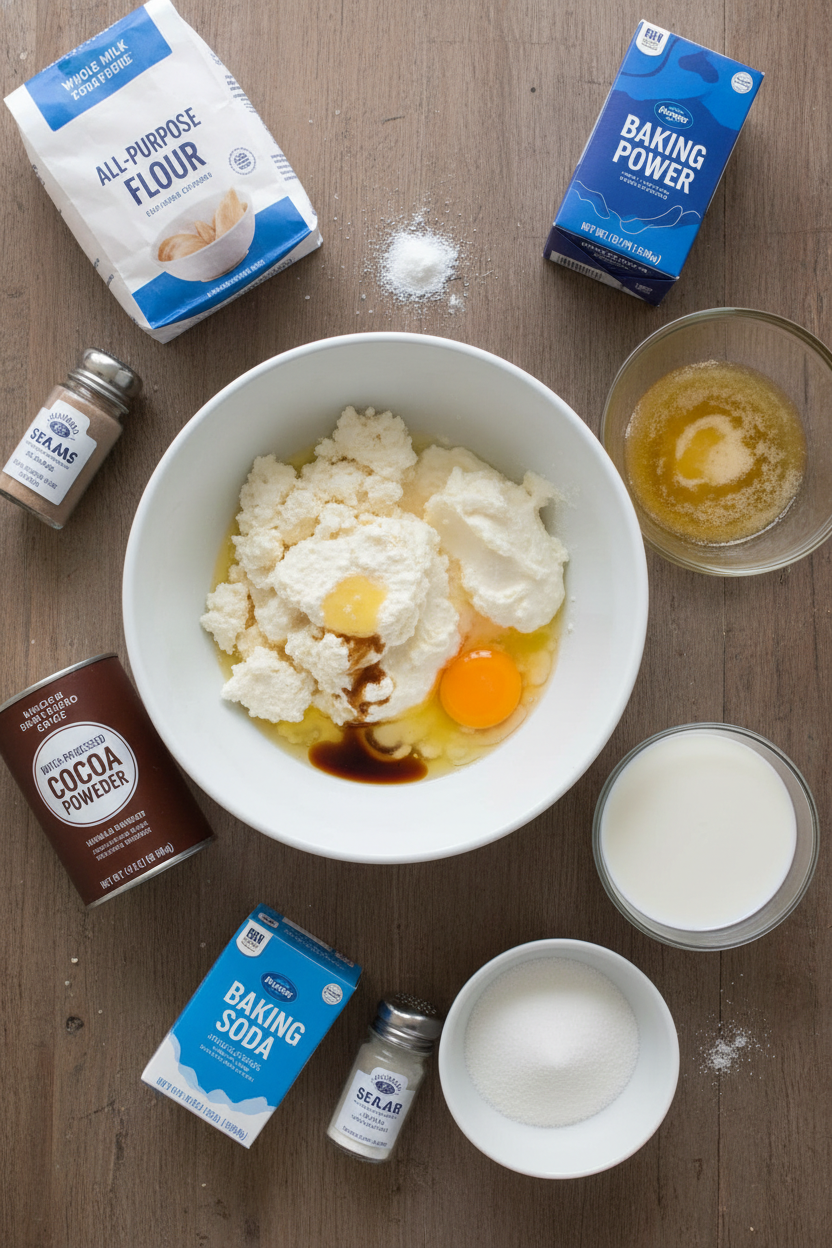
Ingredients:
| Ingredient | Amount | Notes |
|---|---|---|
| All-purpose flour | 2 ¾ cups (13¾ ounces/390 grams) | |
| Dutch-processed cocoa powder | ½ cup (1½ ounces/43 grams) | |
| Baking powder | 1 teaspoon | |
| Baking soda | 1 teaspoon | |
| Salt | ½ teaspoon | |
| Unsalted butter | 16 tablespoons (2 sticks) | Softened |
| Sugar | 1 ¾ cups (12¼ ounces/347 grams) | |
| Small-curd, whole milk cottage cheese | 1 cup | Pureed until smooth |
| Large eggs | 2 | |
| Vanilla extract | 1 teaspoon |
Instructions
Step 1: First, let’s get our oven ready. Preheat it to 350°F. Line two baking sheets with parchment paper. In a medium bowl, whisk your flour, cocoa, baking powder, baking soda, and salt. Now, let’s tackle the cottage cheese. Puree it in a food processor until it’s super smooth. (A smooth blend is the secret to a creamy cookie!)
Step 2: Grab your electric mixer. Cream the butter and sugar until it’s light and fluffy. This takes about two minutes. Turn the speed to low. Blend in your smooth cottage cheese, then the eggs and vanilla. Add the dry ingredients in three parts, scraping the bowl as you go. Why do we scrape the bowl? Share below!
Step 3: Time to make our cookie mounds. Use a level tablespoon of dough for each. Place them on your sheets, about an inch and a half apart. I still laugh at how my grandson always sneaks a taste of the dough here!
Step 4: Bake for about 12 minutes. They’re done when they spring back from a gentle press. Halfway through, swap the sheets from top to bottom rack. This helps them bake evenly. Doesn’t that smell amazing? Let cookies cool on the sheet for 20 minutes.
Creative Twists
These cookies are wonderful as they are. But sometimes, a little change is fun. Here are three easy ideas for you. They make the kitchen feel like a playground. I love seeing what new friends create.
Add a handful of chopped dried cherries for a chocolate-covered-cherry vibe.
Roll the dough balls in powdered sugar before baking for a crackly top.
Mix in a quarter teaspoon of cinnamon with the dry ingredients for a warm hint.
Which one would you try first? Comment below!
Serving & Pairing Ideas
These cookies are lovely with a cold glass of milk. That’s a classic for a reason. For a special treat, place one on a small plate with a scoop of vanilla ice cream. The warmth of the cookie makes the ice cream melt just right. It’s pure happiness.
For drinks, a cold glass of whole milk is always my first pick. For the grown-ups, a small glass of tawny port wine pairs beautifully. Its sweet, nutty flavor loves the chocolate. Which would you choose tonight?
Keeping Your Cookies Happy
Let’s talk about keeping these cookies tasty. They stay fresh in a sealed container for three days. You can also freeze the baked cookies for a month. Just layer them with parchment paper in a freezer bag.
I love to bake a double batch for this. I freeze half the dough in little scoops on a tray. Once frozen, I pop them into a bag. This way, I can bake just a few warm cookies anytime.
I once left a whole batch out overnight. They were sadly stale by morning. Now I always tuck them away right after they cool. Storing them well means no waste and a sweet treat ready for you.
Have you ever tried storing cookie dough this way? Share below!
Cookie Troubles? Easy Fixes Here
First, if your cookies spread too much, your butter was too soft. Your dough should be cool when it goes in the oven. Chilling it for 30 minutes fixes this perfectly.
Second, if they seem dry, you might have measured the flour wrong. Fluff your flour first, then spoon it into the cup. Level it off with a knife. This matters because perfect measuring makes a tender cookie.
Third, I remember when my first batch tasted bland. I had forgotten the salt! That tiny bit of salt makes the chocolate flavor sing. It balances all the sweetness so beautifully. Getting these right builds your kitchen confidence.
Which of these problems have you run into before?
Your Quick Questions, Answered
Q: Can I make these gluten-free?
A: Yes! Use a good gluten-free flour blend. Make sure it has xanthan gum in it.
Q: Can I make the dough ahead?
A: Absolutely. Keep it covered in the fridge for up to two days. Let it soften a bit before scooping.
Q: What can I use instead of cottage cheese?
A: Plain, thick Greek yogurt works in a pinch. The cookies will be a little cakier.
Q: Can I halve this recipe?
A: You can. Just halve all the ingredients exactly. You will get about 18 lovely cookies.
Q: Any optional tips?
A: Try adding a pinch of cinnamon to the dry ingredients. It’s a fun fact that cinnamon and chocolate are old friends.
Which tip will you try first?
From My Kitchen to Yours
I hope you love baking these cookies as much as I do. They are a little different and very special. My kitchen always smells wonderful when they are in the oven.
I would love to hear all about your baking adventure. Tell me how it went for you and your family. Your stories are my favorite thing to read.
Have you tried this recipe? Please leave a comment below and let me know. Happy cooking!
—Fiona Brooks.
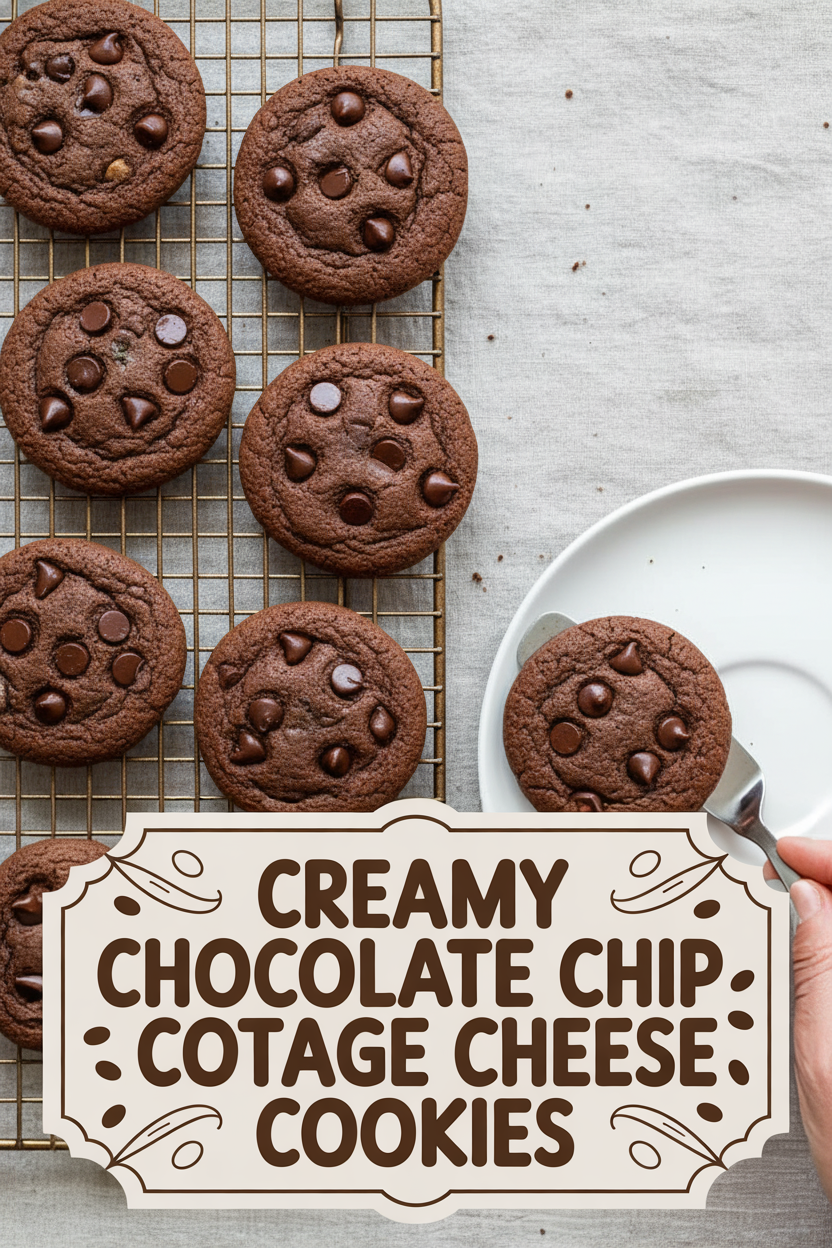
Creamy Chocolate Chip Cottage Cheese Cookies
Description
A unique and delicious cookie with a tender texture from pureed cottage cheese and a rich chocolate flavor.
Ingredients
Instructions
- Preheat your oven to 350°F (175°C). Position two oven racks in the upper and lower thirds of the oven. Line two baking sheets with parchment paper. In a medium bowl, whisk together the flour, cocoa powder, baking powder, baking soda, and salt. Separately, puree the cottage cheese in a food processor until completely smooth.
- Using an electric mixer, cream the butter and sugar together on medium-high speed until the mixture is light and fluffy, approximately 2 minutes. Reduce the mixer speed to low. Blend in the smooth cottage cheese, followed by the eggs and vanilla extract. Gradually incorporate the dry flour mixture in three batches, pausing to scrape down the sides of the bowl as necessary.
- For each cookie, place a level tablespoon of dough onto the prepared baking sheets, leaving about 1½ inches between them. Bake for about 12 minutes, or until the cookies spring back when gently pressed. Halfway through the baking time, swap and rotate the baking sheets to ensure even cooking. Allow the cookies to cool on the sheets for 20 minutes before transferring them to a wire rack to cool completely. Once the baking sheets have cooled, line them with new parchment paper and continue baking the remaining dough.
Notes
- Nutrition information is an estimate per cookie. Ensure cottage cheese is pureed until completely smooth for the best texture. Store cooled cookies in an airtight container.


Leave a Reply