My Kitchen Helper
My grandson, Sam, helped me make this once. He was in charge of the bread. He pulsed the food processor like a race car driver. Crumbs flew everywhere! I still laugh at that.
Mixing the buttery crumbs with the onions is the fun part. You get to use your hands. Doesn’t that smell amazing? It’s salty and rich. This matters because cooking should be joyful, not a chore.
Why We Blanch
The recipe asks you to boil then ice the beans. This is called blanching. It sounds fancy, but it’s simple. It keeps your beans bright green and crisp.
No one likes a mushy green bean. This step stops the cooking fast. It makes all the difference. Do you have a favorite kitchen trick that seems small but helps a lot?
The Heart of the Dish
Now for the creamy sauce. You cook mushrooms until they give up their juice. That juice is pure flavor. Then you stir in flour, broth, and cream.
Watch it bubble and get thick. It’s like a warm, savory hug for the beans. *Fun fact: the cream and flour work together to thicken the sauce, no gluey lumps!* This matters because a good sauce makes simple vegetables feel special.
Bringing It All Together
Now, fold those crisp beans into the sauce. Be gentle. Pour it all into your baking dish. Then, sprinkle your crumb topping over everything.
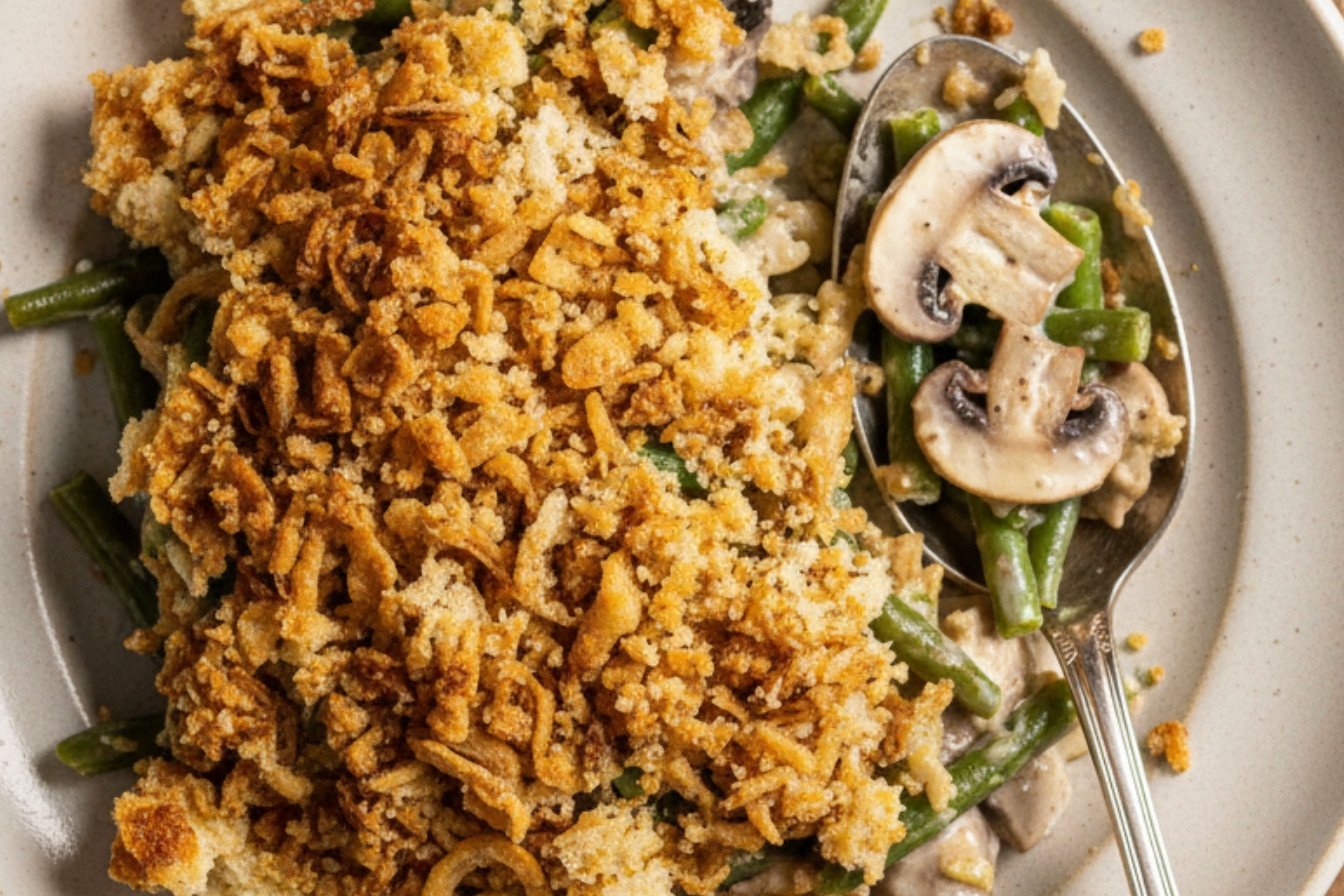
See how the topping covers it like a cozy blanket? That’s how you know you’re almost done. The oven does the final magic. Do you prefer your casserole toppings crunchy or soft?
The Grand Finale
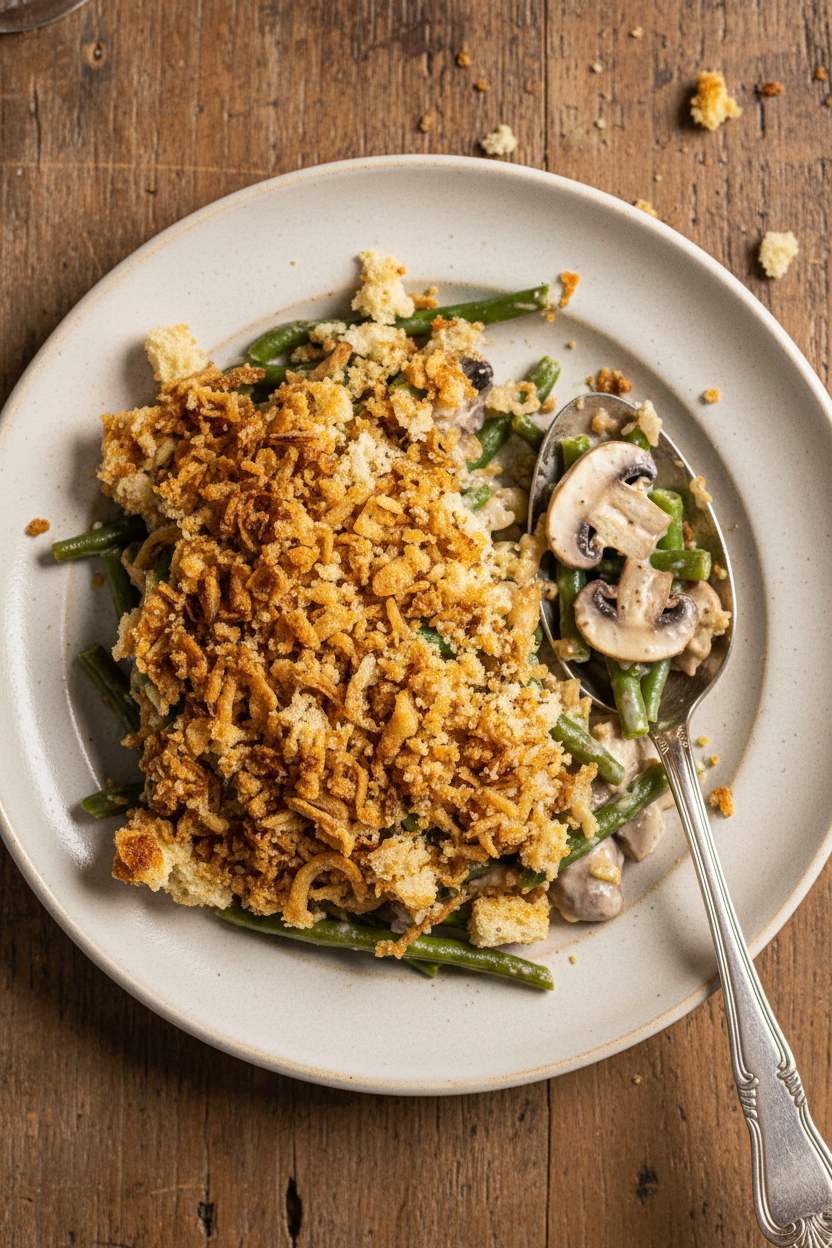
Bake it until it’s golden and bubbly. That sound from the oven is the best part. It means dinner is ready. The topping will be crisp, the sauce creamy.
Serve it hot right from the dish. Everyone will want seconds. What’s the dish your family always asks you to make for holidays? I’d love to hear about it.
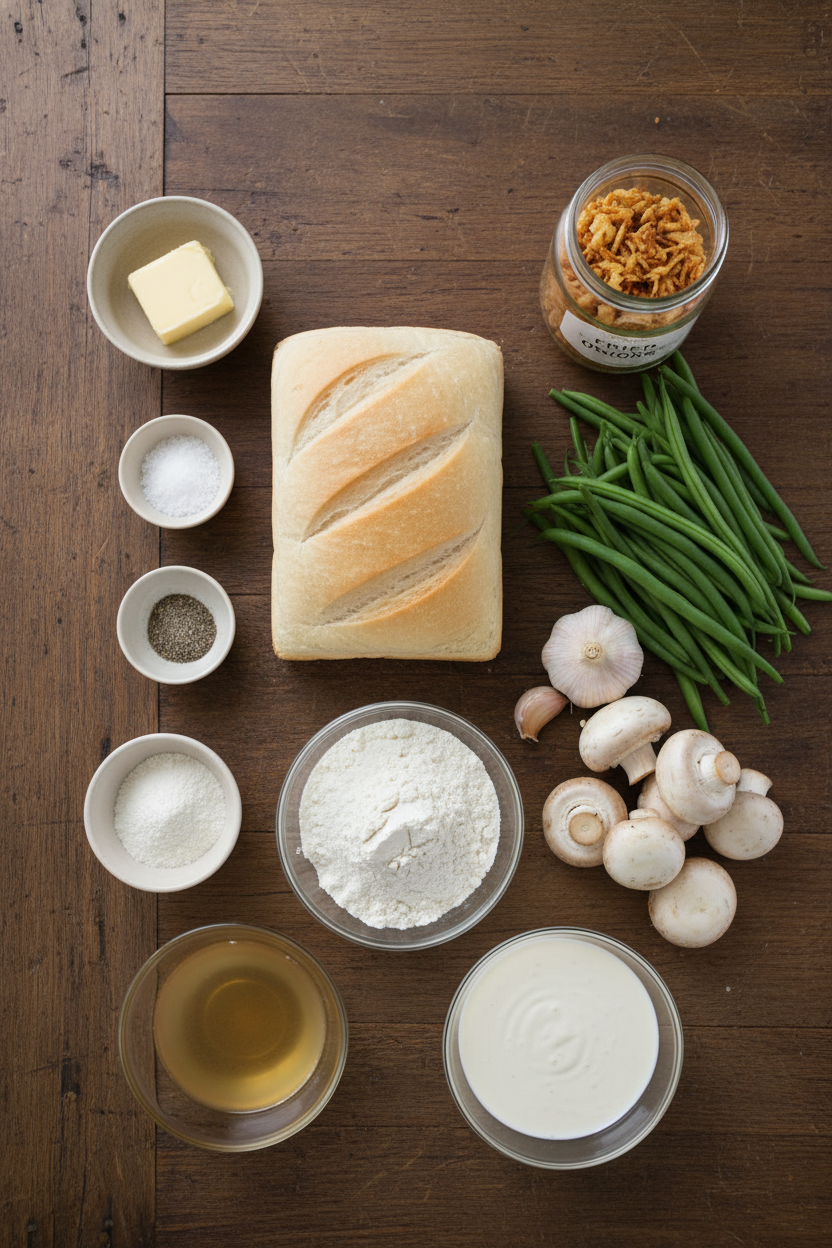
Ingredients:
| Ingredient | Amount | Notes |
|---|---|---|
| White sandwich bread | 4 slices | Each slice torn into quarters |
| Unsalted butter (for topping) | 2 tablespoons | Softened |
| Table salt (for topping) | ¼ teaspoon | |
| Ground black pepper (for topping) | ⅛ teaspoon | |
| Canned fried onions | 3 cups (about 6 ounces) | |
| Table salt (for water) | 2 tablespoons | For boiling the green beans |
| Green beans | 2 pounds | Ends trimmed, and halved |
| Unsalted butter (for sauce) | 3 tablespoons | |
| White button mushrooms | 1 pound | Stems trimmed, wiped clean, and broken into ½-inch pieces |
| Garlic | 3 medium cloves (about 1 tbsp) | Minced or pressed |
| Ground black pepper (for sauce) | ⅛ teaspoon | Plus more to taste |
| Unbleached all-purpose flour | 3 tablespoons | |
| Low-sodium chicken broth | 1 ½ cups | |
| Heavy cream | 1 ½ cups |
Instructions
Step 1: First, let’s make the crunchy topping. Tear your bread into pieces. Put them in the food processor with the soft butter, salt, and pepper. Pulse it about ten times. You want little crumbs. Dump them into a big bowl. Now, stir in all those crispy canned onions. Set this bowl aside for later. Doesn’t that smell amazing already?
Step 2: Next, get your oven ready. Turn it on to 425°F. Put a rack right in the middle. Fill a big bowl with ice water. This is for our beans. Now, boil a huge pot of water. Add two big spoonfuls of salt. When it’s bubbling, add all the green beans. Boil them for about 6 minutes. They should be bright green and a bit crisp. (A hard-learned tip: Don’t walk away! Set a timer.)
Step 3: Drain the beans right away. Plunge them into the ice water bath. This stops the cooking and keeps them pretty. Let them sit a minute. Then, spread them on a towel to dry. Use the same big pot for the sauce. Melt the butter in it. Add the mushrooms, garlic, salt, and pepper. Cook until the mushrooms look golden and dry. I still laugh at how they sizzle and shrink.
Step 4: Sprinkle the flour over the mushrooms. Stir for one whole minute. This makes your sauce thick. Now, slowly whisk in the chicken broth. Bring it to a gentle bubble. Stir in the heavy cream. Let it simmer and get thick for about 12 minutes. Give it a little taste. Does it need more salt or pepper? What’s your favorite cozy spice? Share below!
Step 5: Fold your green beans into that creamy sauce. Be gentle so they get coated nicely. Pour everything into your baking dish. Spread it out evenly. Now, take that topping you made. Sprinkle it all over the top. Try to cover every bit. It’s like putting a crunchy blanket on your casserole.
Step 6: Bake it for about 15 minutes. Watch for the top to turn a perfect golden brown. You’ll see the sauce bubbling at the edges. That’s your sign it’s done. Take it out carefully. Let it sit for just five minutes before serving. This dish is best when it’s hot and happy from the oven.
Creative Twists
This recipe is wonderful as-is. But sometimes, it’s fun to play. Here are three simple twists. Add crispy bacon bits to the topping. Cook four slices first, then crumble them in. Swap half the mushrooms for chopped leeks. They add a sweet, mild onion flavor. Use a mix of green and yellow beans. It makes the dish look so cheerful on the table. Which one would you try first? Comment below!
Serving & Pairing Ideas
This casserole is a star next to a simple roast chicken. Or try it with baked ham. For a garnish, a little extra black pepper is lovely. You could also add a sprinkle of fresh thyme. For drinks, a cold glass of apple cider is perfect. For the grown-ups, a glass of Chardonnay pairs nicely. It’s all about cozy, happy flavors. Which would you choose tonight?
Keeping Your Casserole Cozy
Let’s talk about keeping this dish happy. Cool it completely after dinner. Then cover it tight and pop it in the fridge. It will stay good for three days. You can also freeze it before baking. Just assemble everything in a freezer-safe dish. Wrap it well with foil. It will keep for a month.
To reheat, thaw it overnight if frozen. Bake it covered at 350°F until warm. Then uncover to crisp the top. I once reheated it straight from the fridge. The middle was still cold! Patience is a kitchen virtue. Batch cooking this saves a busy weeknight. It means a warm, homemade meal is always ready. That matters for a tired family.
Have you ever tried storing it this way? Share below!
Simple Fixes for Common Hiccups
Every cook faces little problems. Here are easy fixes. First, a soggy topping. Make sure your bean mixture is not too wet. A thick sauce helps. Also, spread the topping evenly. I remember when my topping sank. The sauce was too runny!
Second, bland flavor. Do not skip salting the bean water. It seasons from the inside. Taste your sauce before adding the beans. Adjust the salt and pepper then. Third, watery mushrooms. Cook them until all their liquid evaporates. This takes a few minutes. It makes the sauce rich, not thin.
Fixing these builds your cooking confidence. You learn how ingredients work. It also makes the final flavor so much better. Every dish becomes a success.
Which of these problems have you run into before?
Your Quick Questions, Answered
Q: Can I make this gluten-free?
A: Yes! Use your favorite gluten-free bread for the crumbs. Also, use a gluten-free flour blend instead of all-purpose.
Q: How far ahead can I make it?
A: You can assemble the whole casserole one day ahead. Keep it covered in the fridge. Add 5-10 minutes to the bake time.
Q: What can I swap for heavy cream?
A: For a lighter version, try whole milk. The sauce will be a bit thinner but still tasty.
Q: Can I make a smaller batch?
A: Absolutely. Just cut all the ingredients in half. Use an 8×8 inch baking dish.
Q: Any optional tips?
A: A fun fact: adding a pinch of nutmeg to the sauce is a lovely, old-fashioned trick. It adds a warm, cozy note.
Which tip will you try first?
From My Kitchen to Yours
I hope you love making this casserole. It is a dish full of comfort and crunch. Food is best when shared with loved ones. I would love to hear about your cooking adventure.
Tell me all about it in the comments below. Did your family enjoy it? Did you add your own special twist? Your stories are my favorite thing to read.
Have you tried this recipe? I am waiting to hear all about it. Happy cooking!
—Fiona Brooks.
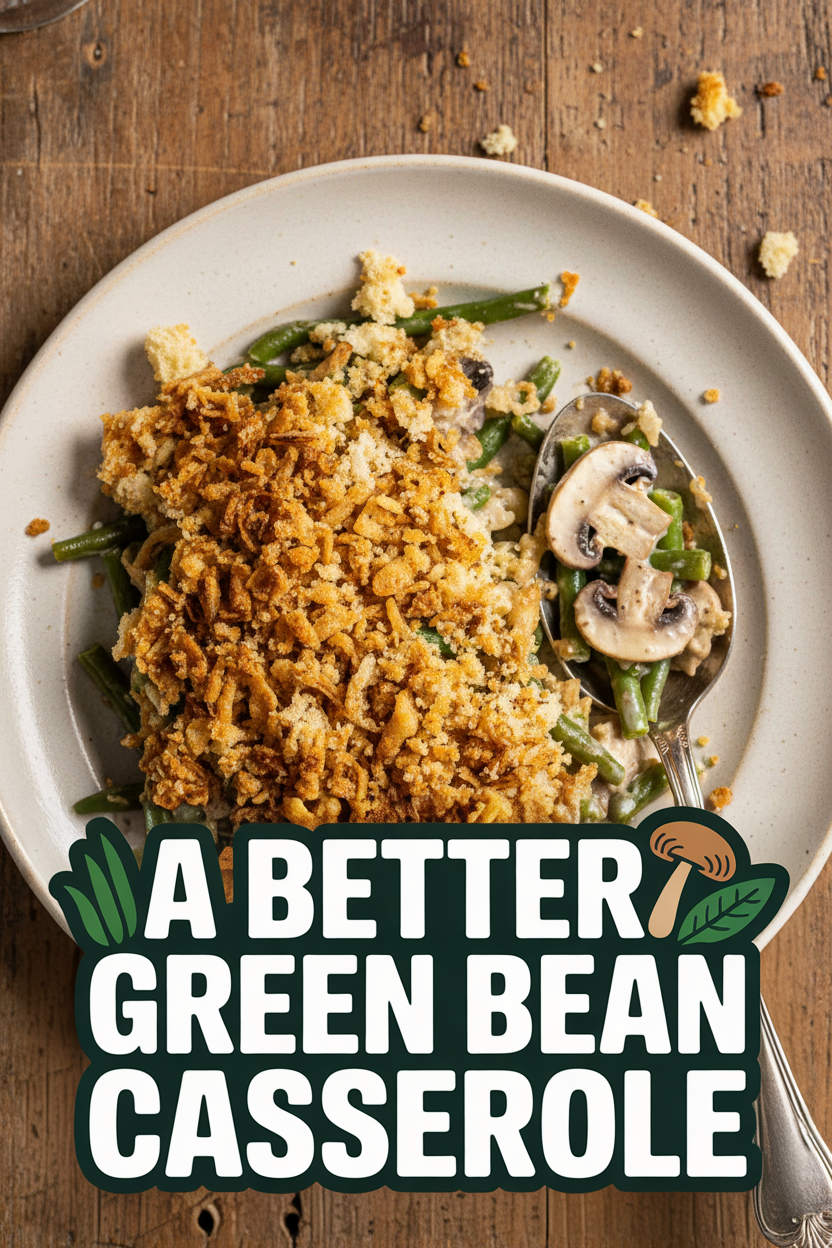
A Better Green Bean Casserole
Description
A modern, from-scratch take on the classic holiday side dish, featuring fresh green beans, a creamy mushroom sauce, and a crispy homemade breadcrumb and fried onion topping.
Ingredients
Instructions
- For the Topping: Combine the bread, butter, salt, and pepper in a food processor. Pulse about ten times until coarse crumbs form. Place these crumbs in a large bowl and mix thoroughly with the canned fried onions. Set the topping aside.
- For the Casserole: Preheat your oven to 425°F with a rack in the center. Prepare an ice water bath in a large bowl. In a Dutch oven, bring 4 quarts of water to a rolling boil and add 2 tablespoons of salt. Boil the green beans until crisp-tender, about 6 minutes. Drain them and immediately submerge in the ice bath to halt cooking. Drain the beans again on a baking sheet lined with paper towels.
- In the same Dutch oven, melt the butter over medium-high heat. Add the mushrooms, garlic, 3/4 teaspoon salt, and 1/8 teaspoon pepper. Cook, stirring, until the mushrooms have released their liquid and it has evaporated, about 6 minutes. Sprinkle the flour over the mushrooms and cook for 1 minute while stirring.
- Whisk in the chicken broth, bring to a simmer, and then stir in the heavy cream. Reduce the heat to medium and simmer the sauce until it thickens and reduces to about 3 1/2 cups, roughly 12 minutes. Taste and adjust seasoning with salt and pepper.
- Fold the blanched green beans into the sauce until they are well coated. Transfer this mixture to a 3-quart or 13×9-inch baking dish, spreading it evenly. Sprinkle the reserved bread and onion topping uniformly over the top.
- Bake for about 15 minutes, or until the topping is golden brown and the sauce is bubbling at the edges. Serve the casserole hot.
Notes
- For a vegetarian version, substitute the chicken broth with vegetable broth. The casserole can be assembled up to the point of baking, covered, and refrigerated for up to 24 hours. Add 5-10 minutes to the baking time if starting from cold.


Leave a Reply