A Cookie with a Story
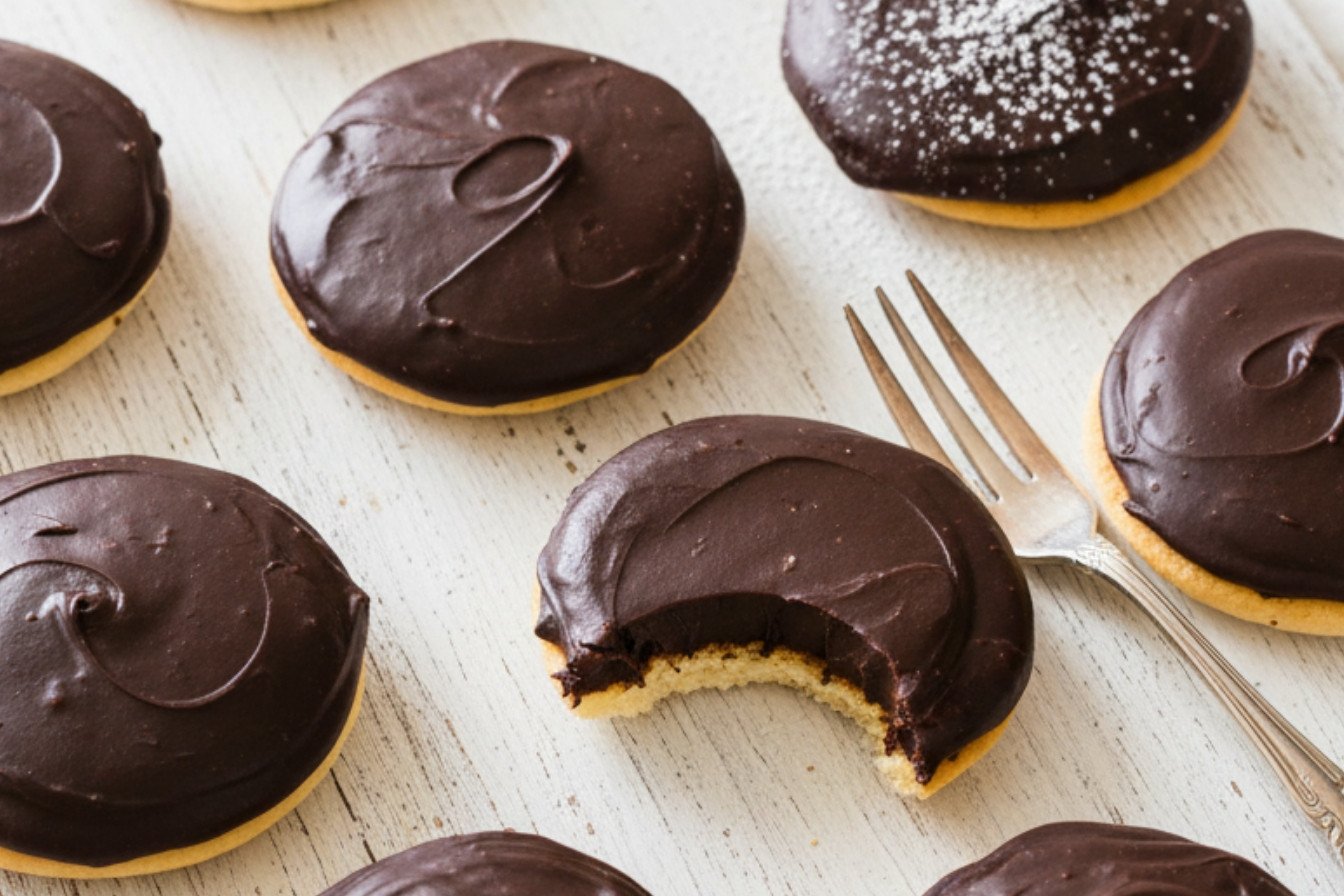
Let me tell you about a special cookie. It comes from a bakery far away. They are famous for a thick, fudgy hat on a soft cookie. I tried to copy them at home. My first try was a funny mess. The frosting slid right off! I still laugh at that.
But we learn from mistakes. Getting it just right feels so good. This recipe is my happy version. It matters because food connects us to places and people. Even if we’ve never been there. What’s a treat that reminds you of a special place?
Making the Cookie Base
First, we make the soft cookie. Use room-temperature butter. It mixes with sugar until fluffy. Doesn’t that smell amazing? Add your egg white, cream, and vanilla. Then mix in the dry stuff gently.
Roll the dough into little balls. Flatten them with your fingers. Keep them small, about two inches wide. They will not spread much. This gives us a perfect base for our fudge hat. *Fun fact: cake flour makes them extra tender and soft.*
The Magic Fudge Frosting
This frosting is the star. It is like brownie batter you can spoon. Melt chocolate and cream together slowly. Be patient. Then whisk in the cocoa and sugar. It will be gloriously thick and shiny.
Let it cool a bit. You want it warm, not hot. The warmth helps it settle into a perfect mound. This step matters. A good frosting turns a simple cookie into a celebration. Do you like lots of frosting or just a little?
The Big Finish
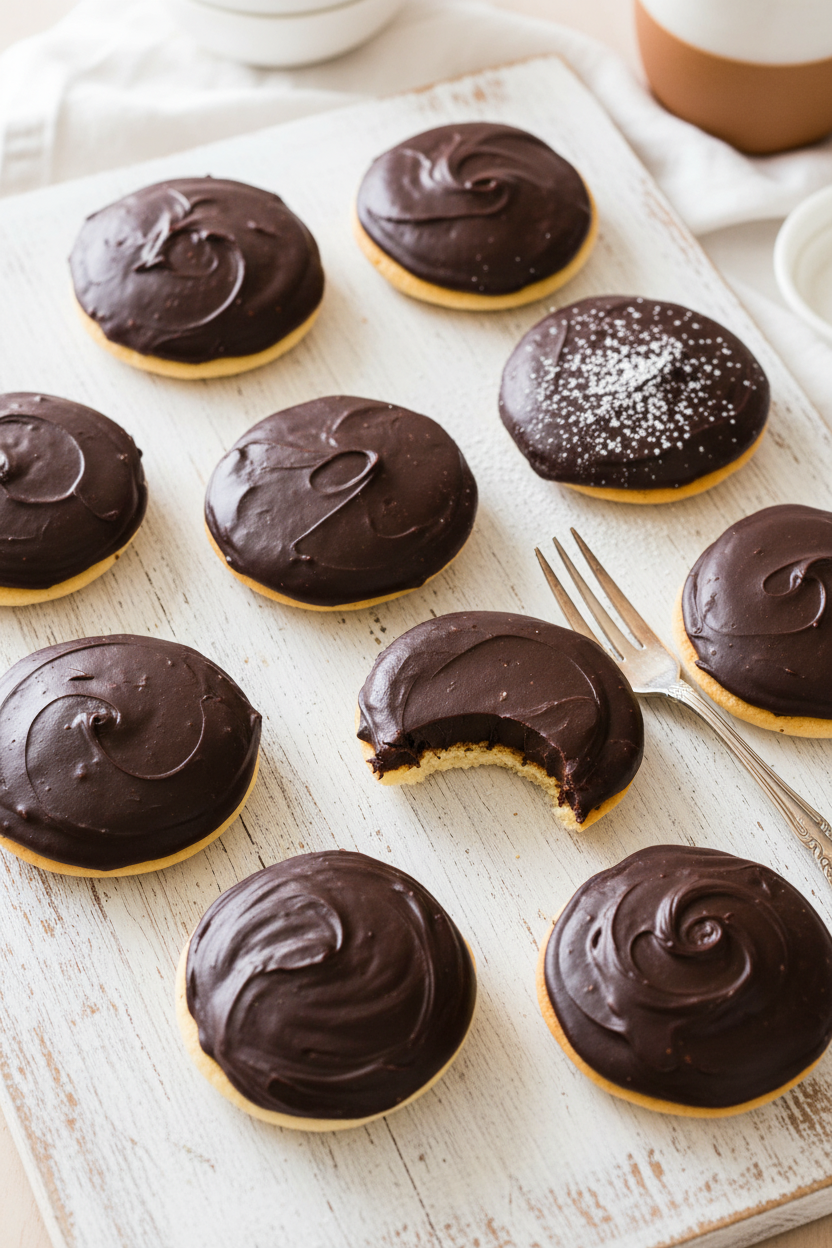
Flip your cooled cookies over. Their flat bottoms are now the tops. Spoon a big dollop of frosting right in the center. Do not spread it. Just let it sit. The frosting will find its own shape.
Now, walk away. This is the hard part. Let them sit for a few hours. The frosting sets firm but stays fudgy inside. The wait is worth it. You get a cookie you can really pick up. No messy fingers!
Why We Bake Together
Sharing food is sharing love. These cookies are rich. You only need one to feel happy. They are perfect for sharing with a friend over milk.
Baking teaches us patience and joy. It is not just about eating. It is about making something wonderful with your own hands. That feeling matters. It is a little gift you give yourself. Will you make these for a special someone soon?
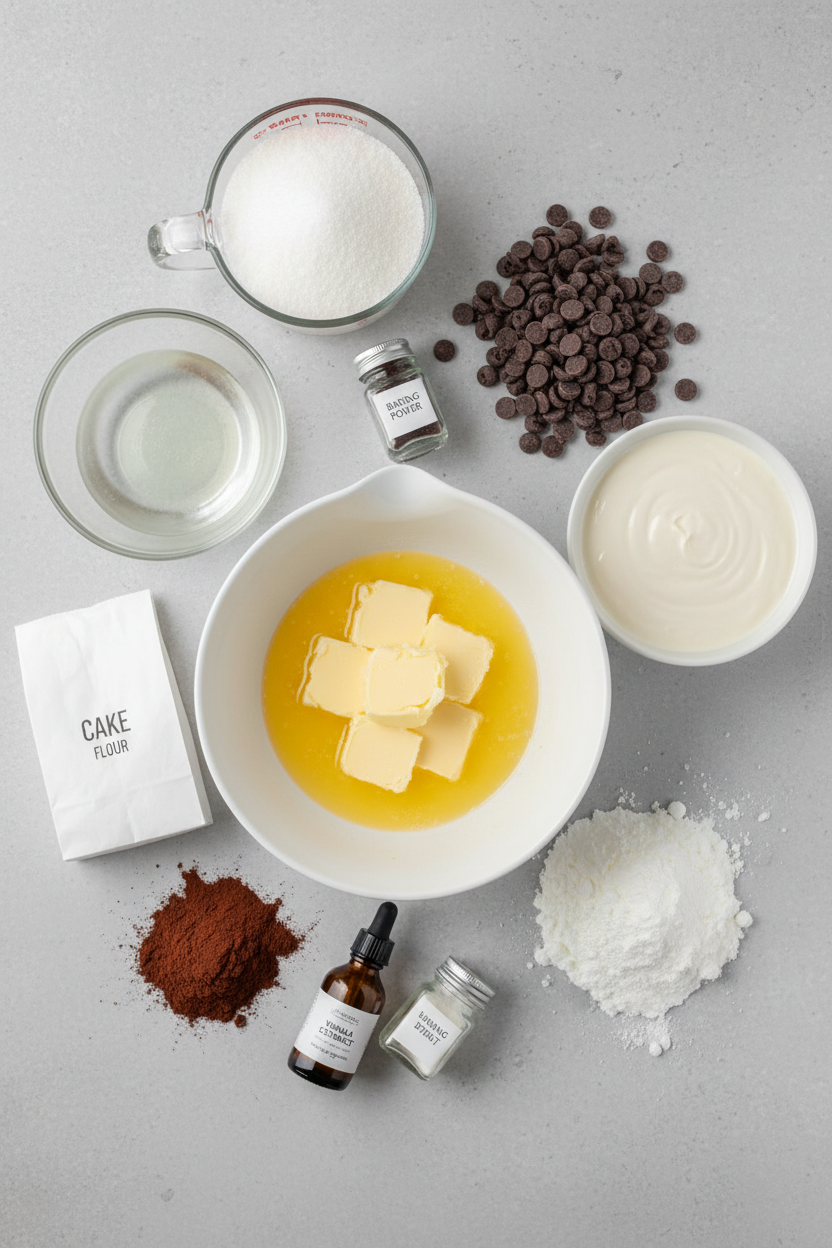
Ingredients:
| Ingredient | Amount | Notes |
|---|---|---|
| Cake flour | 2 cups (8 oz / 227 g) | For the cookie dough |
| Baking powder | 1 ½ teaspoons | For the cookie dough |
| Salt | ¼ teaspoon | For the cookie dough |
| Unsalted butter | 8 tablespoons, softened | For the cookie dough |
| Granulated sugar | ¾ cup (5 ¼ oz / 149 g) | For the cookie dough |
| Egg white | 1 large | For the cookie dough |
| Heavy cream | 1 ½ tablespoons | For the cookie dough |
| Vanilla extract | 1 ½ teaspoons | For the cookie dough |
| Milk chocolate chips | 3 cups (18 oz / 510 g) | For the frosting |
| Heavy cream | 1 ¼ cups | For the frosting |
| Salt | ¼ teaspoon | For the frosting |
| Dutch-processed cocoa powder | 1 ⅔ cups (5 oz / 142 g) | For the frosting |
| Confectioners’ sugar | 1 ¼ cups (5 oz / 142 g) | For the frosting |
| Vanilla extract | 1 ½ teaspoons | For the frosting |
Instructions
Step 1: First, get your oven cozy at 350°F. Line two baking sheets with parchment paper. Whisk your cake flour, baking powder, and salt in a bowl. Set this dry mix aside for now. It feels good to be prepared.
Step 2: Now, let’s make the cookie dough creamy. Beat the soft butter and sugar together until fluffy. It should look pale and dreamy. This takes about three minutes of mixing. I love watching it change.
Step 3: Mix in the egg white, cream, and vanilla. Then add your dry mix in three parts. Mix just until the dough comes together. (Scrape the bowl sides so nothing gets left out!). What kitchen tool is best for scraping? Share below!
Step 4: Roll dough into tablespoon-sized balls. Place twelve on each sheet. Dip your fingers in water and press each ball flat. Make them about a quarter-inch thick. I still laugh at my first lopsided cookies.
Step 5: Bake one sheet at a time for 8-10 minutes. Rotate the sheet halfway through baking. They’re done when the edges are just golden. Let them cool completely on the sheet. Patience is a baker’s secret ingredient.
Step 6: Time for the famous frosting! Melt chocolate chips, cream, and salt together. Use your microwave at half power, stirring often. Stop when it’s perfectly smooth. Doesn’t that smell amazing? Let it cool just a bit.
Step 7: Whisk in the cocoa powder, powdered sugar, and vanilla. You’ll get a thick, brownie-batter frosting. It should feel warm, not hot, to your touch. (If it’s too hot, it will slide right off the cookie!).
Step 8: Flip all your cooled cookies over. Spoon a big mound of frosting on each one. Let them sit for three hours so the frosting sets. Then, you have pure magic. Sharing them is the best part.
A Sweet Baltimore Memory
These cookies take me right back to my grandma’s kitchen. She always had a blue tin of Berger Cookies on the counter. That thick, fudgy frosting was a special treat. We’d have them with a cold glass of milk. Making them myself feels like a hug from the past.
Creative Twists
Peanut Butter Swirl: Add a tiny spoonful of peanut butter to the frosting as you whisk.
Sea Salt Sparkle: Sprinkle a little flaky sea salt on the wet frosting.
Minty Fresh: Use a drop of peppermint extract instead of vanilla in the frosting.
Which one would you try first? Comment below!
Serving & Pairing Ideas
These are rich, so a little goes a long way. Serve one on a small plate with fresh berries. The tart fruit is perfect with the sweet chocolate. For a real treat, crumble one over vanilla ice cream. It makes the simplest dessert feel fancy.
With them, I love a steaming mug of coffee with cream. For the grown-ups, a small glass of port wine is lovely. For everyone else, an ice-cold glass of whole milk is the classic choice. Which would you choose tonight?
Keeping Your Cookie Treats Fresh
Let’s talk about keeping these cookies happy. They are best stored in a single layer. Use a container with a tight lid. Keep them at room temperature for up to five days.
You can freeze the unfrosted cookies for later. Just wrap them well. The frosting can be made ahead and warmed gently. I once frosted cookies that were still warm. The frosting melted right off! Let them cool completely first.
Batch cooking saves so much time. Make the dough and freeze the balls. Then bake a few fresh cookies anytime. This matters because it makes special treats easy. You can have a little joy on a busy day. Have you ever tried storing it this way? Share below!
Cookie Troubles and Easy Fixes
Sometimes cookies spread too much. Your butter was probably too soft. Chill your dough balls for 15 minutes before baking. This helps them keep their perfect shape.
The frosting might seem too runny. Do not worry. Just let it sit for ten minutes. It will thicken up as it cools. I remember when my first batch was like soup. Patience fixed it!
Your cookies could be tough. This happens if you mix the dough too much. Mix just until the flour disappears. Gentle handling makes a tender cookie. This matters for confidence. Knowing the fix turns a flop into a win. It also matters for flavor. A tender cookie is a happy cookie. Which of these problems have you run into before?
Your Quick Questions, Answered
Q: Can I make these gluten-free? A: Yes. Use a good gluten-free flour blend made for cookies.
Q: Can I make them ahead? A: Absolutely. Frosted cookies keep well for days. Unfrosted dough balls freeze beautifully.
Q: What if I don’t have cake flour? A: Here’s a swap. For each cup, use one cup minus two tablespoons of all-purpose flour. Add two tablespoons of cornstarch.
Q: Can I make a half batch? A: You can. Just halve all the ingredients. This is perfect for a smaller family.
Q: Any optional tips? A: A tiny sprinkle of sea salt on top of the frosting is lovely. Fun fact: Salt makes chocolate taste even more chocolatey! Which tip will you try first?
From My Kitchen to Yours
I hope you love making these special treats. Baking is about sharing love and stories. My kitchen is always open for your questions.
I would love to hear about your baking adventure. Tell me all about it in the comments. Have you tried this recipe? Let me see your beautiful cookies!
Happy cooking!
—Fiona Brooks.

Berger Cookie Style Homemade Treats
Description
Rich, soft cookies topped with a thick, fudgy milk chocolate frosting, inspired by the famous Baltimore treat.
Ingredients
Instructions
- Preheat your oven to 350°F and position a rack in the center. Prepare two baking sheets by lining them with parchment paper. In a medium bowl, whisk together the cake flour, baking powder, and salt. Set this dry mixture aside.
- In the bowl of a stand mixer using the paddle attachment, beat the softened butter and granulated sugar together on medium-high speed until the mixture becomes light in color and fluffy, which should take about 3 minutes.
- Mix in the egg white, heavy cream, and vanilla extract until fully combined. Lower the mixer speed to low and gradually add the reserved dry ingredients in three parts, mixing just until a dough forms. Be sure to scrape down the sides of the bowl as needed.
- For each cookie, scoop a heaping tablespoon of dough and roll it into a ball. Place 12 balls on each prepared baking sheet, spacing them about 2 inches apart. Lightly moisten your fingertips and gently press each ball into a flat disk, roughly ¼ inch thick and 2 inches wide.
- Bake one sheet at a time for 8 to 10 minutes, rotating the sheet halfway through. The cookies are done when the edges just begin to turn light golden. Allow the cookies to cool completely on the baking sheet.
- After the cookies are completely cool, place the milk chocolate chips, heavy cream, and salt in a large microwave-safe bowl. Heat the mixture at 50% power in the microwave, stopping to stir occasionally, until it is fully melted and smooth. This will take 1 to 3 minutes.
- Whisk the Dutch-processed cocoa powder, confectioners’ sugar, and vanilla extract into the warm chocolate mixture until you have a smooth, thick frosting with a consistency similar to brownie batter. It should be about 95°F.
- Turn all the cookies over on their sheets so the flat bottoms are facing up. Spoon approximately 2 tablespoons of frosting onto the center of each cookie, forming a generous mound. Let the frosted cookies sit undisturbed at room temperature for about 3 hours, or until the frosting is fully set. They are then ready to serve.
Notes
- For best results, ensure cookies are completely cool before frosting. The frosting sets best at room temperature; do not refrigerate to set as it can cause the frosting to sweat.


Leave a Reply