
My Grandfather’s Secret Ingredient
My grandfather made this spread every Christmas Eve. He called it “poor man’s feast.” I loved watching his big hands work. He always added an extra clove of garlic. I still laugh at that.
This dish matters because it turns simple things into celebration. Salt cod was cheap food for fishermen. Now it is a treasure. It reminds us to be clever with what we have. What food reminds you of a family celebration?
How to Befriend a Salt Cod
Salt cod is very shy at first. It needs a long, cold bath. Soak it for a full day. Change the water once. This makes it gentle and ready to cook.
This step matters most. It removes the extra salt. Without it, your spread would be too strong to enjoy. Patience here makes everything else delicious. Fun fact: Centuries ago, sailors salted fish so it wouldn’t spoil on long voyages!
The Magic of Milk and Potato
Now we cook the fish. Place it in a pot with milk, potato, and garlic. Doesn’t that smell amazing? The milk makes the cod soft and sweet. The potato will thicken our spread.
Simmer until the potato is tender. Save a little of that milky cooking liquid. You will need it later. Do you prefer your dips smooth or a little chunky?
Whirling and Whipping
Everything goes into the food processor. Add the bright lemon zest. Then, pour in the olive oil slowly. Watch it turn creamy. It’s like a cloud.
Now add that saved cooking liquid. It brings all the flavors together. The spread should be nearly smooth. I like to taste it now. A little secret between me and the bowl.
The Golden-Brown Finish
Spread it into a dish. Slide it under the broiler. Wait for those golden spots. They look like little islands. This adds a warm, toasty flavor.
Let it cool for five minutes. Then, finish with fresh parsley and a drizzle of oil. The green makes it so pretty. Serve it with crusty bread or crackers. What is your favorite dipper for a creamy spread?
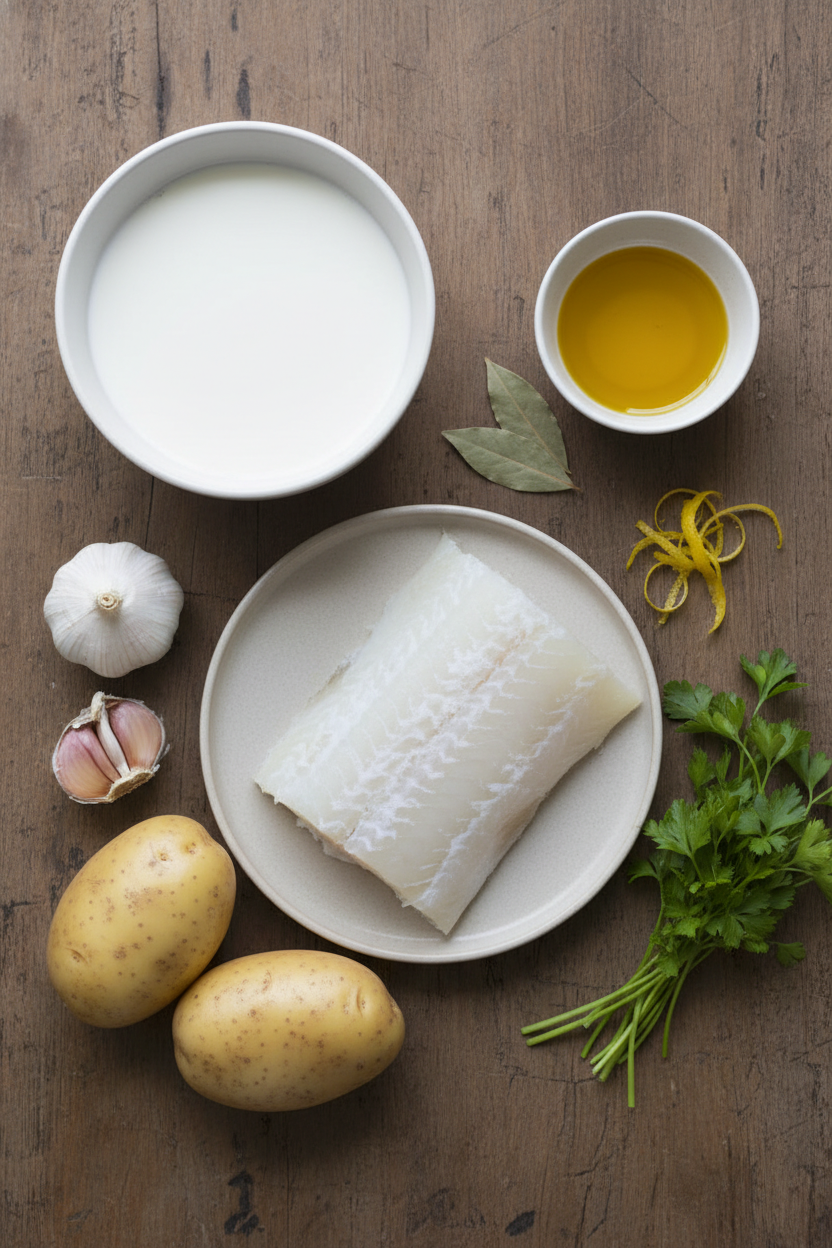
Ingredients:
| Ingredient | Amount | Notes |
|---|---|---|
| Salt cod | 1 lb (450g) | Rinsed and soaked for 24 hours |
| Whole milk | 4 cups (1 quart) | For poaching the cod and potato |
| Russet potato | 1 large (about 12 oz / 340g) | Peeled and cut into 2-inch pieces |
| Garlic cloves | 4 | Peeled |
| Bay leaves | 2 | Discarded after cooking |
| Lemon zest | From 1 lemon | Finely grated |
| Extra-virgin olive oil | ¾ cup | Plus more for drizzling to serve |
| Fresh parsley | 2 tbsp, chopped | For garnish |
Instructions
Step 1: First, we must be kind to our salty fish. Rinse the salt cod well under cool water. Place it in a big bowl and cover it with fresh, cold water. Let it take a long bath in the fridge for a whole day. Change the water once, halfway through. This makes it tender and not too salty. (A good soak is the secret to perfect flavor!)
Step 2: Now, let’s cook everything together. Drain your fish and put it in a pot. Add the milk, potato pieces, garlic, and bay leaves. Bring it to a gentle bubble, then let it simmer. Cook until the potato is soft and the fish flakes apart. This smells like my grandmother’s kitchen. Save a little cup of the milky cooking liquid before you drain the rest.
Step 3: Time to make it creamy! Put the drained fish and potato into a food processor. Add the lemon zest for a sunny sparkle. Pulse it a few times until it’s chopped. With the machine running, slowly pour in the olive oil. Then add that saved cooking liquid. Process until it’s almost smooth. What other ingredient makes things wonderfully creamy? Share below!
Step 4: Almost done! Spread your mixture into a baking dish. Smooth the top with a spoon. Now, slide it under the broiler until you see golden, toasty spots. This only takes a few minutes, so watch it closely. Let it cool for just five minutes. (Broiling gives it a wonderful warm crust!)
Step 5: The final touch is my favorite part. Sprinkle the top with lots of fresh, green parsley. Give it one more pretty drizzle of olive oil. Now it’s ready to share. I still laugh at how fast this disappears at my table. Serve it warm with your favorite crackers or bread.
Creative Twists
This spread is like a friendly canvas. You can paint it with different flavors. Try adding a spoonful of chopped sun-dried tomatoes for a sweet tang. A pinch of smoked paprika will give it a cozy, campfire warmth. For a little kick, mix in some finely chopped pickled jalapeños. Which one would you try first? Comment below!
Serving & Pairing Ideas
This creamy spread loves good company. I serve it with crispy baguette slices or simple salted crackers. For a pretty plate, add some crunchy radishes and green olives on the side. A glass of chilled, crisp white wine pairs beautifully with the rich fish. For a cozy night, try sparkling apple cider instead. Doesn’t that sound lovely? Which would you choose tonight?

Keeping Your Spread Happy
This spread is a wonderful make-ahead friend. You can keep it in the fridge for three days. Just cover it tightly. The flavors get even better as they sit together.
I do not recommend freezing it. The texture becomes a bit grainy. It loses its lovely creaminess. I learned this the hard way years ago.
To reheat, use the oven method in the notes. This keeps it from drying out. A quick broil at the end makes it perfect. Batch cooking matters because it gives you a tasty, ready treat.
You deserve a simple, delicious snack after a busy day. Have you ever tried storing it this way? Share below!
Simple Fixes for Common Hiccups
Is your spread too thick? Add a splash more reserved cooking liquid. Blend it in slowly. This will make it creamy and spreadable again.
Worried about saltiness? Soaking the cod well is the key. Change the water halfway, like the recipe says. I once forgot and it was much too salty.
Not browning under the broiler? Your rack might be too far away. Move it up to six inches from the heat. Watch it closely so it does not burn.
Fixing small issues builds your cooking confidence. It also makes sure every bite tastes just right. Which of these problems have you run into before?
Your Quick Questions, Answered
Q: Is this gluten-free?
A: Yes, all the ingredients are naturally gluten-free. It is a safe choice for most.
Q: Can I make it ahead?
A: Absolutely. Prepare it up to a day before. Broil it just before serving.
Q: What if I do not have a food processor?
A: You can mash it very well with a fork. Then whisk in the oil and liquid.
Q: Can I double the recipe?
A: You can, but use a bigger pot. You may need to broil it in two dishes.
Q: Any optional tips?
A: A pinch of black pepper is nice. A *fun fact*: this dish is a classic in many Portuguese homes. Which tip will you try first?
From My Kitchen to Yours
I hope you love making this cozy spread. It reminds me of sunny afternoons with my family. Food is best when shared with others.
I would love to hear about your cooking adventure. Tell me how it turned out for you. Have you tried this recipe? Your stories make my day brighter.
Happy cooking!
—Fiona Brooks.
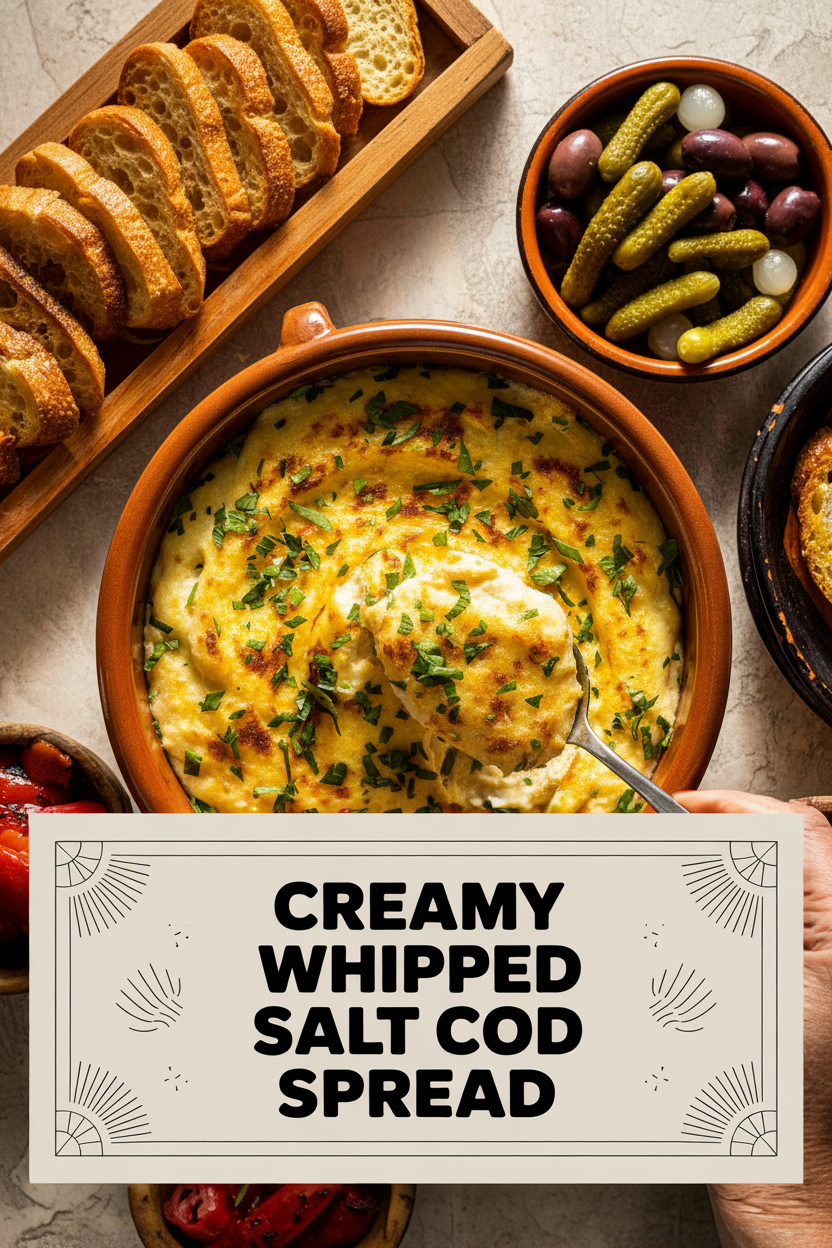
Creamy Whipped Salt Cod Spread
Description
A rich and savory spread made from whipped salt cod, potato, and olive oil, broiled to a golden finish.
Ingredients
Instructions
- Thoroughly rinse the salt cod to remove surface salt. Submerge it in 2 quarts of fresh water in a large bowl. Refrigerate for 24 hours, replacing the water once at the halfway point.
- Drain the soaked cod. Place it in a large saucepan with the milk, potato pieces, garlic cloves, and bay leaves. Bring to a boil, then reduce to a simmer. Cook until the potato is very tender and the cod flakes easily, about 15 to 20 minutes. Set aside ¼ cup of the cooking liquid. Drain the mixture, discarding the bay leaves and remaining liquid.
- Position an oven rack 6 inches from the broiler and preheat the broiler. Transfer the drained cod mixture to a food processor, add the lemon zest, and pulse several times until finely chopped. With the processor running, gradually pour in the olive oil until fully blended. Next, slowly add the reserved cooking liquid and process until the spread is nearly smooth. Transfer the mixture to a broiler-safe baking dish and level the top.
- Place the dish under the broiler until the surface is golden brown in spots, 3 to 5 minutes. Allow it to cool briefly for 5 minutes. Finish by sprinkling with chopped parsley and a drizzle of additional olive oil before serving.
Notes
- The spread can be prepared up to the point of broiling, covered, and refrigerated for up to a day. To serve, cover the dish with foil and warm in a 350°F oven for about 1 hour. Then, uncover, broil, and garnish as directed.


Leave a Reply