My First Batch of Crescent Cookies
I made these cookies for the first time in 1978. My kitchen was a mess of flour and nuts. I was so nervous. But the smell that filled my house was pure magic. I still smile thinking about it.
These cookies taught me a good lesson. It is okay if things look messy at first. The dough might seem crumbly. Just keep mixing gently. It will come together. This matters because cooking is about patience, not perfection.
Why We Use Two Kinds of Nuts
You grind some nuts very fine. You chop others to stay chunky. This is the secret. The fine nuts make the cookie tender. The chunky bits give you a lovely crunch in every bite.
It creates a wonderful texture. You get smooth and crunchy all at once. Doesn’t that sound nice? This matters because texture is just as important as taste. It makes eating more fun.
The Joy of Shaping Dough
Here is the fun part. You can shape them any way you like. I make little crescent moons. My grandson makes fat little logs. What shape would you try first? A ring, a ball, or a moon?
This is your chance to play. No two cookies need to be the same. Fun fact: The crescent shape is very old. It comes from places where the moon is a symbol of good luck.
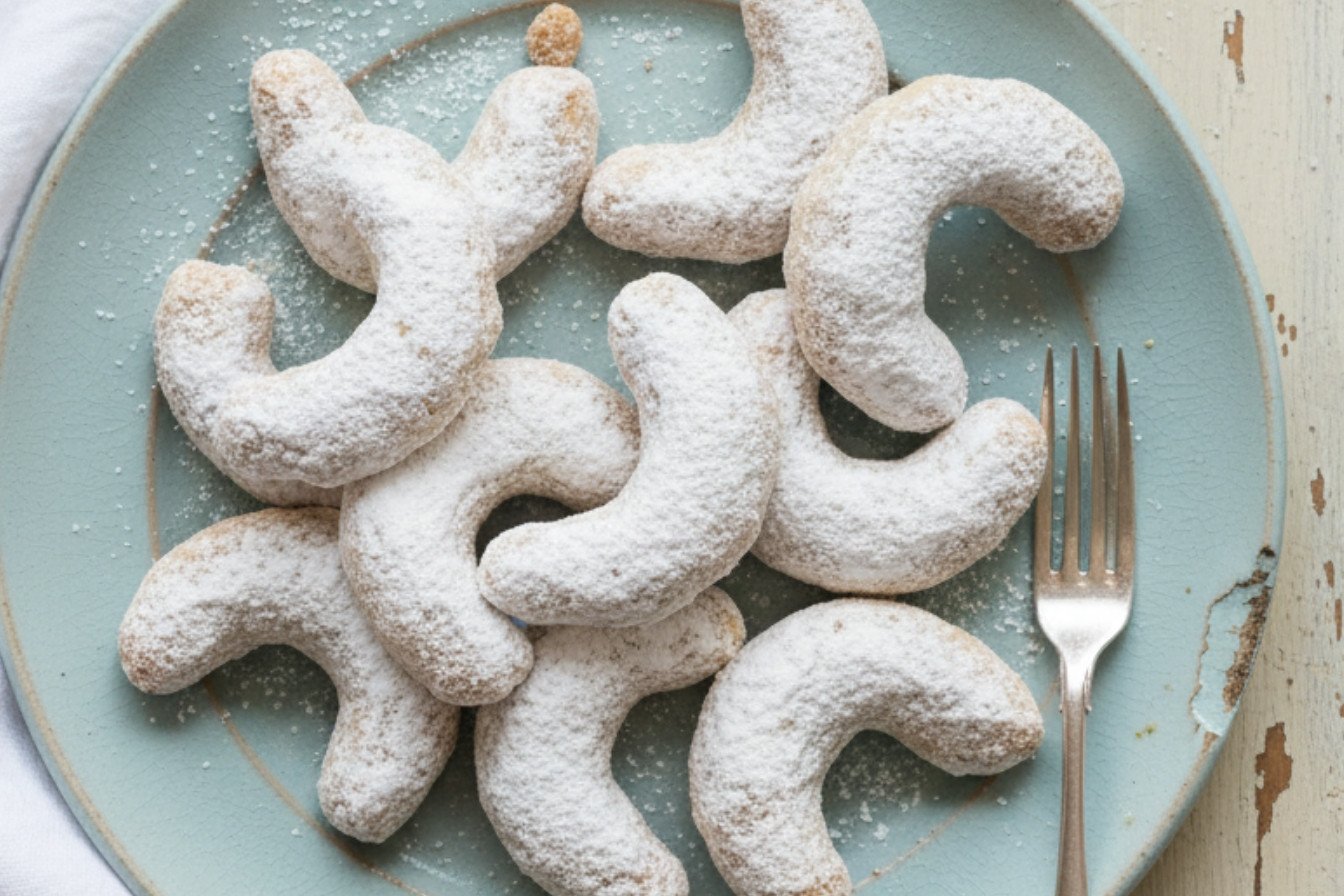
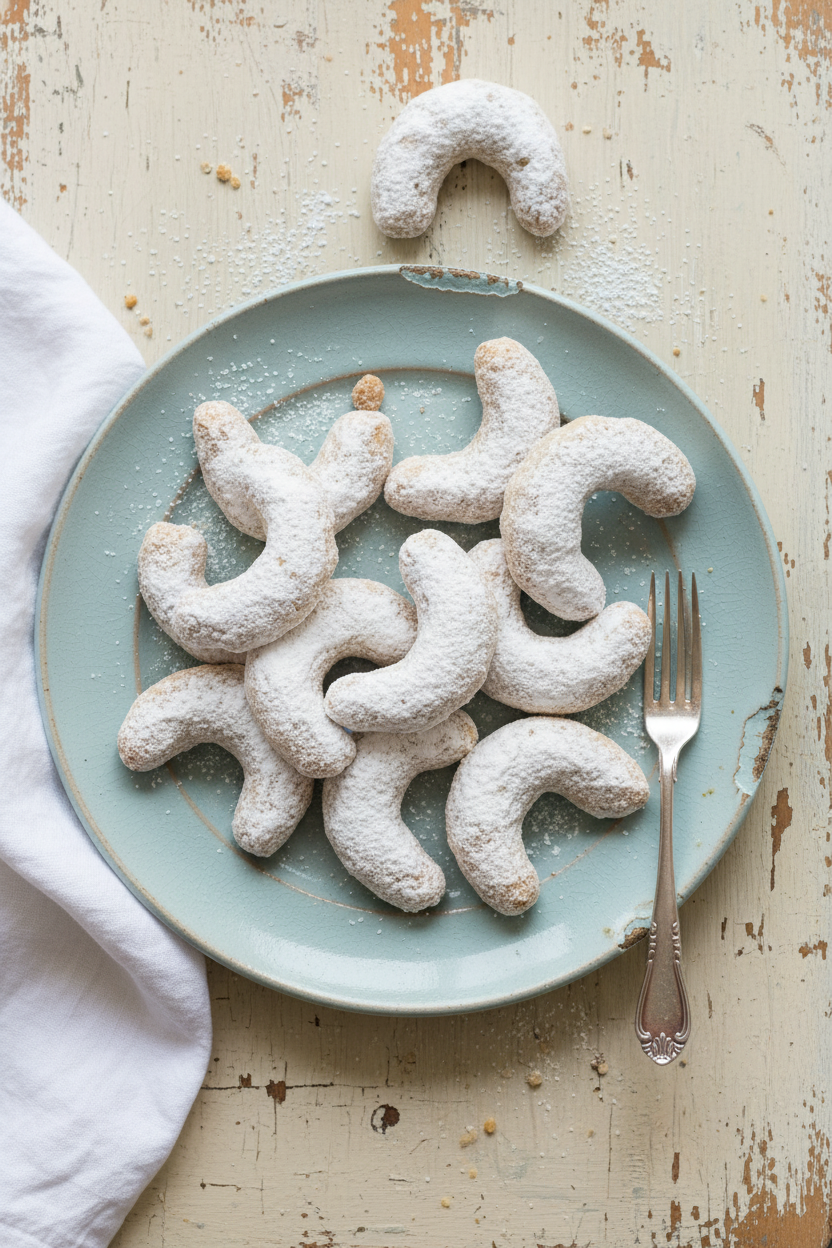
The Snowy Sugar Coat
Let the cookies cool completely. This is hard because they smell so good. But wait. Then, roll them in the powdered sugar. It is like rolling a snowball. They get a beautiful white coat.
Do it twice for extra magic. The first coat melts in a little. The second coat stays fluffy and white. It makes them look like little winter treasures. Do you have a favorite cookie that gets rolled in sugar?
Sharing is the Best Ingredient
I always pack these in my old tin. I bring them to neighbors. The tin comes back empty, with happy notes. That feeling is better than eating the cookies myself.
Food tastes better when shared. Who would you share a batch of these with? Maybe a teacher or a friend? Tell me if you do. I love hearing your stories.
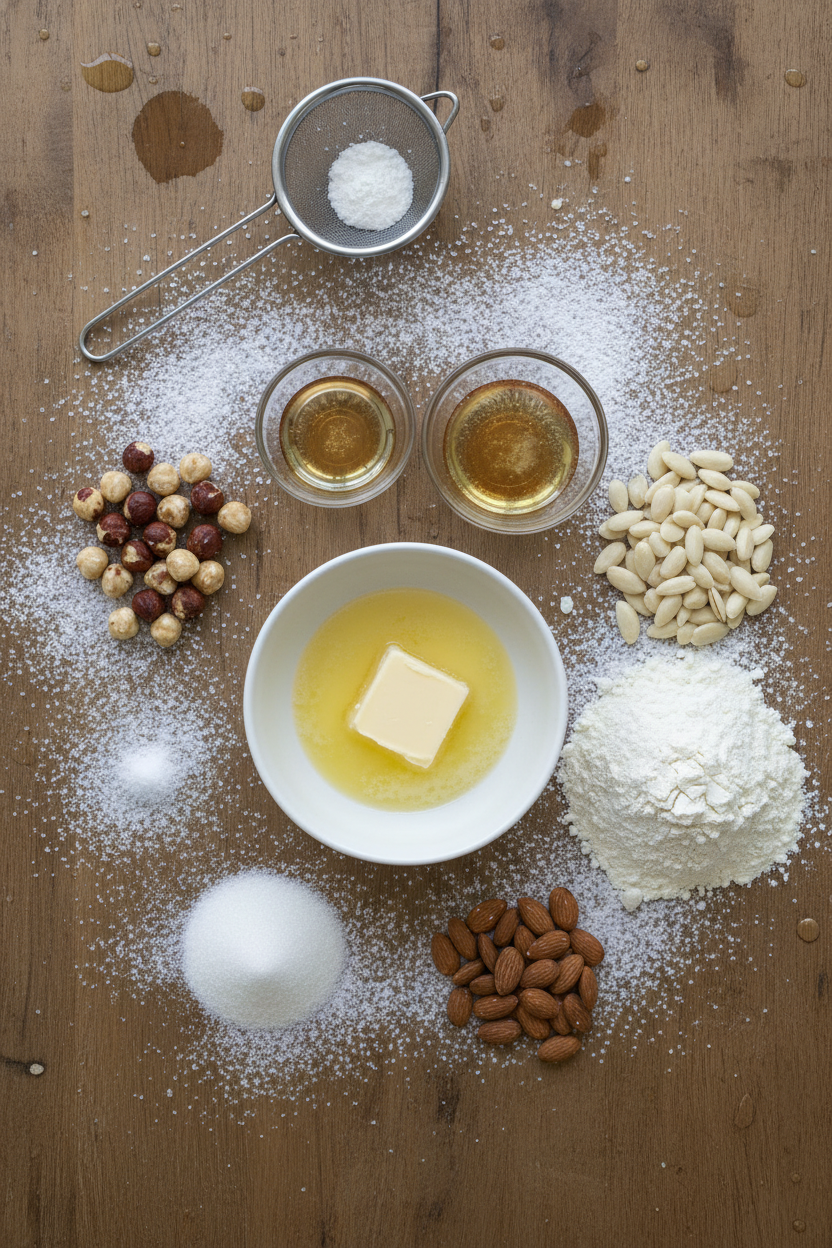
Ingredients:
| Ingredient | Amount | Notes |
|---|---|---|
| Hazelnuts or Blanched Almonds | 2 cups (8 oz / 227g) | Toasted if using hazelnuts; use almonds for almond extract variation. |
| All-purpose flour | 2 cups (10 oz / 284g) | Bleached. |
| Table salt | ¾ teaspoon | |
| Unsalted butter | ½ lb (2 sticks / 227g) | Softened. |
| Superfine sugar | ⅓ cup (2 ⅓ oz / 66g) | |
| Vanilla extract | 1 ½ teaspoons | |
| Almond extract | ½ teaspoon | Use only if making the almond version. |
| Confectioners’ sugar | 1 ½ cups (6 oz / 170g) | For rolling the cookies after baking. |
Instructions
Step 1: First, get your oven ready at 325°F. Put one rack high and one low. Mix your flour, salt, and one cup of nuts in a bowl. Now, take the rest of the nuts. Buzz them in the food processor until they look like sandy crumbs. (Don’t walk away, or you’ll get nut butter! I learned that the hard way.) Gently stir those fine nuts into your flour bowl. Set it all aside for now.
Step 2: Let’s make the dough! Beat the soft butter and superfine sugar together. Keep going until it’s fluffy and pale. This takes a little patience. Mix in the vanilla. Now, add your flour and nut mixture. Mix on low just until it starts to stick together. It will look a bit shaggy. Give it a few more seconds until it forms one big ball. What’s your favorite cookie shape to make? Share below!
Step 3: Time to shape your cookies. Grab a tablespoon of dough. Roll it into a ball in your hands. Then you can shape it. I love making little crescent moons. You can make rings or logs too. Place them on your baking sheets. Bake for about 18 minutes. Halfway through, swap the sheets top to bottom. They’re done when they’re pale gold.
Step 4: Let the cookies cool on the sheet for two minutes. Then move them to a rack. They need to cool completely. This is the fun part. Pour powdered sugar into a bowl. Roll a few cookies at a time in the sugar. Tap off the extra. They’ll look like little snowballs. For a real winter wonderland look, give them a second roll right before you serve. Doesn’t that smell amazing?
Creative Twists
You can make these cookies your own. Try a different nut, like pecans or walnuts. They each have their own cozy flavor. For a holiday sparkle, roll them in colored sugar instead of powdered. You could even add a tiny pinch of cinnamon to the dough. It makes the kitchen smell like Christmas morning. Which one would you try first? Comment below!
Serving & Pairing Ideas
These cookies are perfect with a hot drink. I love them on a plate with some fresh orange slices. The bright citrus is so nice with the sweet nuts. For a drink, a glass of cold milk is always right. For the grown-ups, a small glass of sherry or port is lovely. It’s sweet and warm, just like the cookies. Which would you choose tonight?
Keeping Your Crescent Cookies Cozy
These cookies keep beautifully. Let them cool completely first. Store them in a tin with a tight lid. They will stay fresh for about five days.
You can also freeze the dough. I shape it into logs first. Wrap the logs tightly in plastic. They can wait in the freezer for a month.
I remember my first batch. I left them out overnight. They got a bit soft. Now I always use a tin right away. This keeps them perfect for my grandson’s visits.
Batch cooking matters. It means fresh cookies are always ready. A happy home often smells like baked goods. Have you ever tried storing it this way? Share below!
Simple Fixes for Cookie Troubles
Sometimes dough feels too crumbly. Your butter might be too cold. Just let it soften on the counter. Then mix it again.
Cookies spreading too much? Your butter was likely too soft. Chill your shaped dough for 15 minutes before baking. This helps them hold their shape.
I once ground my nuts into paste. I was not paying attention. Now I pulse them just until sandy. This gives the best texture.
Fixing small problems builds your confidence. You learn how ingredients work together. It also makes your food taste just right. Which of these problems have you run into before?
Your Quick Questions, Answered
Q: Can I make these gluten-free? A: Yes. Use a good gluten-free flour blend. The results will be just as tasty.
Q: Can I make them ahead? A: Absolutely. The dough logs freeze well. You can bake from frozen, just add a few minutes.
Q: What nut can I swap? A: Walnuts or pecans work nicely. Use the same amount the recipe calls for.
Q: Can I make a half batch? A: You can. Just halve all the ingredients. It is perfect for a smaller family.
Q: Is the almond extract needed? A: Only if you use almonds. It makes their flavor shine. Skip it for hazelnuts. Which tip will you try first?
From My Kitchen to Yours
I hope you love these little crescent moons. They are a bite of comfort. My kitchen is always messy after I make them.
Fun fact: These are sometimes called Russian Tea Cakes or Mexican Wedding Cookies. Sharing recipes connects us all.
I would love to hear about your baking day. Tell me about your kitchen adventures. Have you tried this recipe? Your stories make my day brighter.
Happy cooking!
—Fiona Brooks.

Crescent Nut Cookies
Description
Classic, buttery nut cookies rolled into crescents and coated in a snowy layer of confectioners’ sugar.
Ingredients
Instructions
- Preheat your oven to 325°F and position two racks in the upper and lower thirds of the oven. In a medium bowl, combine the flour, salt, and one cup of the chopped nuts. Set aside. Take the remaining chopped nuts and process them in a food processor until they resemble coarse cornmeal, about 10-15 seconds. Be careful not to over-process. Mix these finely ground nuts into the flour mixture and set aside.
- Using an electric mixer or a sturdy spoon, cream the softened butter and superfine sugar together until the mixture is light and fluffy. This will take about 1.5 minutes with a mixer or 4 minutes by hand. Blend in the vanilla extract (and almond extract if you used almonds). Scrape down the sides of the bowl. Add the prepared flour and nut mixture and mix on low speed just until the dough begins to clump together but still appears uneven. Scrape the bowl again, then continue mixing on low for another 6-9 seconds until the dough forms a cohesive mass. Avoid overmixing.
- For each cookie, scoop about one tablespoon of dough. Roll and shape the portions into balls, crescents, rings, or small logs as you prefer. Place them on baking sheets. Bake for 17 to 19 minutes, rotating the sheets from front to back and swapping their positions on the upper and lower racks halfway through. The cookies are done when the tops are a pale golden color and the bottoms just start to brown.
- Allow the cookies to cool on the baking sheets for about 2 minutes before transferring them to a wire rack with a spatula. Let them cool completely, approximately 30 minutes. Once cool, roll small batches of three or four cookies at a time in the confectioners’ sugar until they are fully coated, then gently tap off any excess. For storage, keep them in an airtight container for up to five days. Just before serving, give the cookies a second roll in confectioners’ sugar to create a thick, snowy coating, tapping off the excess once more.
Notes
- Estimated yield is about 36 cookies. Nutrition information is an estimate per cookie.


Leave a Reply