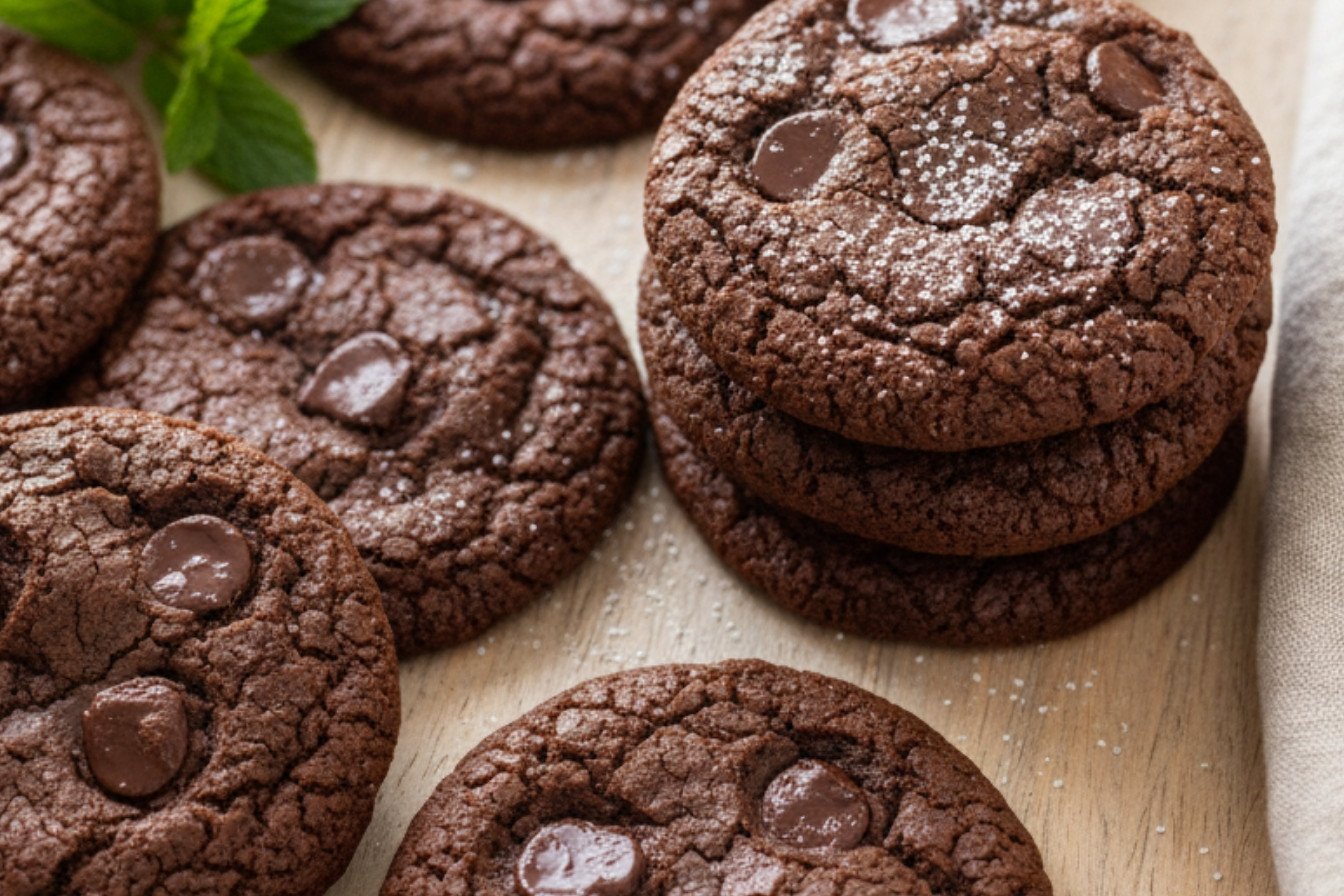
My Chocolate Mistake
I once forgot the sugar in a chocolate cake. Can you believe it? My grandson took one bite and his face went funny. I still laugh at that. It taught me that baking needs care, but also joy. A little mistake makes a good story.
That’s why we measure carefully here. But don’t be scared. These cookies are very friendly. They come from my heart to your kitchen. What’s your funniest kitchen mistake? I’d love to hear it.
Why We Let the Dough Rest
After you mix the dough, you must let it sit. Wait for 30 minutes. I know, waiting is hard. The dough will still look soft and sticky. That’s perfect.
This wait matters. It lets the flour drink up the wet things. This gives our cookies the best texture. They will be chewy inside and crisp at the edges. Good things take a little time, in baking and in life.
The Secret in the Bowl
Melting the chocolate is my favorite part. Doesn’t that smell amazing? Use half power in the microwave. Stir it often. We let it cool a bit before adding it. This keeps the eggs from getting too warm.
Now, here’s a fun fact for you. Fun fact: The espresso powder is a secret helper. You won’t taste coffee. It just makes the chocolate flavor sing louder. Whisk it in with the vanilla. Your kitchen will smell like a dream.
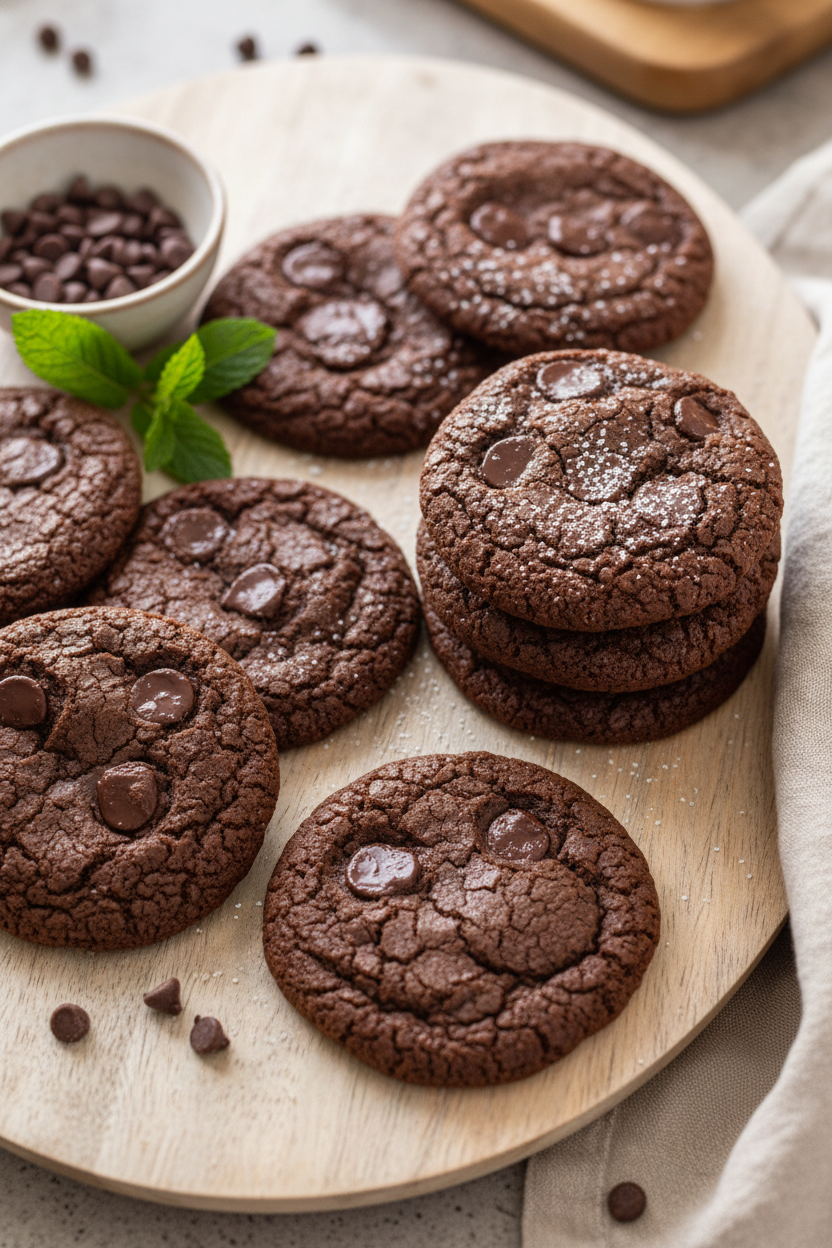
Shaping & Baking with Love
The dough will be sticky. That’s okay. Use a spoon to scoop it. Roll it into a rough ball with your hands. Place them on the sheet with space to grow. They need room like a good hug.
Bake them until the edges look set. The centers should still look soft. They keep cooking on the hot pan. This makes them fudgy. Do you like crispy or chewy cookies best? Tell me your favorite.
The First Bite
Let them cool for just 5 minutes. Then move them to a rack. Now, the hardest part. You must wait again. But you can have one warm. The chocolate chip will be a little melty. It’s a sweet reward.
Sharing food matters. It connects us. These cookies are for after-school talks, or with a cold glass of milk. Who will you share your first batch with? I always think of my grandkids.
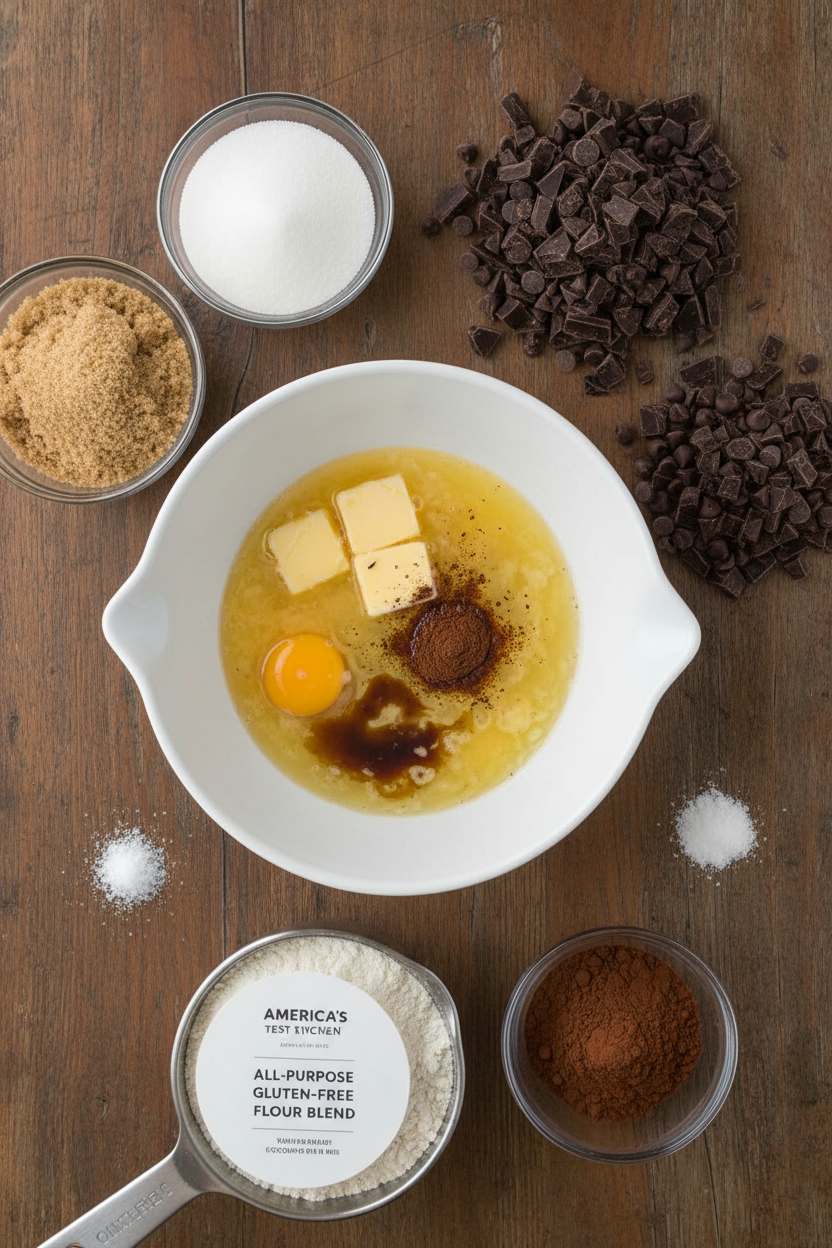
Ingredients:
| Ingredient | Amount | Notes |
|---|---|---|
| Semisweet chocolate, chopped | 12 ounces (340 grams) | |
| All-Purpose Gluten-Free Flour Blend | 4 ounces (¾ cup plus 2 tbsp) | America’s Test Kitchen blend |
| Unsweetened cocoa powder | ¾ ounce (¼ cup) | |
| Baking soda | ½ teaspoon | |
| Salt | ½ teaspoon | |
| Xanthan gum | ¼ teaspoon | |
| Light brown sugar | ¾ cup packed (5 ¼ ounces) | |
| Granulated sugar | ¼ cup (1 ¾ ounces) | |
| Large eggs | 2 | |
| Vegetable oil | 5 tablespoons | |
| Unsalted butter | 2 tablespoons | Melted and cooled |
| Vanilla extract | 1 teaspoon | |
| Instant espresso powder | ½ teaspoon | |
| Bittersweet chocolate chips | 9 ounces (1 ½ cups) |
Instructions
Step 1: First, let’s melt that chocolate. Put the chopped chocolate in a bowl. Microwave it on half power. Stop and stir it every 30 seconds. It will be smooth and shiny in a few minutes. Let it cool on the counter for a bit. (This keeps it from cooking the eggs later!)
Step 2: Now, grab another bowl. Whisk your flour, cocoa, baking soda, salt, and xanthan gum together. This is your dry team. Set them aside for now. I always give the bowl a little tap. It settles everything nicely.
Step 3: In a big bowl, mix both sugars, eggs, oil, melted butter, vanilla, and espresso powder. Whisk it until it’s all one color. It will look a little glossy. Then, whisk in your slightly cooled chocolate. Doesn’t that smell amazing already?
Step 4: Time to bring the teams together. Gently stir the dry ingredients into the wet ones. Use a spatula and go slow. Stop when you see no more flour streaks. Then, fold in all those chocolate chips. The dough will be very soft and sticky. That’s perfect!
Step 5: Cover the bowl and let the dough rest for 30 minutes. This helps the flour blend get cozy. While you wait, preheat your oven to 350°F. Also, line your baking sheets with parchment paper. Why do we let cookie dough rest? Share below!
Step 6: Scoop about 2 tablespoons of dough per cookie. Roll them into rough balls. Place them 2 inches apart on your sheets. They need room to become puffy and wonderful. Bake just one sheet at a time for even heat.
Step 7: Bake for 12 to 14 minutes. Rotate the sheet halfway through. They’re done when puffed and cracked, with soft centers. Let them cool on the sheet for 5 minutes. Then move them to a rack. I still laugh at how I always eat one too fast!
Creative Twists
These cookies love to play dress-up. You can make them new every time. Here are my favorite little twists to try in the kitchen.
Sea Salt Sparkle: Press a few flakes of sea salt on each dough ball before baking. It makes the chocolate taste even deeper.
Peppermint Party: Swap the vanilla for peppermint extract. Use white chocolate chips instead. It’s like a holiday in your mouth.
Berry Surprise: Fold in 1/2 cup of freeze-dried raspberries with the chips. They add a lovely little tang and crunch.
Which one would you try first? Comment below!
Serving & Pairing Ideas
A warm cookie is a little piece of happiness. But it can be even happier. Try serving one slightly warm with a scoop of vanilla ice cream. The melt is divine. Or, crumble one over a bowl of fresh strawberries.
For a drink, a cold glass of milk is always the champion. For the grown-ups, a small glass of ruby port wine is a lovely match. Its sweetness dances with the dark chocolate. Which would you choose tonight?
Keeping Your Chocolate Delights Delightful
Let’s talk about keeping these cookies happy. They are best the day you bake them. But they freeze beautifully for a sweet later.
Just cool them completely first. Then layer them in a container with parchment paper. They can live in the freezer for a month.
I once sent a batch to my grandson at college. He said they tasted just-baked after a quick thaw. That made my heart sing.
Why does this matter? A little planning means you always have a homemade treat ready. It saves time and spreads joy.
Have you ever tried storing cookies this way? Share below!
Cookie Troubles? Easy Fixes Right Here
Even grandmas have cookie troubles sometimes. Here are three common ones and their fixes.
First, if your cookies spread too much, your dough was too warm. Chill it a bit longer before baking. I remember when my first batch turned into one giant cookie!
Second, if they are too cakey, you might have over-mixed the flour. Stir just until you see no more dry spots. This keeps them fudgy, not fluffy.
Third, if they taste bland, your cocoa or chocolate might be old. Fresh ingredients make all the difference. Good flavor starts with good staples.
Why does fixing this matter? It builds your confidence. And it makes sure every bite is as delicious as it should be.
Which of these problems have you run into before?
Your Quick Questions, Answered
Q: Do I have to use that specific gluten-free flour?
A: For best results, yes. Different blends absorb liquid differently. This one is tested for perfect texture.
Q: Can I make the dough ahead?
A: Absolutely! You can scoop the dough balls and freeze them on a tray. Then bake straight from the freezer, adding a minute or two.
Q: What can I use instead of espresso powder?
A: You can just leave it out. It deepens the chocolate flavor but is not essential. Your cookies will still be wonderful.
Q: Can I double this recipe?
A: Of course! Double all the ingredients. Just mix in a very large bowl. You will have plenty to share.
Q: Any optional tips?
A: A sprinkle of sea salt on top before baking is lovely. Fun fact: A little salt makes sweet things taste even sweeter!
Which tip will you try first?
From My Kitchen to Yours
I hope you love baking these chocolate delights. There is nothing like a warm cookie and a cold glass of milk.
My kitchen is always open for your stories and questions. I would love to hear all about your baking adventure.
So tell me, friend. Have you tried this recipe? Let me know how it went in the comments below.
Happy cooking!
—Fiona Brooks.
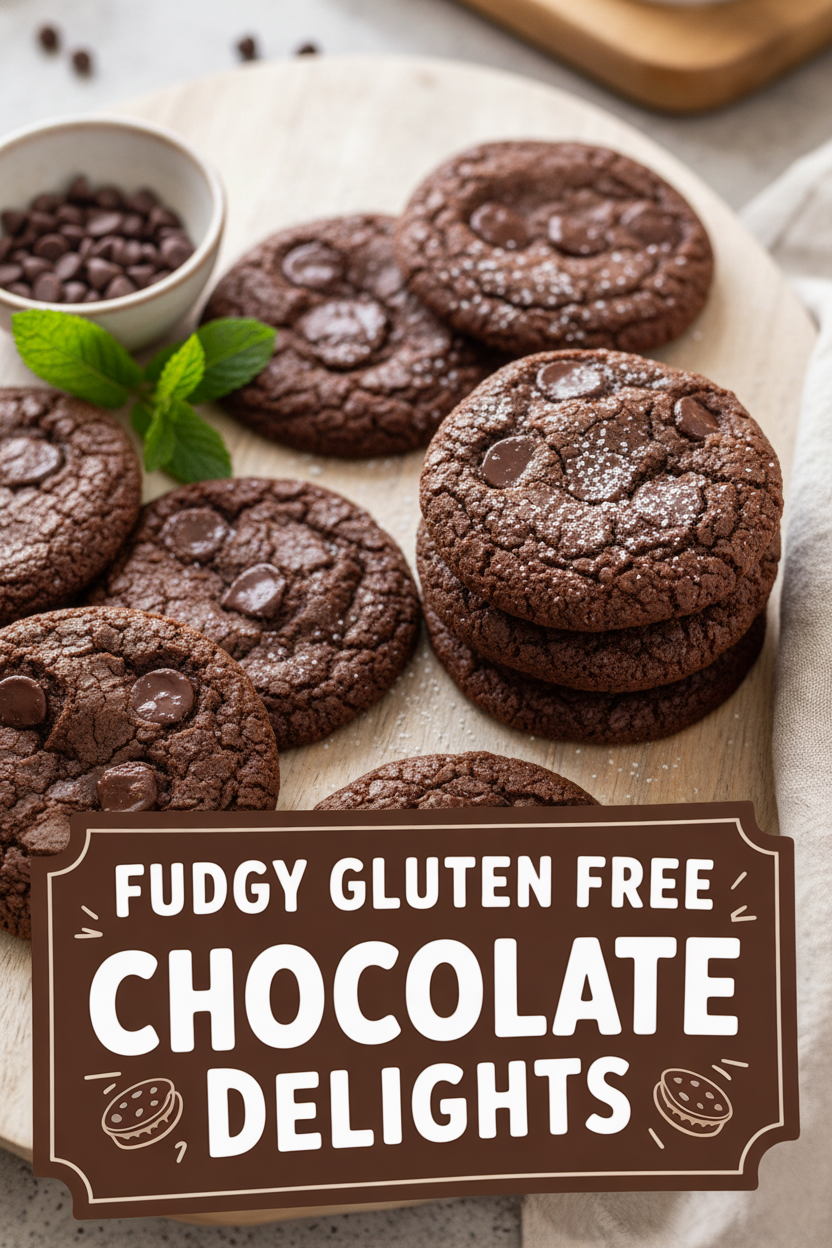
Fudgy Gluten Free Chocolate Delights
Description
Indulge in rich, fudgy, and perfectly chewy gluten-free chocolate cookies loaded with chocolate chips.
Ingredients
Instructions
- Begin by melting the semisweet chocolate. Place it in a bowl and microwave at half power, pausing to stir every so often, until fully melted. This should take 2 to 4 minutes. Allow it to cool a bit.
- In a separate bowl, thoroughly whisk together the gluten-free flour blend, cocoa powder, baking soda, salt, and xanthan gum. Set this dry mixture aside.
- In a large bowl, combine the brown sugar, granulated sugar, eggs, oil, melted butter, vanilla, and espresso powder. Whisk until the mixture is completely smooth and uniform.
- Whisk in the slightly cooled melted chocolate until incorporated.
- Using a rubber spatula, gently stir the reserved flour mixture into the wet ingredients just until a soft, consistent dough forms. Mix in the chocolate chips.
- Cover the bowl with plastic wrap and let the dough sit at room temperature for 30 minutes. It will remain quite soft and sticky.
- While the dough rests, position an oven rack in the center and preheat your oven to 350°F. Prepare two baking sheets by lining them with parchment paper.
- For each cookie, scoop about 2 generous tablespoons of dough, roll it into a ball, and place it on a sheet, spacing the balls about 2 inches apart to allow for spreading.
- Bake one sheet at a time. Place in the oven and bake for 12 to 14 minutes, rotating the sheet halfway through. The cookies are done when they are puffed, the surfaces are cracked, and the edges look set while the centers still appear soft and slightly underdone through the cracks.
- Allow the cookies to cool on the baking sheet for 5 minutes before carefully transferring them to a wire rack to finish cooling. They are best served warm or at room temperature.
Notes
- For a variation, try using milk or dark chocolate chips instead of bittersweet. Ensure all ingredients, including chocolate and cocoa powder, are certified gluten-free if necessary.


Leave a Reply