A Turkey Trick from My Mother
My mother taught me this turkey trick. She said it makes the meat juicy and pretty. You tie two breast halves together. It makes a neat little roast. I still laugh at that. She called it her “Sunday best” turkey.
Why does this matter? Tying the meat helps it cook evenly. Every slice is tender. No dry ends! Have you ever tried tying a roast before? It feels like a kitchen puzzle.
Why We Make Our Own Stock
Do not throw that bone away! Roasting it first is the secret. It fills your kitchen with a warm, cozy smell. Doesn’t that smell amazing? Then you simmer it with onion and celery.
This step matters so much. Your gravy will taste deep and rich. It will not taste like a box. *Fun fact: That roasted bone gives the stock a color like amber. It is liquid gold!
The Secret is a Slow Oven
We brown the turkey fast in a pan. This gives it a lovely golden skin. Then the oven does the gentle work. We cook it low and slow at 275 degrees.
This keeps all the juices inside. The meat stays soft as butter. What is your favorite way to cook meat? Do you like it fast and hot, or slow and low like this?
Gravy is Just a Happy Accident
Gravy can scare people. But it is simple. You cook butter and flour until it looks like peanut butter. That is the trick! Then you whisk in your special stock.
It thickens into the best sauce. It catches all the good flavors from the pan. I love to pour it into my grandmother’s gravy boat. It makes the whole meal feel special.
Let it Rest, Then Feast
You must let the turkey rest. I know, it is hard to wait! But those 15 minutes let the juices settle. If you cut it too soon, all the good juice runs out.
Then you slice it and remove the twine. Serve it with that beautiful gravy. What side dish do you think goes best? Tell me, is it mashed potatoes, or maybe some green beans?
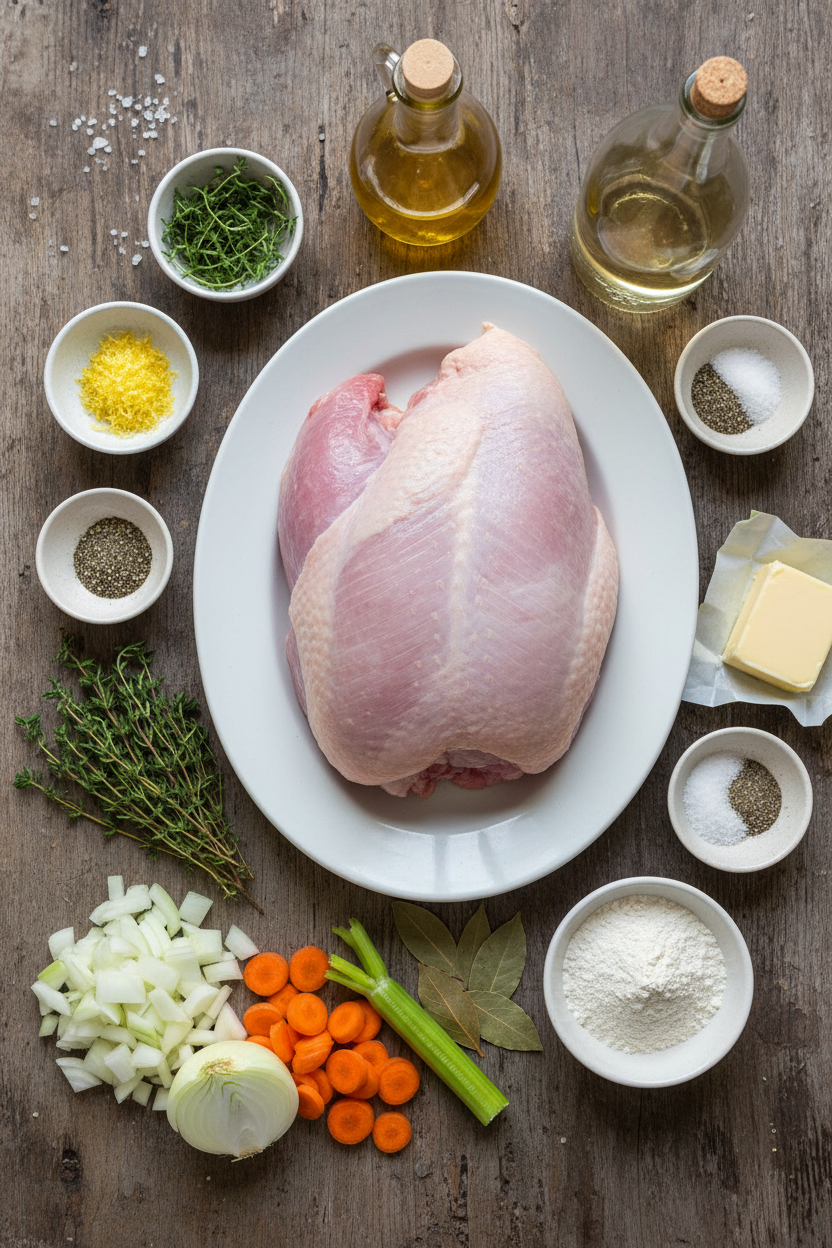
Ingredients:
| Ingredient | Amount | Notes |
|---|---|---|
| Bone-in turkey breast | 1 (5- to 7-pound) | Trimmed, breastbone reserved for stock |
| Kosher salt | 1 tablespoon | For turkey seasoning |
| Fresh thyme, minced | 2 teaspoons | For turkey seasoning |
| Lemon zest, grated | 2 teaspoons | |
| Pepper | ½ teaspoon | |
| Vegetable oil | 1 tablespoon | For browning |
| Onion | 1 | Chopped, for stock |
| Carrot | 1 | Peeled and chopped, for stock |
| Celery rib | 1 | Chopped, for stock |
| Fresh thyme sprigs | 6 | For stock |
| Bay leaf | 1 | For stock |
| Unsalted butter | 4 tablespoons | For gravy roux |
| All-purpose flour | ¼ cup | For gravy roux |
| Dry white wine | ⅓ cup | For gravy |
| Kosher salt and pepper | To taste | For seasoning gravy |
Instructions
Step 1: First, get your turkey breast ready. Carefully cut the two breast halves away from the bone. Save that breastbone for later. Mix the salt, thyme, lemon zest, and pepper in a little bowl. Rub this all over the meat. Doesn’t that smell amazing already? It’s like a little herb garden.
Step 2: Now, let’s shape our roast. Lay two pieces of kitchen twine in a loaf pan. Place one breast half skin-side down on the twine. Put the second one skin-side up on top. Try to line up the thick and thin ends so it’s even. (This makes it cook perfectly later). Tuck it in, then tie the first two strings tight. Can you guess why we chill it next? Share below!
Step 3: Take the roast out of the pan. Tie more twine around it every inch. Wrap it all up in plastic wrap. Let it rest in the fridge for two hours. This helps the flavors get cozy. I always use this time to start the stock. It makes the whole house smell wonderful.
Step 4: For the stock, roast that saved bone. Put it on a foil-lined sheet. Bake it at 450°F until it’s a deep brown. This takes about an hour. Then put the bone in a pot with the onion, carrot, celery, thyme, and bay leaf. Cover it all with water and let it simmer. I still laugh at how this turns scraps into gold.
Step 5: Time to cook! Heat your oven to 275°F. Put a wire rack on a baking sheet. Heat oil in a skillet until it shimmers. Brown your tied turkey roast on all sides. This gives it a gorgeous color. Then move it to the rack and roast it. It’s done when a thermometer says 160°F. Let it rest for 15 minutes. (This keeps it juicy, I promise!).
Step 6: Finally, the gravy. Melt butter in a saucepan. Whisk in flour until it looks like peanut butter. Slowly whisk in three cups of your homemade stock. Add the wine, salt, and pepper. Let it bubble and thicken a little. Taste it and smile. Your patience made this.
Creative Twists
You can make this recipe your own. Try adding a layer of softened butter and sage under the skin. Or mix a little orange zest with the thyme for a brighter flavor. For a cozy twist, add a sliced apple to the pan while the turkey roasts. Which one would you try first? Comment below!
Serving & Pairing Ideas
Slice the turkey and spoon that gravy on the side. I love it with mashed potatoes and green beans. A simple salad with a lemony dressing is nice too. For a drink, a glass of chilled Chardonnay pairs beautifully. The kids always love sparkling apple cider with a cinnamon stick. Which would you choose tonight?
Keeping Your Turkey Tasty for Later
Let’s talk about keeping your turkey delicious. First, let the roast cool completely. Then slice what you’ll eat in a few days. Store the slices in gravy in a sealed container. It keeps everything moist. You can refrigerate it for up to four days.
For longer storage, freeze the meat and gravy separately. Use airtight bags or containers. They will be good for two months. Thaw in the fridge overnight when you’re ready. I once froze a whole breast without gravy. It was dry as a bone when reheated! Gravy is your friend.
To reheat, warm slices gently in a saucepan with some gravy. Keep the heat low. Batch cooking this roast is a smart move. It gives you ready-made meals for busy weeks. This matters because good food should never feel like a rush. Have you ever tried storing it this way? Share below!
Simple Fixes for Common Turkey Troubles
Even grandmas have kitchen hiccups. Here are three common ones. First, a pale turkey skin. The fix is simple. Make sure your skillet is very hot before browning. This gives you that beautiful golden color. I remember when my first roast came out looking pale. I learned the heat lesson fast!
Second, gravy that tastes bland. The secret is in the stock. Let those vegetables and bones roast until very dark. This builds a deep, rich flavor base. It matters because flavor starts long before the gravy pot.
Third, a dry turkey breast. The key is not overcooking. Use a meat thermometer. Pull it at 160 degrees. Let it rest for a full 15 minutes. The juices will settle back in. This matters for confidence. Knowing the “why” behind steps makes you a better cook. Which of these problems have you run into before?
Your Quick Questions, Answered
Q: Can I make this gluten-free?
A: Yes! Just use a gluten-free flour blend for the gravy. It works perfectly.
Q: How far ahead can I prepare it?
A: You can season and tie the roast two days before. Keep it wrapped in the fridge.
Q: I don’t have white wine.
A: That’s fine. Use an extra half cup of your turkey stock instead. The flavor will still be wonderful.
Q: Can I make a smaller portion?
A: You can use a smaller breast. Just reduce the salt rub and stock ingredients a little.
Q: Any optional tips?
A: Add a spoon of apple jelly to your gravy. It’s my fun little secret for a sweet hint. Which tip will you try first?
From My Kitchen to Yours
I hope you feel ready to try this cozy recipe. It’s simpler than it looks. The smell of it roasting is pure comfort. My kitchen table has seen many meals like this. I would love for yours to, as well.
Please tell me all about your cooking adventure. Did your family enjoy it? What stories did you share at the table? Have you tried this recipe? Leave a comment below and let’s chat. I read every single one.
Happy cooking!
—Fiona Brooks.
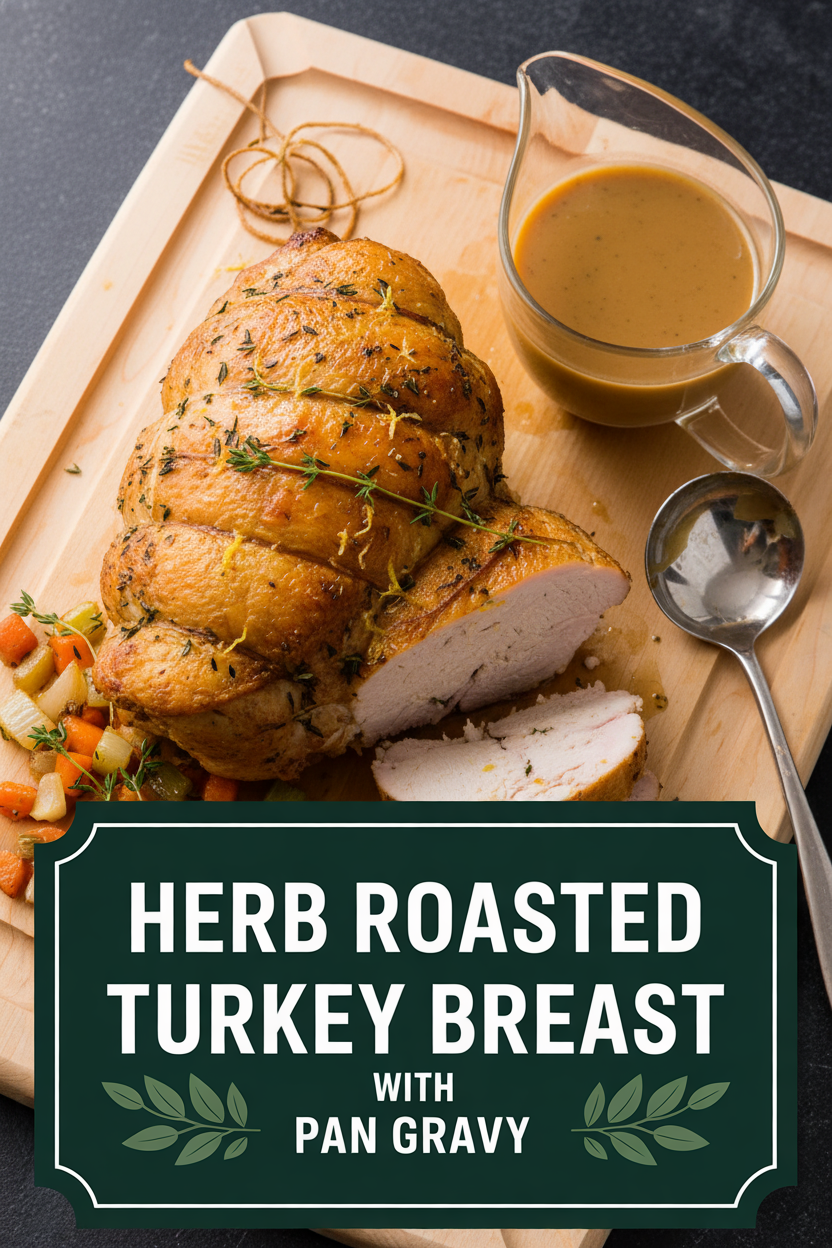
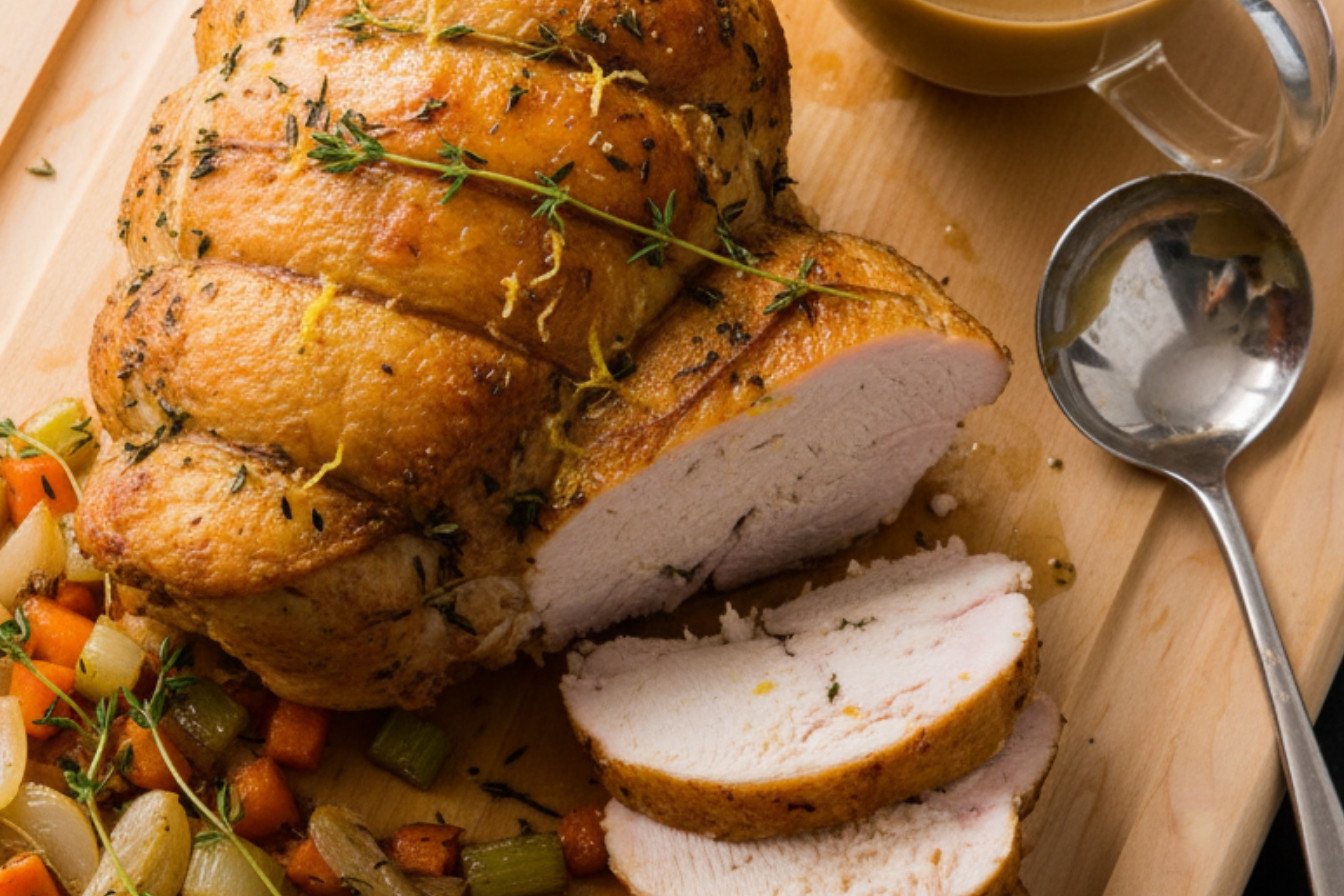
Herb Roasted Turkey Breast with Pan Gravy
Description
A flavorful and tender boneless turkey roast, seasoned with herbs and lemon, served with a rich homemade pan gravy.
Ingredients
Instructions
- Remove the two breast halves from the bone, keeping the breastbone for stock. Mix the salt, thyme, lemon zest, and pepper, then rub this seasoning all over the turkey breasts.
- Place two lengths of twine in a loaf pan. Lay one breast half skin-side down on the twine. Place the second breast half skin-side up on top, offsetting the thick and tapered ends so the roast is even. Tuck the meat into the pan, then tie the twine tightly to secure the roast. Remove it from the pan and tie additional twine at one-inch intervals. Wrap in plastic and refrigerate for at least 2 hours.
- Roast the reserved breastbone on a foil-lined sheet at 450°F until deeply browned, about 1 hour. Transfer the bone to a saucepan, add the chopped onion, carrot, celery, thyme sprigs, and bay leaf. Cover with water by an inch, bring to a boil, then simmer for 1 hour. Strain the stock, pressing on the solids; discard the solids. Set the stock aside.
- Preheat the oven to 275°F. Set a wire rack on a rimmed baking sheet. Heat oil in a skillet until very hot. Brown the tied turkey roast on all sides. Transfer it to the wire rack and roast until the internal temperature reaches 160°F. Let it rest on a carving board for 15 minutes.
- Melt butter in a saucepan. Whisk in flour and cook until it turns a peanut butter color. Gradually whisk in 3 cups of the reserved turkey stock. Add the wine, salt, and pepper. Bring to a boil, then simmer until slightly thickened. Season to taste and keep warm.
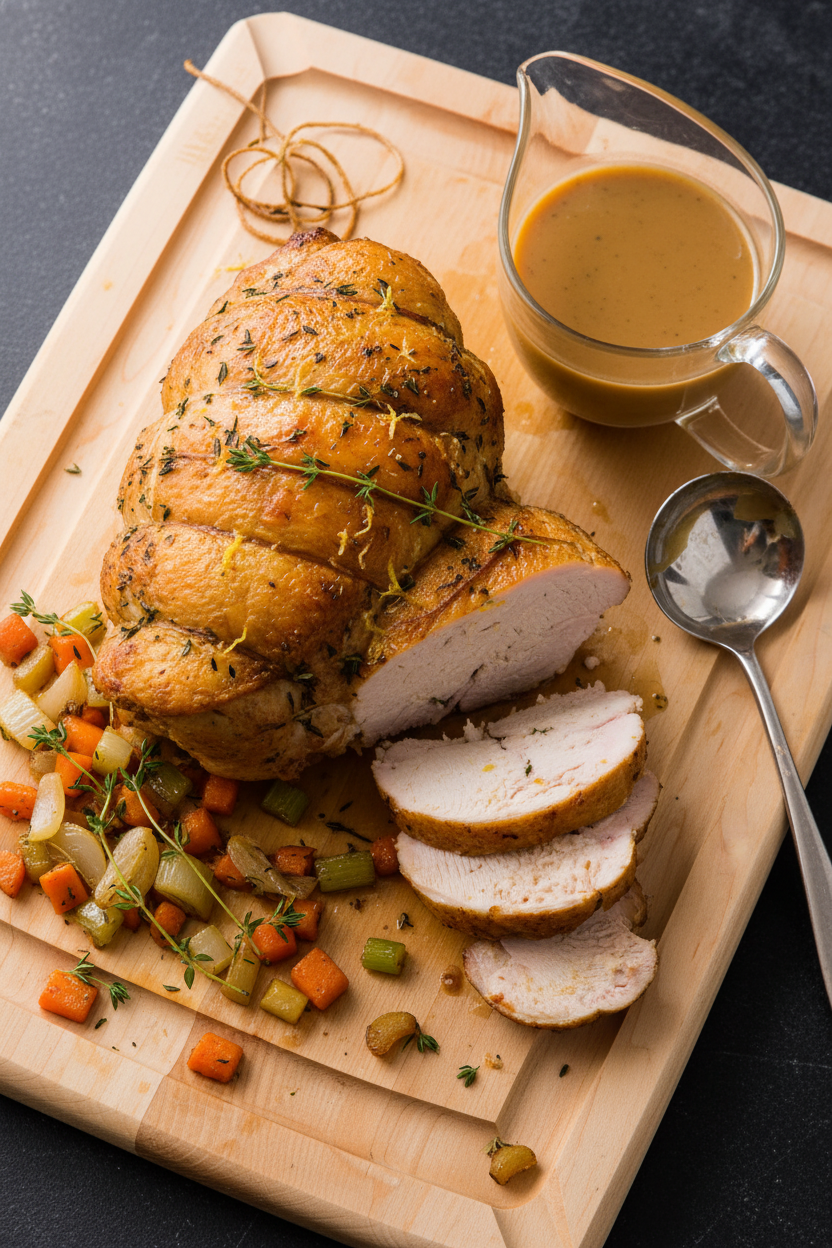
- Slice the turkey, removing the twine as you go. Serve the slices with the gravy on the side.
Notes
- For the crispiest skin, ensure the turkey breast is very dry before seasoning. Letting the shaped roast chill helps it hold its shape for even cooking.


Leave a Reply