My Kitchen, Full of Stories
Let me tell you about my peanut butter cookie jar. It is never empty for long. My grandson, Sam, sees to that. He once tried to sneak the whole jar to his room. I still laugh at that. The smell of these baking is pure happiness. Doesn’t that smell amazing?
This recipe is my old friend. We have made it for years. It is simple and kind. It never lets you down. That matters. Food should be a warm hug, not a worry.
The Secret is in the Chill
Now, the first step is easy. You mix everything until it is happy and fluffy. But here is the big trick. You must wrap that dough and let it take a nap in the fridge. For at least an hour!
This chill time matters. It lets the flavors get to know each other. It also makes the dough strong. Then you can roll it out without a fuss. Patience makes a better cookie. I promise.
Rolling and Cutting Fun
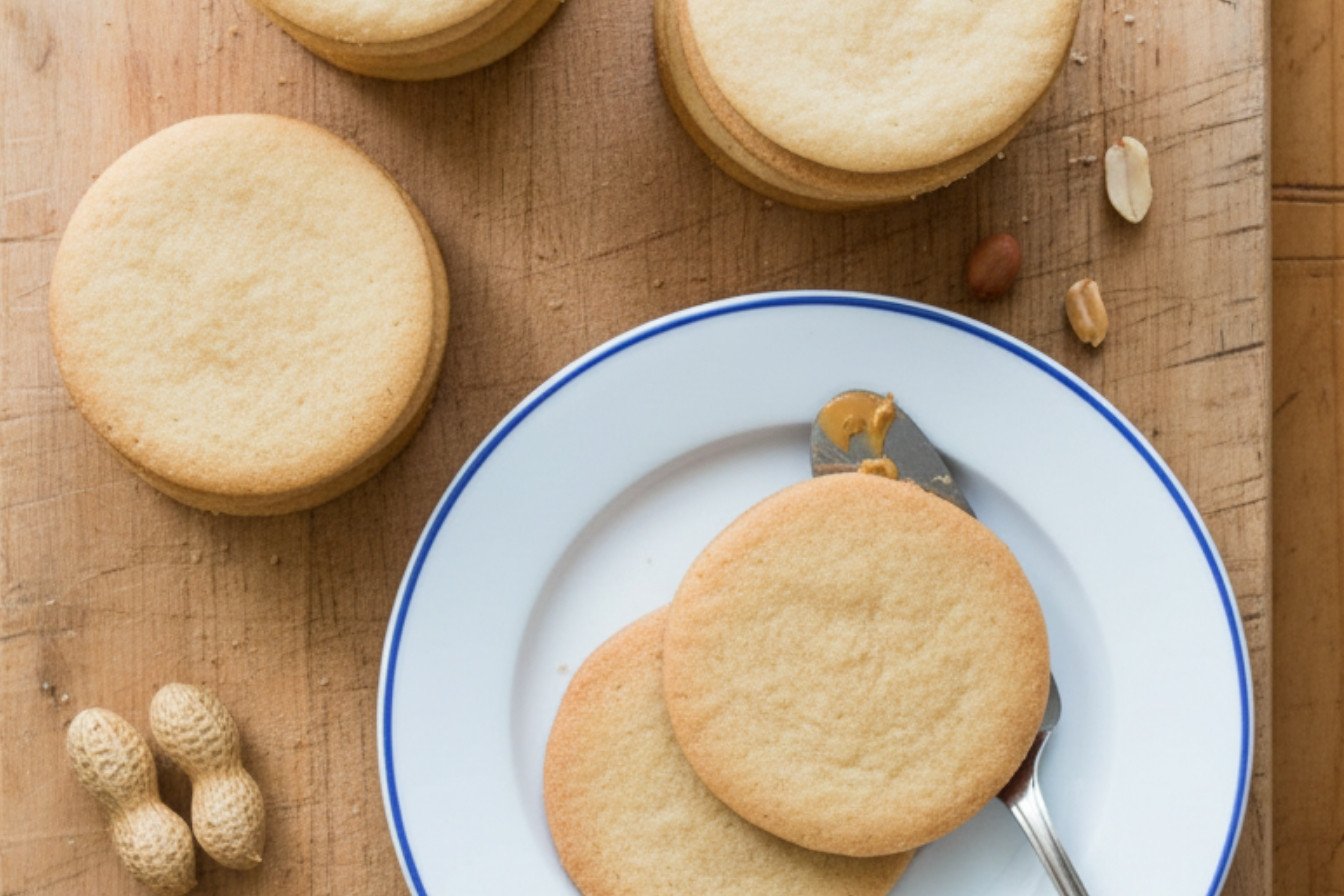
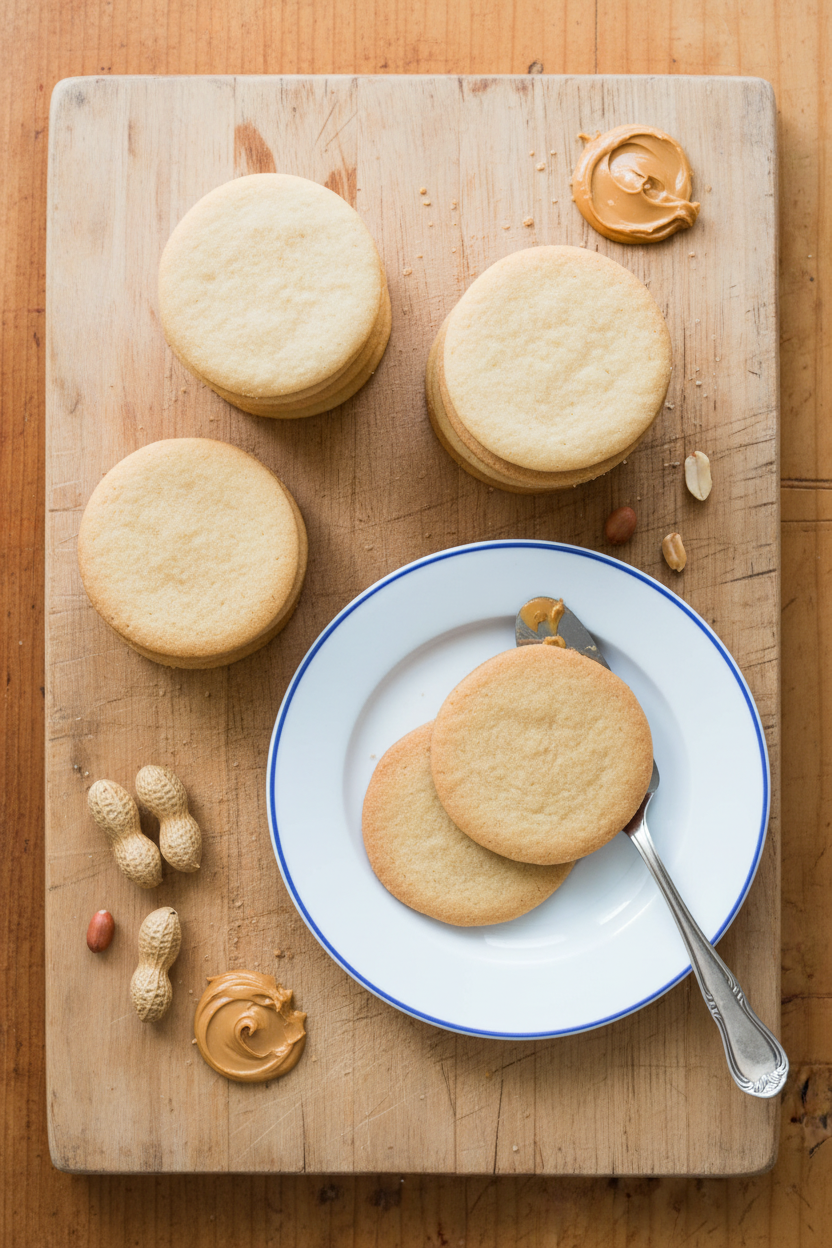
Time to play! Flour your counter a little. Roll the dough nice and thin. Use any cookie cutter you like. I have a dog shape and a star. Sam likes the dinosaur one best.
Fun fact: peanut butter cookies got their famous fork marks because the dough used to be so sticky! The fork kept it from puffing up too much. Do you have a favorite cookie shape? Tell me yours.
A Watchful Eye in the Oven
Your oven should be hot and ready. Put the cookies on parchment paper. This stops them from sticking. Now, watch them closely. They bake fast, only 6 to 8 minutes.
Halfway through, swap the trays from top to bottom. This makes sure every cookie gets the same golden tan. They are done when they look evenly light brown. What is your favorite thing to smell baking?
The Cool Down
As soon as they are out, move them. Use a thin spatula to a cooling rack. This stops them from cooking more on the hot tray. Let them cool all the way.
This is the hardest part! Waiting. But a cool cookie is a crisp cookie. It is worth it. Then you can decorate. A little drizzle of chocolate? Or just eat them plain. I won’t tell.
Your Turn to Share
So there you have it. My perfect peanut butter cookie. It is more than a snack. It is a memory waiting to happen. In my house, they never last a full day.
I would love to hear from you. Will you make these for someone special? Or do you have a family cookie recipe too? Share your story with me. What is the first cookie you ever learned to bake?
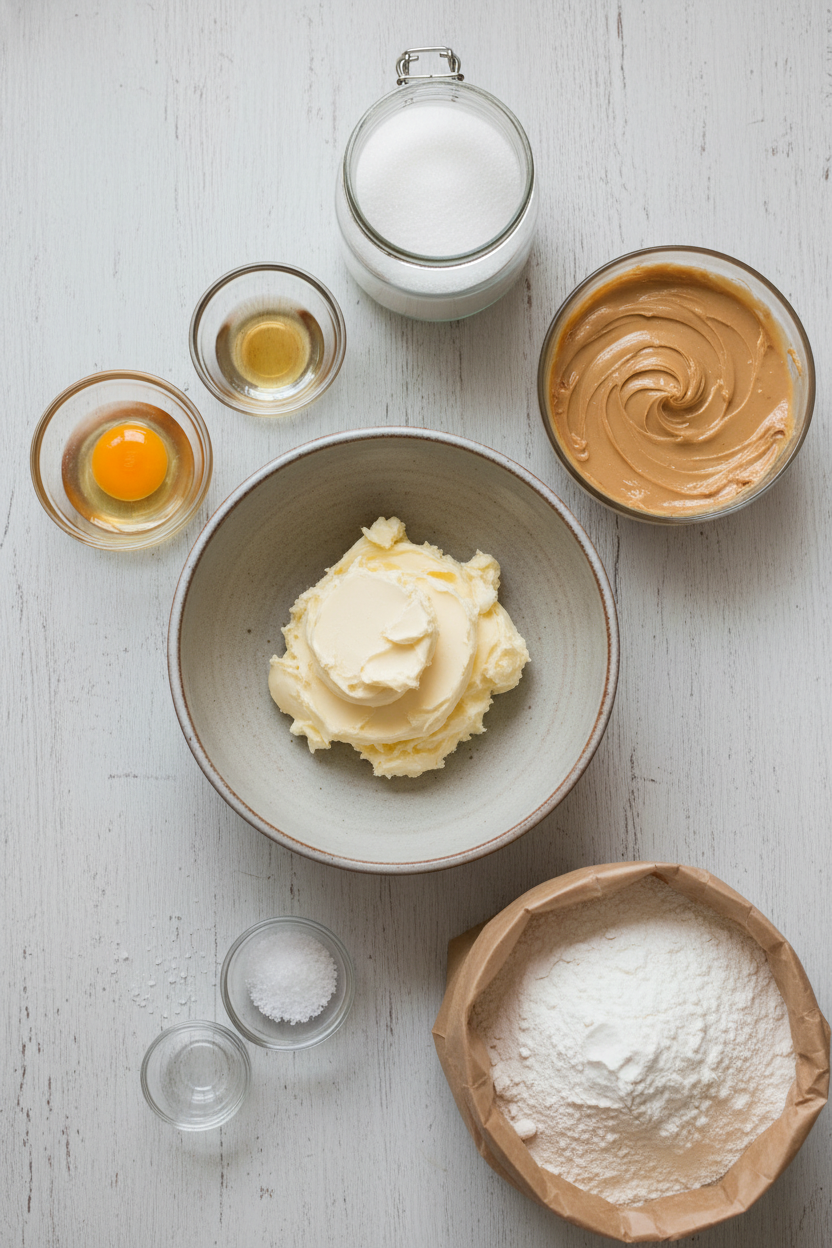
Ingredients:
| Ingredient | Amount | Notes |
|---|---|---|
| Unsalted butter | ½ pound (227 grams / 2 sticks) | At cool room temperature |
| Granulated sugar | 1 cup | Processed in food processor for 30 seconds, or superfine sugar |
| Peanut butter | ⅔ cup | |
| Salt | ½ teaspoon | |
| Egg | 1 whole egg plus 1 yolk | |
| Vanilla extract | 2 teaspoons | |
| Bleached all-purpose flour | 2 ½ cups | Plus extra for work surface |
My Perfect Peanut Butter Cookie Story
Oh, these cookies bring back such happy memories. My grandson Charlie helped me make them first. He loved pressing the cookie cutters into the dough. We made stars, hearts, and even a dinosaur shape. Doesn’t that smell amazing when they bake? The whole house fills with warmth. I still laugh at that flour-covered kitchen. It was a wonderful mess. Now, this recipe is my go-to for any happy occasion. It feels like a hug from the oven. Let’s make some together, shall we?
Instructions
Step 1: Let’s mix our dough. Beat the butter, sugar, peanut butter, and salt until fluffy. Then add the egg yolk, whole egg, and vanilla. Mix it all in well. Finally, gently stir in the flour just until it disappears. (A hard-learned tip: don’t overmix the flour, or cookies get tough!). Split the dough in two and wrap it up. Pop it in the fridge to firm up for an hour. Do you know why we chill cookie dough? Share below!
Step 2: Time to get ready. Preheat your oven to 375°F. Put racks in the top and bottom thirds. Take one dough packet from the fridge. Cut that packet in half. Put the half you aren’t using right back to chill. This keeps it from getting too soft. Soft dough is tricky to roll out.
Step 3: Now for the fun rolling part. Lightly flour your counter. Roll one dough half out very thin. Use your spatula to lift it if it sticks. Sprinkle a tiny bit more flour underneath if needed. I think of this like making a dough blanket. It should be nice and even.
Step 4: Cut out your shapes. Press the cutters close together to use all the dough. Place cookies on parchment-lined sheets. Give them a little space to breathe. Bake for 6-8 minutes. Switch the sheet positions halfway through. They’re done when golden all over.
Step 5: The final step needs care. Move cookies to a cooling rack right away. They are delicate when hot. Let them cool completely. Then repeat with all the remaining dough. Decorate them if you like. Store your creations in a tin. They stay crisp and lovely.
Creative Twists
Chocolate Dip: Melt some chocolate chips. Dip half of each cooled cookie in it. Let it set on wax paper.
Jam Sandwich: Spread a little raspberry jam between two cookies. A sweet, sticky surprise inside!
Sprinkle Fun: Before baking, brush cookies with milk. Then add colorful sprinkles for a party look.
Which one would you try first? Comment below!
Serving & Pairing Ideas
These cookies are perfect with a cold glass of milk. For a special treat, crumble one over vanilla ice cream. You could also arrange them on a pretty plate for guests. For a drink, I love a cold glass of iced coffee with them. My husband prefers a creamy stout beer with his. The nutty flavors go so well together. Which would you choose tonight?
Keeping Your Cookies Happy
Let’s talk about storing these treats. Cooled cookies go in an airtight container. They stay fresh for a week. You can also freeze the dough for later.
Just shape it into a log and wrap it well. Slice and bake whenever you want a fresh cookie. I once froze dough for a month. The cookies baked up perfectly for a surprise visit from my grandson.
Storing them right means no waste. You always have a little joy ready to share. Have you ever tried storing cookie dough in the freezer? Share below!
Cookie Troubles? Easy Fixes!
Sometimes cookies spread too much. Your butter was probably too warm. Chilling the dough firm fixes this. It makes for a nicer shape.
If the dough is sticky, just add a tiny bit more flour. I remember when my first batch stuck to everything. A light flour sprinkle on the rolling pin saved the day.
Tough cookies mean you mixed in the flour too much. Mix just until you see no white streaks. This keeps them tender and soft. Getting these steps right builds your kitchen confidence. It also makes your cookies taste just like you dreamed. Which of these problems have you run into before?
Your Quick Questions, Answered
Q: Can I make these gluten-free?
A: Yes. Use a good gluten-free flour blend that works like regular flour.
Q: Can I make the dough ahead?
A: Absolutely. Wrap it and chill for up to three days. It actually helps the flavor.
Q: What if I only have chunky peanut butter?
A: That’s fine. It will add a nice little crunch to your cookies.
Q: Can I make a half batch?
A: You can. Just divide all the ingredients in half. It’s great for a smaller family.
Q: Are the decorations necessary?
A: Not at all. A simple fork-press on top before baking is lovely. *Fun fact: the fork marks help the cookies bake evenly.* Which tip will you try first?
From My Kitchen to Yours
I hope you love baking these cookies. The smell alone fills a home with happiness. Share them with someone you care about.
That’s the best part of baking. It’s a gift made with your own hands. I would love to hear about your baking day. Have you tried this recipe? Tell me all about it in the comments.
Happy cooking!
—Fiona Brooks.
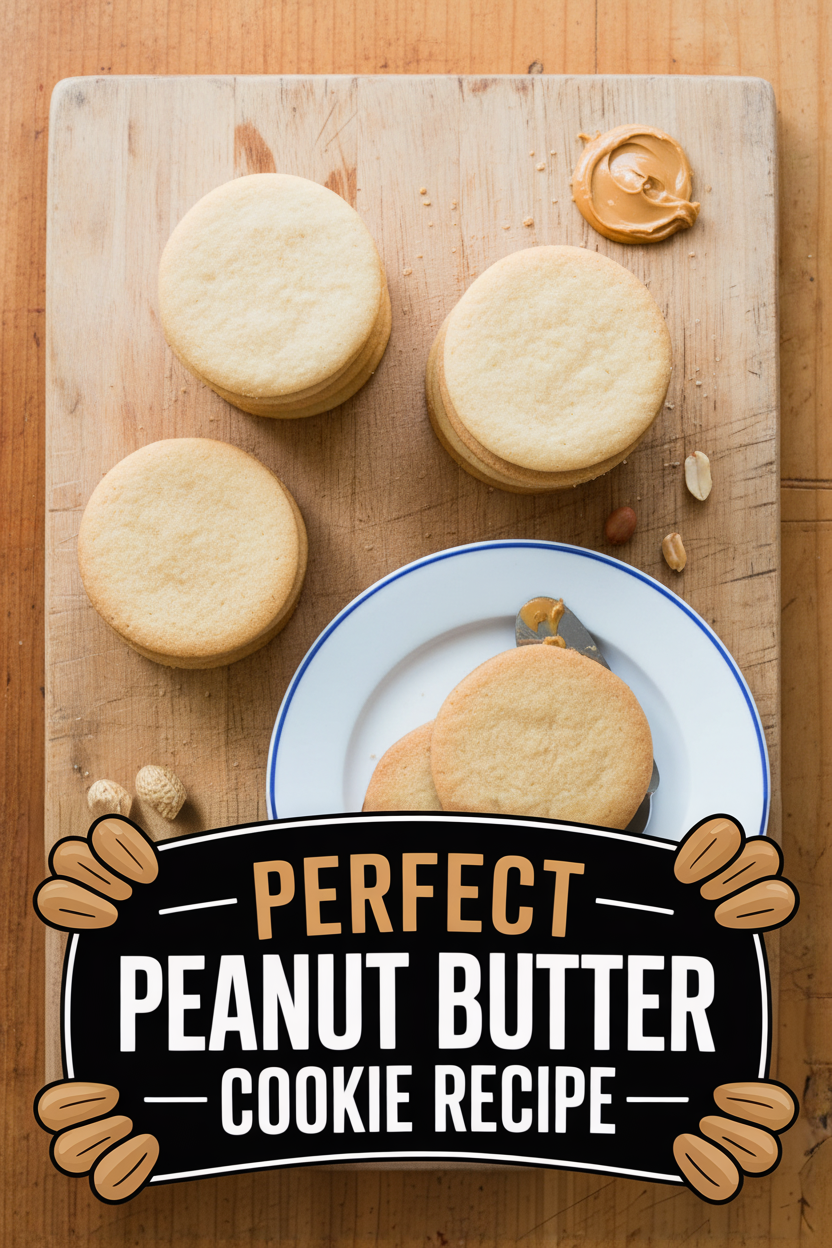
Perfect Peanut Butter Cookie Recipe
Description
Classic, buttery peanut butter cookies rolled thin and cut into shapes, perfect for decorating.
Ingredients
Instructions
- In an electric mixer, beat the butter, sugar, peanut butter, and salt at medium speed until the mixture is pale and fluffy. Incorporate the egg yolk, then the whole egg and vanilla, beating until fully combined. Mix in the flour on low speed just until no dry streaks remain. Split the dough into two portions, wrap each in plastic, and chill until firm (minimum 1 hour).
- Preheat your oven to 375°F, positioning racks in the upper and lower thirds. Take one dough portion from the refrigerator and slice it in half, returning the unused half to chill.
- On a lightly floured surface, roll the dough out to a 1/8-inch thickness. Use an offset spatula to loosen it and add sprinkles of flour as needed to prevent sticking.
- Cut the dough into your chosen shapes and arrange them 1/2 inch apart on parchment-lined baking sheets. Bake for 6 to 8 minutes, swapping the sheets’ positions halfway through, until the cookies are uniformly golden.
- Right after baking, use a thin spatula to move the cookies to a wire rack to cool completely. Repeat the process with all remaining dough. Once cooled, decorate if you wish, then store in an airtight container.
Notes
- For best results, ensure your dough is thoroughly chilled before rolling to prevent sticking and maintain shape. Cookies can be decorated with royal icing or sprinkles once completely cooled.


Leave a Reply