A Cake for Celebrating
I have always believed every celebration needs a special cake. This one is my go-to. It has three layers of pure chocolate joy. Each layer is a different kind of yummy.
Making it feels like a small adventure. You get to build it, piece by delicious piece. It is a project, but a very fun one. What was the last thing you celebrated with a special treat?
The Fudgy Brownie Bottom
We start with a brownie base. It is rich and fudgy. Melting the chocolate and butter together makes the whole kitchen smell wonderful. Doesn’t that smell amazing?
Be sure to let it cool completely. I know, it is hard to wait. But a warm brownie will melt our next layer. Patience here makes the whole cake better. This matters because good things often take a little time.
The Cloud-Like Mousse
Next comes the fluffy mousse. This layer is like a chocolate cloud. You fold the whipped cream in gently. You want to keep all that air inside.
I once folded it too fast. My mousse was a little flat. I still laugh at that. But it still tasted great! *Fun fact: The word “mousse” is French for “froth.”* It is just a fancy word for a light, bubbly treat.
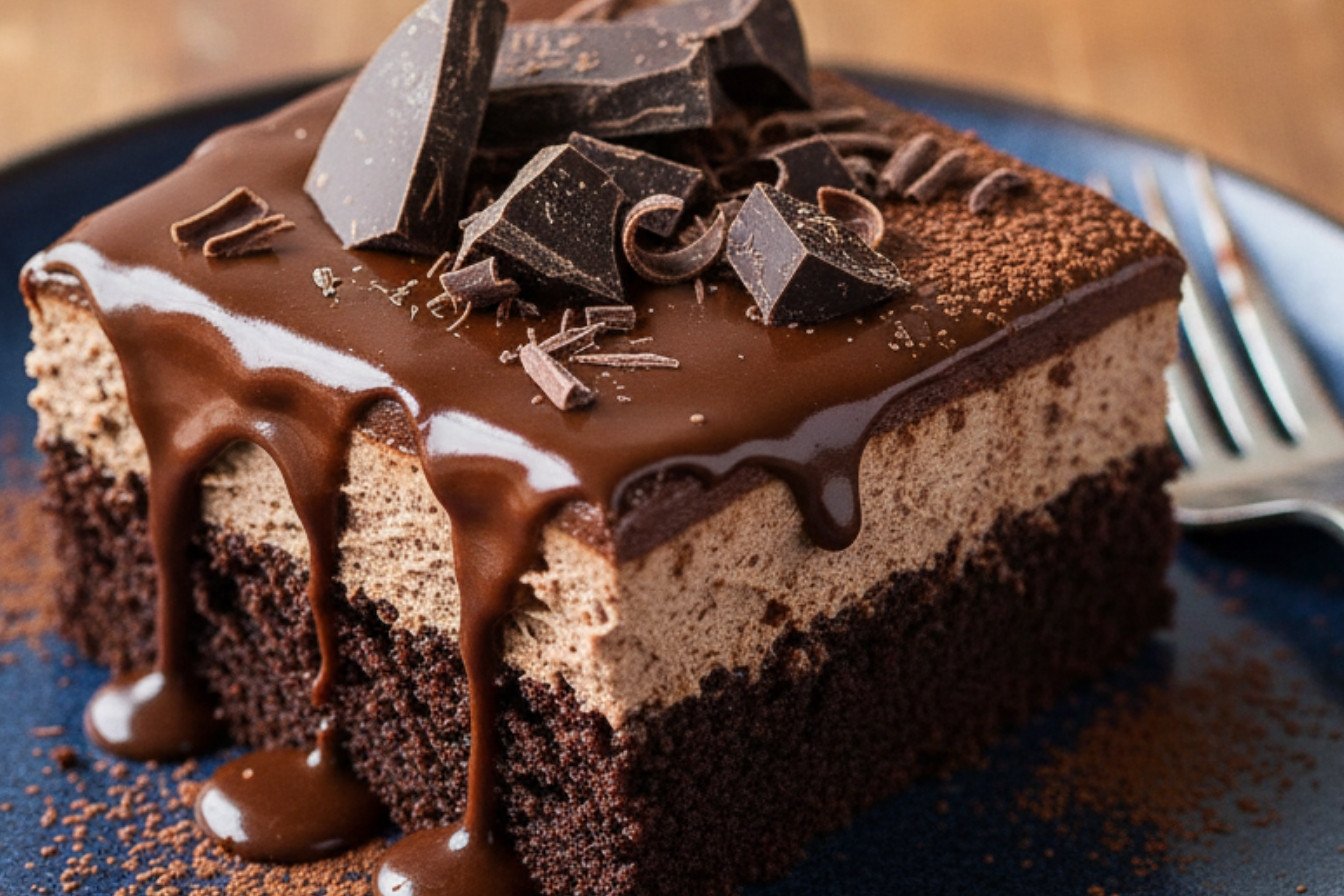
The Shiny Ganache Hat
The final layer is a shiny ganache. It is simply cream and chocolate melted together. When you pour it on, it looks so professional. It’s the cake’s beautiful hat.
Let it cool a bit before pouring. If it is too hot, it might sink into the mousse. This matters because each layer should be its own surprise. Do you like your cakes with frosting or a shiny glaze like this?
Sharing Your Masterpiece
Taking the springform pan off is the big reveal. You see all your hard work. The layers are so pretty. I always feel so proud at this moment.
This cake is rich, so cut small slices. A little goes a long way. It is perfect for sharing with people you love. Food just tastes better when we eat it together. Tell me, who would you share a slice of this cake with?
Ingredients:
| Ingredient | Amount | Notes |
|---|---|---|
| For the Brownie Base: | ||
| Unsweetened chocolate, coarsely chopped | 6 oz (170 g) | |
| Unsalted butter, cut into pieces | 1/2 cup (113 g) | |
| Granulated sugar | 1 cup (200 g) | |
| Large eggs, room temperature | 3 | |
| Pure vanilla extract | 1 tbsp | |
| All-purpose flour | 1 cup (130 g) | |
| Dutch-process cocoa powder | 3 tbsp | |
| Salt | 1/2 tsp | |
| For the Mousse Layer: | ||
| Gelatin | 3/4 tsp | |
| Water | 1 tbsp | For blooming the gelatin |
| Semisweet chocolate, coarsely chopped | 6 oz (168 g) | |
| Heavy cream, cold | 1 1/2 cups (360 ml) | Divided use |
| Granulated sugar | 2 tbsp | |
| For the Ganache Topping: | ||
| Heavy cream | 3/4 cups (180 ml) | |
| Unsalted butter | 1 tbsp | |
| Semisweet chocolate, coarsely chopped | 9 oz (252 g) |
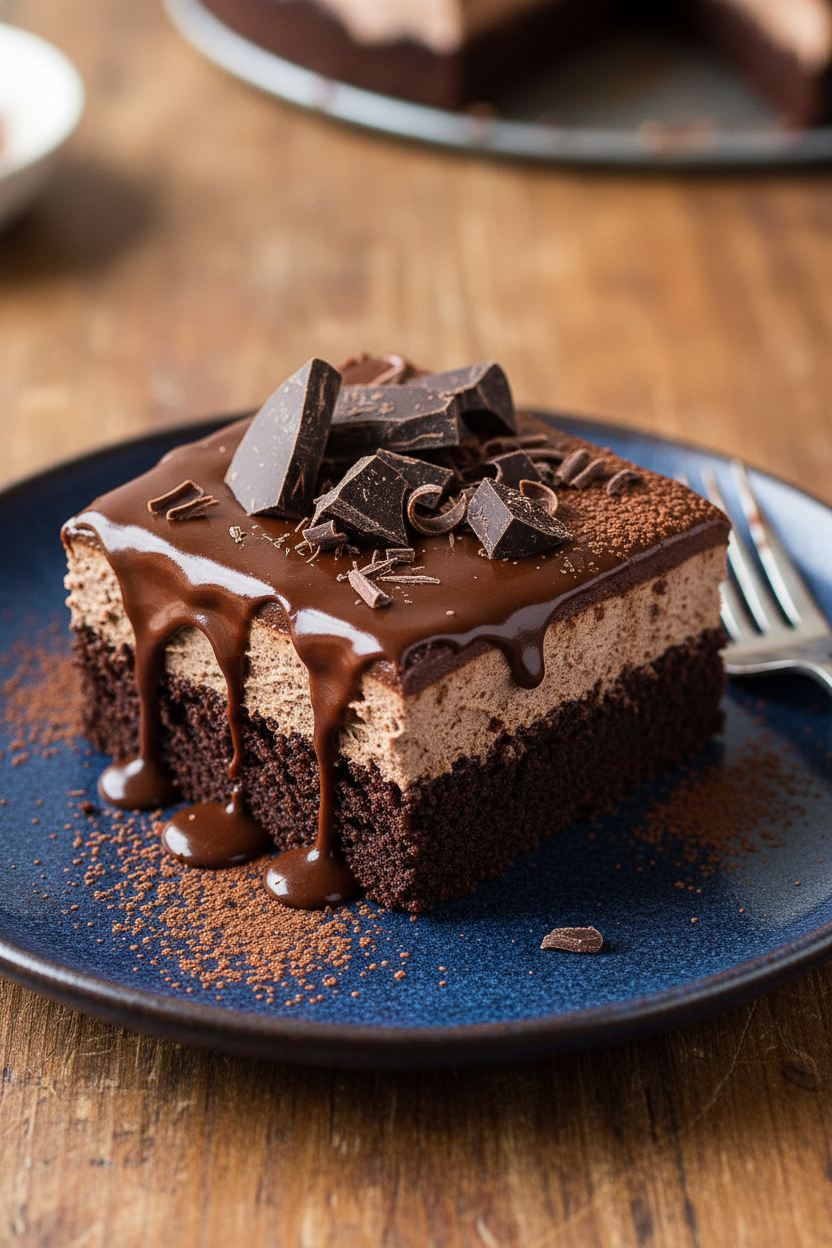
My Triple Chocolate Dream Cake
Oh, this cake is pure happiness on a plate. I first made it for my grandson’s birthday. His eyes got so wide with that first bite. I knew it was a keeper. It has three layers of chocolate joy. You get a fudgy brownie, a cloud of mousse, and a shiny ganache hat. Doesn’t that sound amazing?
Now, don’t let the layers scare you. We will take it one sweet step at a time. It’s like building a little chocolate tower. The secret is letting each part cool before adding the next. I still laugh at the time I rushed it. Let’s just say the mousse layer decided to go on an adventure!
Step 1: The Brownie Base
Heat your oven to 350°F. Spray an 8-inch springform pan. Melt the unsweetened chocolate and butter together. Stir it until it’s smooth and glossy. Take it off the heat and whisk in the sugar. Let it cool for a few minutes. Then whisk in the eggs and vanilla. It will look so rich and shiny.
Step 2: Combine and Bake
Sift the flour, cocoa, and salt into the chocolate. Fold it all together gently. You just want the flour to disappear. Pour the batter into your prepared pan. Spread it into an even layer. Bake for 20 to 25 minutes. A toothpick should come out with a few crumbs. Let the brownie cool completely in the pan. (A hard-learned tip: If the brownie is warm, the mousse will melt. Patience is a baker’s best friend!).
Step 3: The Fluffy Mousse
Time for the fluffy mousse! Sprinkle gelatin over water in a small bowl. Let it sit for 5 minutes to get soft. Heat 1/2 cup of cream with the sugar until it simmers. Take it off the heat and stir in the gelatin. Pour this hot cream over the chopped semisweet chocolate. Stir until it’s a smooth, silky pool. Let this cool to room temperature.
Step 4: Fold and Chill
Whip the remaining cold cream until it forms soft peaks. Stir a big spoonful into the cooled chocolate. This makes it lighter. Now, gently fold in the rest of the whipped cream. Be gentle, like you’re folding a cloud. Spread this dreamy mousse over the cool brownie. Pop the whole pan into the refrigerator. What’s your favorite chocolate treat? Share below!
Step 5: The Ganache
For the ganache, heat the cream and butter until it simmers. Pour it over the last of the chopped chocolate. Let it sit for a minute. Then stir until it’s glossy and perfect. Let it cool until it’s not warm anymore. Then pour it over the cold mousse. Spread it gently to the edges. Back into the fridge it goes for at least an hour.
Step 6: The Grand Finale
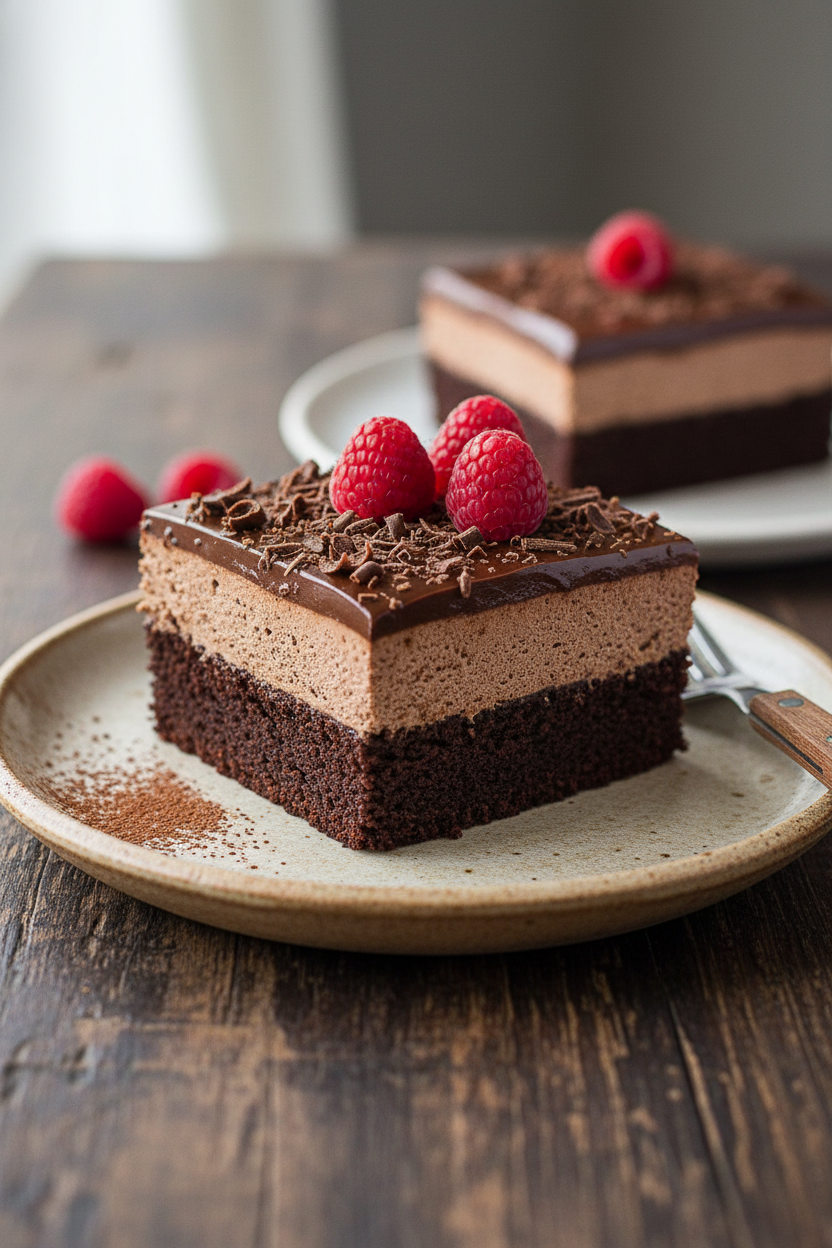
Carefully unclasp the springform pan. Lift away the ring. Slide the cake off the bottom onto a plate. I love to add a few fresh berries on top. Their little burst of tartness is just perfect with all that chocolate. Now, slice, serve, and get ready for smiles.
Cook Time: 30 minutes (plus 4+ hours chilling)
Total Time: About 5 hours
Yield: 12 rich slices
Category: Dessert, Cake
Three Fun Twists to Try
This cake is wonderful as it is. But sometimes, it’s fun to play with your food. Here are a few ideas to make it your own. My neighbor’s girl loves the minty version. It reminds her of a fancy candy bar.
- Mint Chocolate Chip: Add a drop of peppermint extract to the mousse. Fold in some mini chocolate chips for a fun crunch.
- Orange Zest Surprise: Stir the zest of one orange into the brownie batter. That citrus smell will fill your whole kitchen.
- Raspberry Swirl: Before chilling, dot the ganache with raspberry jam. Use a toothpick to swirl it into a pretty pattern.
Which one would you try first? Comment below!
Serving Your Masterpiece
This cake is the star of the show. But a few little touches make it extra special. I like to add a dollop of freshly whipped cream on the side. A few bright red raspberries look lovely, too. For a party, you can add a dusting of cocoa powder. It makes it look like it came from a fancy bakery.
What to drink with all this chocolate? A cup of hot coffee is my go-to. The bitterness is a perfect match. For a special night, a small glass of ruby port is wonderful. For the kids, a tall, cold glass of milk is the only right answer. It’s a classic for a reason! Which would you choose tonight?
Keeping Your Chocolate Mousse Cake Happy
This cake is a special treat. You will want to keep it fresh. Store any leftovers in the fridge for up to four days. Just cover it tightly with plastic wrap. This stops it from picking up other fridge smells. I once forgot to cover a cake. It tasted like my leftover onion soup. What a surprise that was.
You can also freeze slices for a month. Wrap each piece well before freezing. This is perfect for a quick, fancy dessert later. Batch cooking saves you time. It means a homemade treat is always ready for guests.
Have you ever tried storing it this way? Share below!
Easy Fixes for Common Cake Troubles
Sometimes, baking can be tricky. Do not worry. I have some simple fixes for you.
First, if your mousse is runny, your cream was not cold enough. Always use cold cream for whipping. I remember when my mousse would not set. My kitchen was just too warm that day.
Second, if your ganache looks grainy, the cream was too hot. It can make the chocolate separate. Just add a teaspoon of warm cream and stir.
Third, a sticky brownie base means it is under-baked. A few moist crumbs on the toothpick are perfect. Knowing these fixes builds your cooking confidence. It also makes your desserts taste so much better.
Which of these problems have you run into before?
Your Quick Questions, Answered
Q: Can I make this gluten-free?
A: Yes. Use your favorite gluten-free flour blend for the brownie base.
Q: How far ahead can I make it?
A: You can make the whole cake two days before you need it.
Q: Can I use milk chocolate instead?
A: You can, but the cake will be much sweeter. I like a little bitterness.
Q: Can I make a smaller cake?
A: Yes. Just cut all the ingredients in half. Use a 6-inch pan.
Q: Are the berries necessary?
A: No, but they add a nice fresh taste. It is your choice. *Fun fact: The word mousse means “foam” in French!*
Which tip will you try first?
A Little Note From My Kitchen
I hope you love making this cake. It is a joy to share with family. Seeing their smiles is the best part. I would love to see your beautiful creation. Your version might give someone else a great idea. Sharing recipes connects us all.
Have you tried this recipe? Tag us on Pinterest! I always look for your photos. It makes my day.
Happy cooking!
—Fiona Brooks.
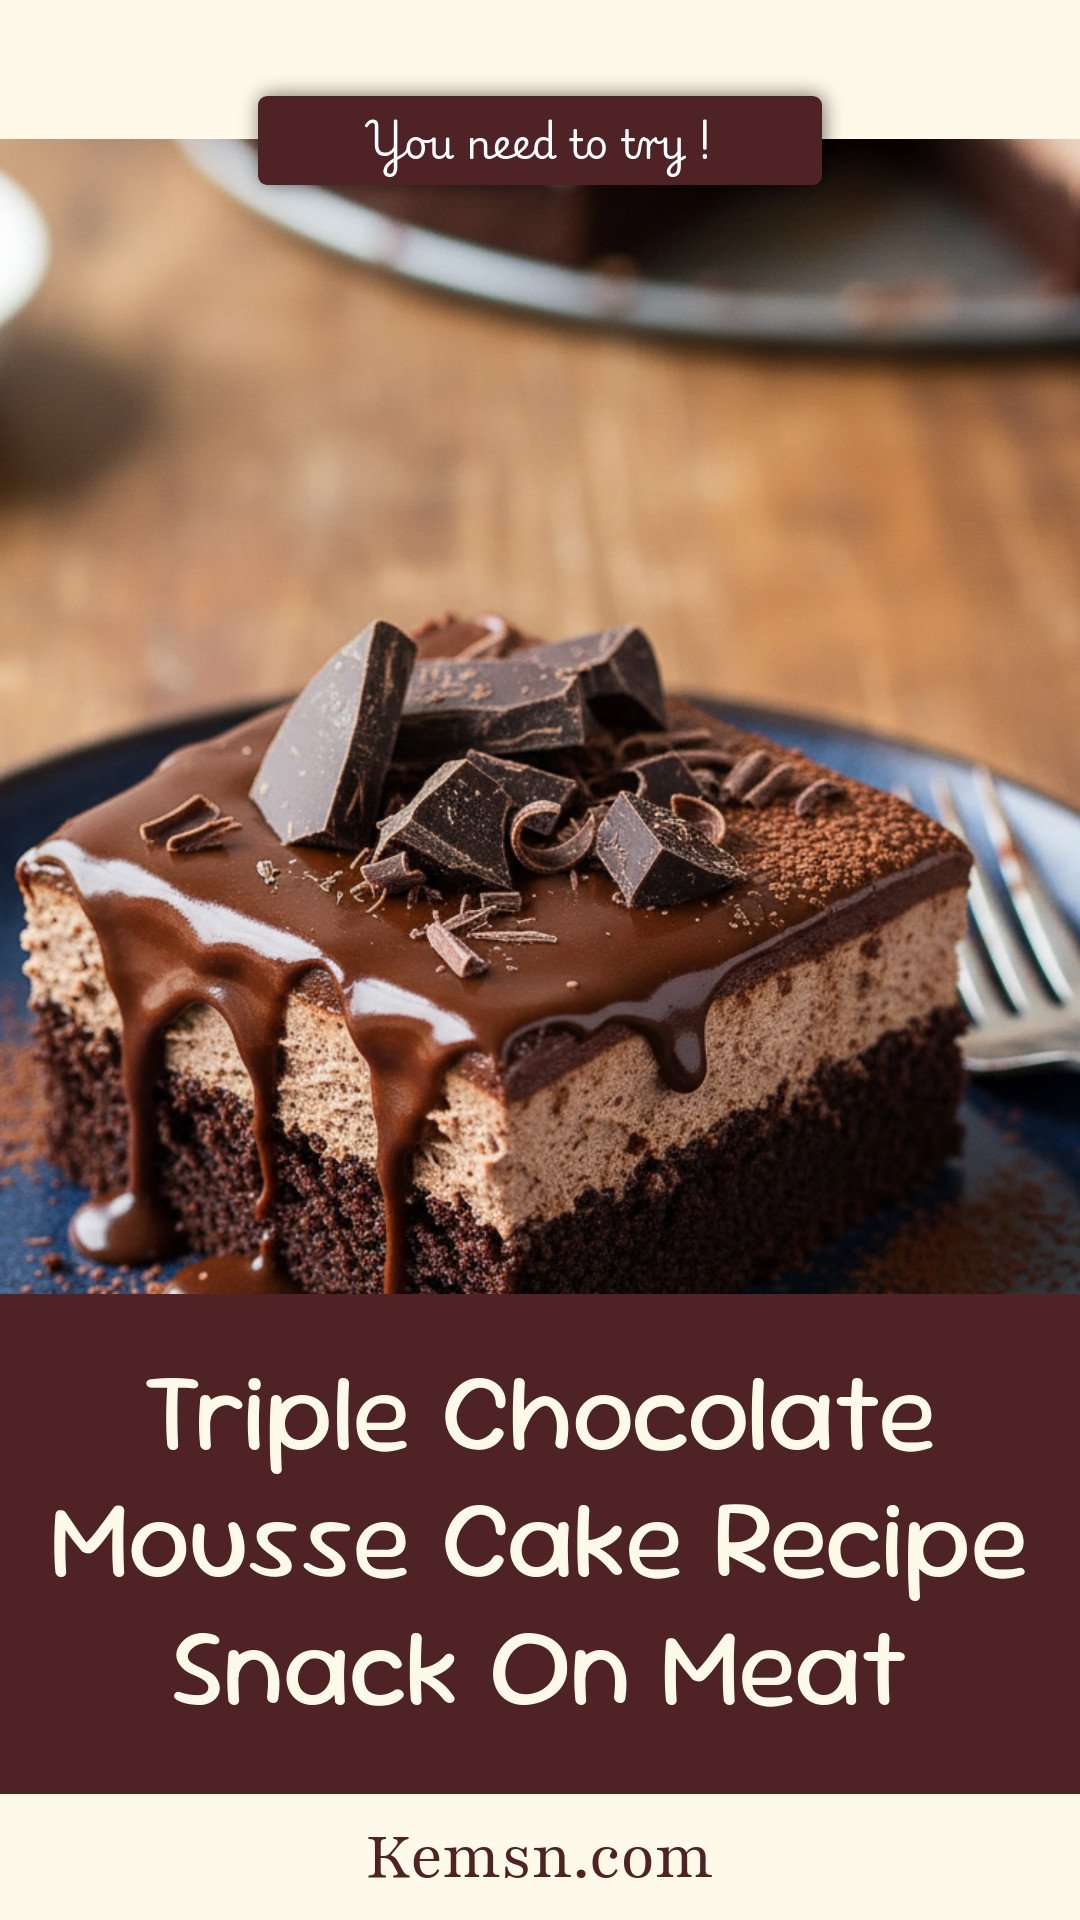
Triple Chocolate Mousse Cake Recipe Snack On Meat
Description
Indulge in the ultimate chocolate experience with this decadent Triple Chocolate Mousse Cake, featuring a rich brownie base, a light chocolate mousse, and a glossy ganache topping.
Ingredients
Instructions
- Begin by heating your oven to 350°F (175°C). Prepare an 8-inch springform pan by spraying it with nonstick spray, lining the bottom with parchment paper, and spraying the paper.
- Gently melt the unsweetened chocolate and butter together, stirring until you have a smooth mixture. Take it off the heat and whisk in the sugar. Allow it to cool for a few minutes before whisking in the eggs and vanilla extract. Sift the flour, cocoa powder, and salt into the chocolate mixture, then fold everything together just until the dry ingredients are fully incorporated.
- Transfer the batter to your prepared pan, spreading it into an even layer. Bake for 20 to 25 minutes; it’s done when a toothpick inserted into the center comes out with a few moist crumbs attached. Let the brownie cool completely in the pan placed on a wire rack.
- Sprinkle the gelatin over the water in a small bowl and let it sit for about 5 minutes to soften. Meanwhile, heat 1/2 cup of the heavy cream with the sugar in a saucepan until it just begins to simmer. Remove it from the heat and stir in the softened gelatin until it has completely dissolved.
- Pour this hot cream mixture over the chopped semisweet chocolate, stirring until the chocolate is melted and the mixture is smooth. Let this chocolate base cool down to room temperature.
- Using a separate bowl, whip the remaining 1 cup of cold heavy cream until it forms medium to stiff peaks. Vigorously whisk about one-third of this whipped cream into the cooled chocolate mixture to lighten it. Then, gently fold in the rest of the whipped cream until no white streaks remain. Spread this mousse over the cooled brownie base and place the cake in the refrigerator.
- Heat the heavy cream and butter in a saucepan over medium heat until it just starts to simmer. Pour this hot cream over the chopped semisweet chocolate, letting it sit for a minute before stirring until completely smooth and glossy. Allow the ganache to cool until it is no longer warm to the touch, then pour and spread it evenly over the set mousse layer. Return the cake to the refrigerator for at least one hour to allow the ganache to firm up.
- To serve, carefully unclasp and remove the outer ring of the springform pan. Peel away the parchment paper from the bottom. Transfer the cake to a serving plate and garnish with whipped cream or fresh berries if you like.
Notes
- For best results, ensure all components are cooled to the correct temperature before assembling. The cake needs time to set, so plan accordingly.


Leave a Reply