My First Pinwheel Fiasco
I tried making pinwheels with my granddaughter once. We rolled the dough too thick. Our cookies looked like plump little snails! I still laugh at that.
But you know what? They tasted wonderful. That’s the real lesson. It doesn’t have to be perfect to be good. This matters because cooking is about joy, not stress.
Why We Twist Dough
Rolling the two doughs together is like making a sweet little secret. Every slice shows a hidden swirl. It feels like magic on a cutting board.
Fun fact: This method is called a “jelly roll” or “pinwheel” technique. Bakers have used it for centuries! Chilling the log is the most important step. It keeps your swirls neat and pretty when you slice them.
The Smell of Memories
Peppermint always takes me back. It smells like winter holidays and candy canes. Doesn’t that smell amazing when it hits the warm oven?
That smell is a powerful thing. It can lift your mood in an instant. This matters because our kitchens should be full of happy scents. What smell makes you feel cozy and safe? Tell me, I’d love to know.
Let’s Get Rolling
Use the parchment paper like I said. It stops the dough from sticking. Roll it nice and thin, into a big rectangle.
When you put the red dough on the white, press gently. Then start rolling from the long side. Take your time. Do you like to bake with music on, or in quiet? I’m always curious how others work in their kitchen.
The Patient Wait
Now, you must wait. Put that log in the fridge. Let it get very firm. This is the hardest part for young bakers!
But waiting makes all the difference. A firm log gives you clean, beautiful slices. If you rush, the swirls will squish. Trust an old grandma on this one.
Sharing the Sweetness
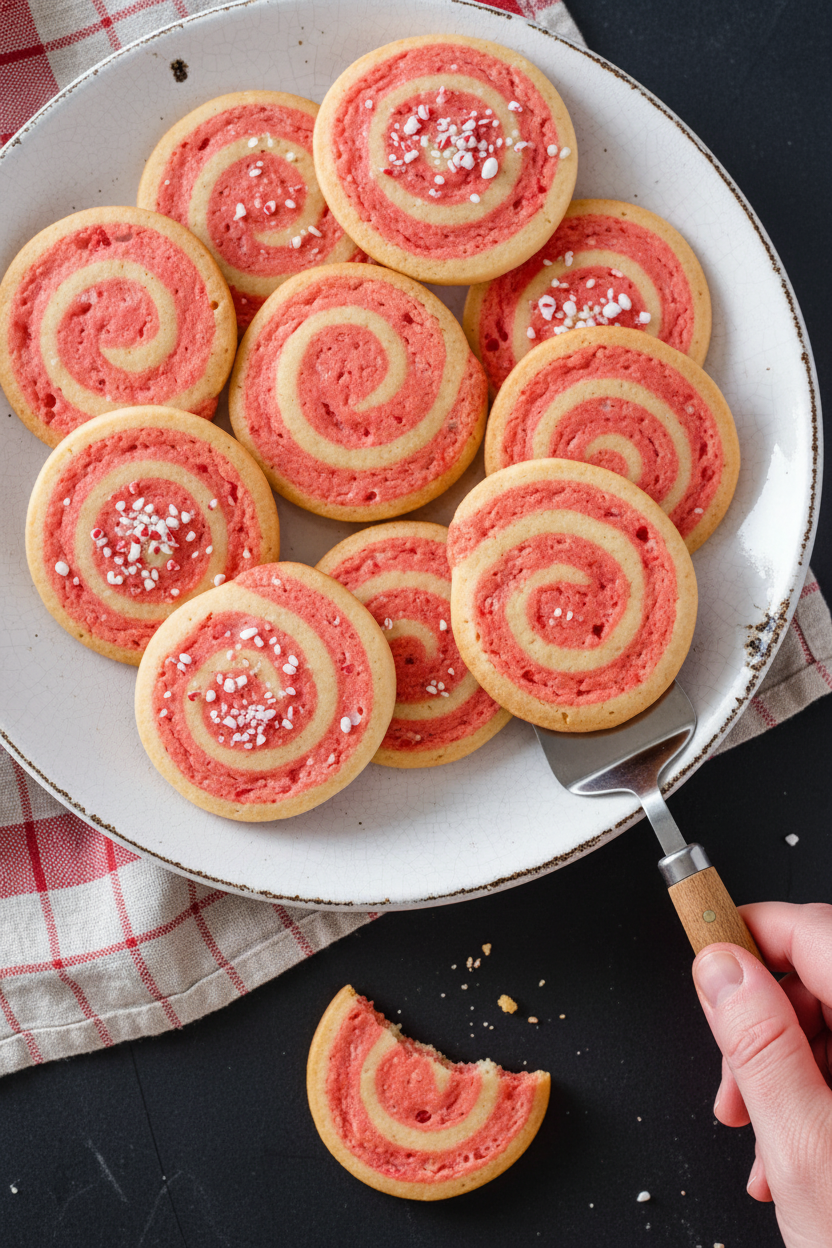
When they are cool, pack them up. A tin or a plate with a napkin works fine. Share them with a neighbor or a friend at school.
Food made by hand is a gift of the heart. That’s the final lesson. Which cookie would you share first—the one with the prettiest swirl, or the one that’s a little funny-looking? I always share the funny one. It has more character.
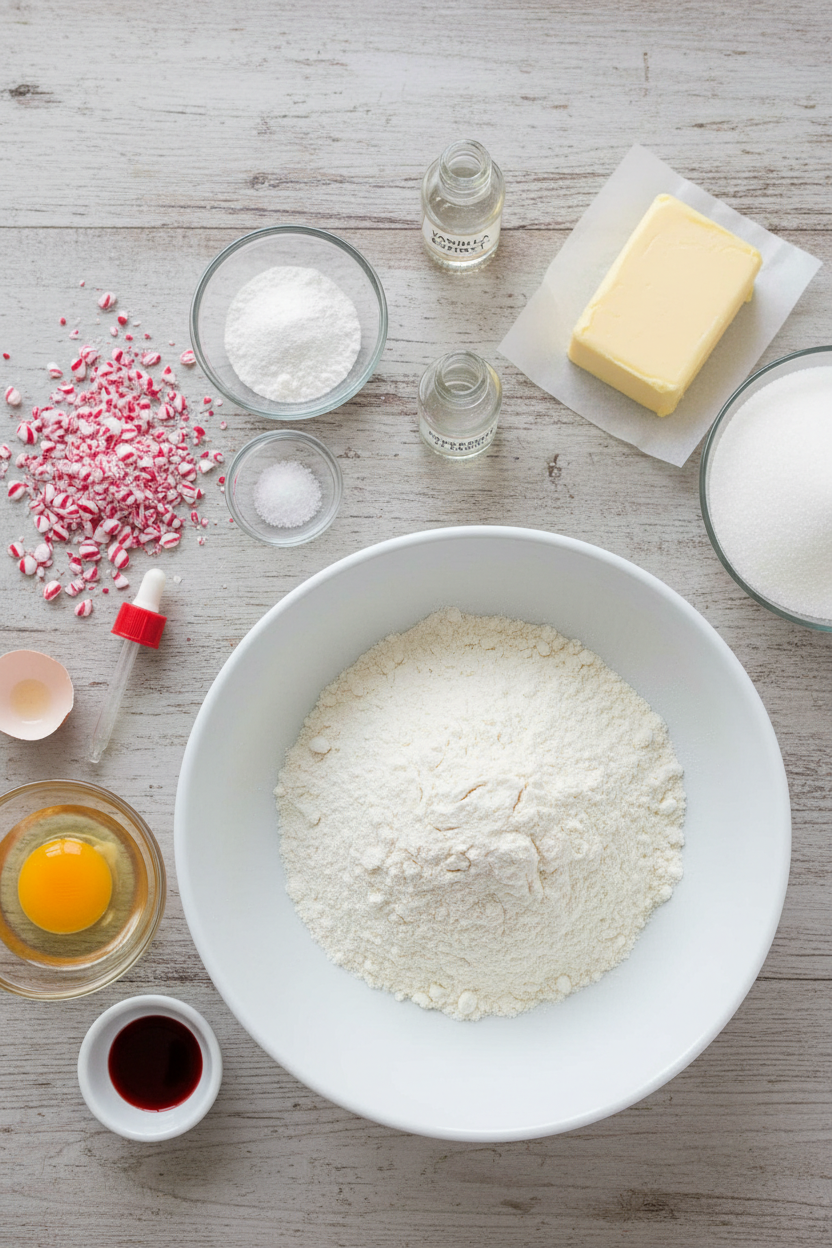
Ingredients:
| Ingredient | Amount | Notes |
|---|---|---|
| All-purpose flour | 3 cups (15 ounces/425 grams) | |
| Baking powder | ¾ teaspoon | |
| Salt | ¼ teaspoon | |
| Unsalted butter | 16 tablespoons (2 sticks) | Softened |
| Sugar | 1 cup (7 ounces/198 grams) | |
| Egg | 1 large | |
| Vanilla extract | 1 teaspoon | |
| Peppermint extract | 1 teaspoon | |
| Peppermint candies | ½ cup (about 20 candies) | Finely ground |
| Red food coloring | 6 drops |
Instructions
Step 1: First, let’s mix our dry friends. Whisk the flour, baking powder, and salt in a bowl. In another bowl, beat the soft butter and sugar until fluffy. It should look pale and dreamy. Now blend in the egg until it’s all one happy family. (Truly soft butter is the secret here. It makes creaming so easy!)
Step 2: Slowly add your flour mixture to the butter bowl. Mix on low until a soft dough forms. Take out half of this plain dough and set it aside. To the dough left in the bowl, add the vanilla, peppermint extract, ground candies, and red food coloring. Mix until it’s a pretty, swirly pink. Doesn’t that smell amazing?
Step 3: Time to make our pinwheel! Roll the plain dough between parchment paper. Make a rectangle about 14 by 8 inches. Do the same with the peppermint dough. Carefully lift the pink sheet on top of the plain one. Press them together lightly. Now, roll it up tightly from the long side, like a sleeping bag. Wrap this log in plastic and chill it for 2 hours. Why do we chill the dough? Share below!
Step 4: Preheat your oven to 375°F. Line your baking sheets. Slice the cold dough into thin rounds, about ¼-inch thick. Place them an inch apart on the sheets. Bake for 12-14 minutes, swapping the trays halfway. You want just a hint of gold on the edges. Let them cool on the sheet for 10 minutes. (A sharp knife gives you the cleanest slices!) I still laugh at my first lopsided pinwheels. They tasted wonderful anyway.
Creative Twists
You can play with this recipe so easily. It’s fun to make it your own. Here are a few ideas I’ve tried over the years.
Chocolate Swirl: Add cocoa powder to half the dough instead of peppermint.
Rainbow Pinwheels: Divide the dough into parts. Color each one with a different food gel.
Sparkly Sugar Rim: Roll the finished log in coarse red or white sugar before slicing.
Which one would you try first? Comment below!
Serving & Pairing Ideas
These cookies are a cheerful treat all on their own. For a special touch, serve them on a vintage plate. A dusting of powdered sugar looks like a light snowfall. They also pair nicely with a scoop of vanilla ice cream. The cold creaminess is perfect with the mint.
For drinks, a cup of hot cocoa is my favorite. The chocolate and mint are old friends. For the grown-ups, a small glass of peppermint schnapps over ice is a festive match. It really brings out the candy flavor. Which would you choose tonight?
Keeping Your Pinwheels Perfect
These cookies keep beautifully. Just store them in a tin at room temperature. They will stay fresh for about a week. You can also freeze the dough log for later. Wrap it well in plastic wrap first. Then pop it in a freezer bag. It will keep for three months. Slice and bake straight from the freezer. Just add a minute or two to the bake time.
I love making a double batch of dough. I bake one log right away. The other log waits in the freezer. This means fresh cookies are always ready for surprise guests. My grandson once showed up with three friends. I had warm cookies for them in twenty minutes. Batch cooking saves the day. It turns a big task into little moments of joy.
Have you ever tried storing cookie dough this way? Share below!
Cookie Troubles and Simple Fixes
Sometimes the dough is too soft to roll. Do not worry. This happens to everyone. Just chill it for thirty minutes first. The butter needs to firm up. I remember my first batch spreading too much. My pinwheels looked like red pancakes. Chilling the dough fixes this every time.
Your swirl might not look tight. This is often because the roll was loose. Roll the dough as tightly as you can. Press gently as you go. A tight roll gives you that pretty spiral. Getting that perfect swirl matters. It makes each cookie a little piece of art. It also means every bite has both flavors.
The cookies can crumble when you slice them. Your log might be too hard. Let it sit on the counter for five minutes. Use a very sharp knife. Clean the blade between cuts. This keeps the shape neat. Solving small problems builds your confidence. You learn that most mistakes have an easy fix.
Which of these problems have you run into before?
Your Quick Questions, Answered
Q: Can I make these gluten-free?
A: Yes. Use a good gluten-free flour blend. Look for one meant for cookies.
Q: How far ahead can I make them?
A: The dough log chills for up to three days. Baked cookies keep for a week.
Q: I don’t have peppermint candies. What can I use?
A: You can leave them out. Just use the peppermint extract. The flavor will still be lovely.
Q: Can I make a smaller batch?
A: Absolutely. Just cut all the ingredients in half. Your log will be smaller and shorter.
Q: Any optional tips?
A: For a festive touch, drizzle with white chocolate. Let it set before serving. *Fun fact: The pinwheel shape is called a “spiral laminate” in fancy baking!*
Which tip will you try first?
From My Kitchen to Yours
I hope you love making these cookies. They always remind me of winter afternoons. The kitchen fills with the smell of peppermint. It is a happy smell. Baking is about sharing stories and treats. I would love to hear about your baking day.
Tell me all about it in the comments. Did your family enjoy them? Did you add your own special twist? Your stories are my favorite thing to read.
Have you tried this recipe? Let me know how it went.
Happy cooking!
—Fiona Brooks.
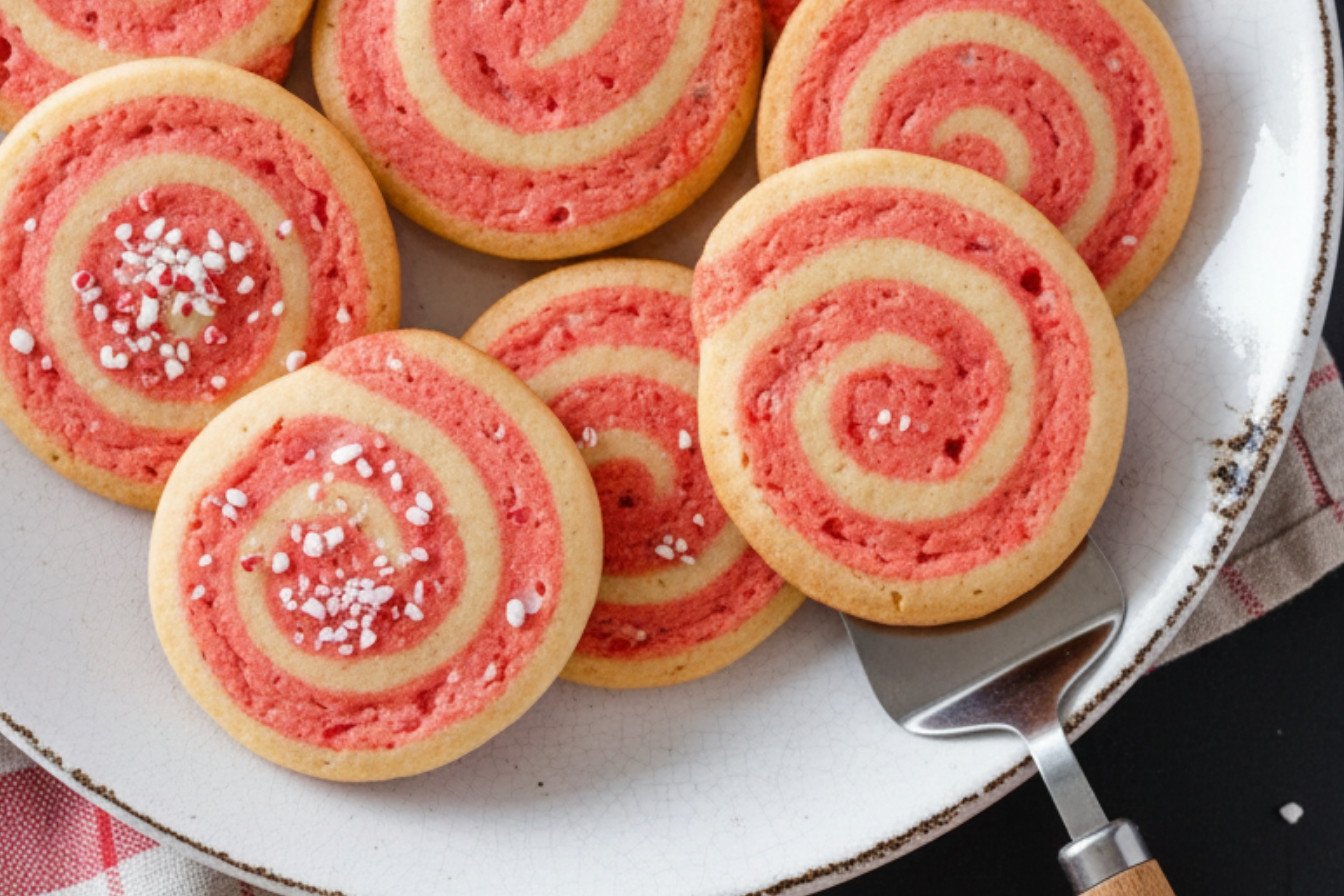
Twisted Peppermint Pinwheel Cookies
Description
Festive and flavorful peppermint pinwheel cookies with a beautiful red and white swirl. Perfect for the holidays.
Ingredients
Instructions
- Prepare the Dough: In a bowl, whisk together the flour, baking powder, and salt. Using an electric mixer, cream the softened butter and sugar on medium-high until pale and fluffy, about 2 minutes. Blend in the egg until fully combined. Reduce the mixer speed to low and gradually add the flour mixture, mixing just until a cohesive dough forms. Remove half of this plain dough and set it aside. To the dough remaining in the bowl, add the vanilla and peppermint extracts, the ground peppermint candies, and the red food coloring. Mix until evenly incorporated.
- Form the Pinwheel Log: Place the reserved plain dough between two sheets of parchment paper and roll it out into a 14 by 8-inch rectangle. Repeat this process with the peppermint dough to create a second rectangle of the same size. Carefully place the peppermint dough rectangle directly on top of the plain dough rectangle, pressing lightly so they stick together. Starting from the long side nearest you, tightly roll the layered doughs into a log. Wrap the log securely in plastic wrap and refrigerate until firm, for at least 2 hours or for up to 3 days.
- Bake the Cookies: Preheat your oven to 375°F and position racks in the upper-middle and lower-middle slots. Line two baking sheets with parchment paper. Slice the chilled dough log into ¼-inch thick rounds and arrange them about 1 inch apart on the prepared sheets. Bake for 12 to 14 minutes, swapping and rotating the sheets halfway through, until the cookie edges just begin to turn golden. Allow the cookies to cool on the sheets for 10 minutes before transferring them to a wire rack to cool completely. Repeat with any remaining dough. Once fully cooled, store the cookies in an airtight container at room temperature.
Notes
- For best results, ensure the dough log is very firm before slicing. Use a sharp, thin-bladed knife and wipe it clean between cuts for neat rounds.


Leave a Reply