A Sweet Start
I have always loved simple recipes. This one only needs three things. It reminds me of my own grandma.
She taught me that the best treats don’t need a fuss. This pecan log is proof of that. It is sweet, nutty, and so easy.
The Magic of Mixing
You will crush the vanilla wafers first. I like to hear the crunch. Then you stir in the milk and pecans.
The best part is using your hands to mix. It feels cool and squishy. Getting messy is half the fun, I think.
A Little Story for You
I once made these logs for a school event. I was in a big hurry. I didn’t let them chill long enough.
When I went to slice them, they were a bit soft. We ended up eating them with spoons! I still laugh at that. Patience is a good lesson for cooking and life.
Why This Treat Matters
Sharing food you made yourself is a special thing. It shows you care. That is why this matters.
It also matters because it is so simple. Anyone can make it and feel proud. What is your favorite simple recipe to share?
A Fun Fact for Your Day
Here is a fun fact for you. The pecan is the only major tree nut that grows naturally in North America. Isn’t that interesting?
It makes this treat feel truly American. I love little facts like that. They make cooking more fun.
The Waiting Game
After you shape the logs, they need to rest in the cold. This is the hardest part. You have to wait.
But waiting makes them firm and perfect for slicing. Doesn’t that smell amazing? The wait is always worth it. Do you find it hard to wait for treats?
Your Turn in the Kitchen
Now you have a wonderful, simple recipe. I hope you try it. It is a great one to make with family.
Making food together creates the best memories. That is another reason this matters. Will you make this for a special person?

Ingredients:
| Ingredient | Amount | Notes |
|---|---|---|
| Vanilla wafers | 1 (11-ounce) box | Finely crushed |
| Sweetened condensed milk | 1 (14-ounce) can | |
| Pecans | 3 1/2 cups | Finely chopped |
My Favorite No-Bake Pecan Logs
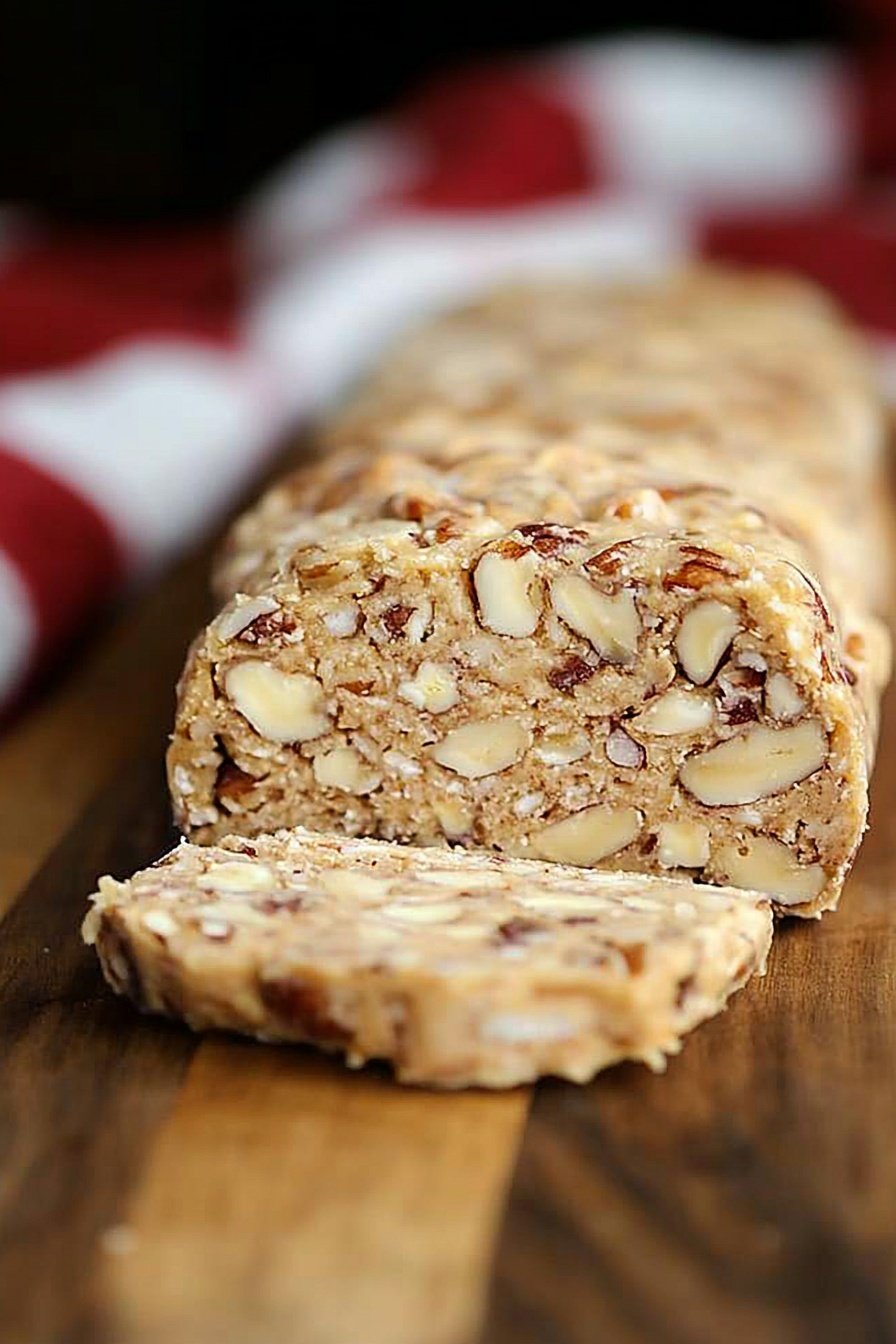
Let me tell you about my easy pecan logs. They are a little piece of my childhood. My own grandma taught me this recipe. It only needs three simple things. I still make them for my grandkids today. They always disappear from the cookie tin so fast. Doesnt that smell amazing? The vanilla and toasted nuts are just wonderful.
You just mix, shape, and chill. There is no oven involved at all. It is the perfect project for a rainy afternoon. I love how simple it is. Even a beginner can feel like a real baker. Let us get our hands a little messy, shall we?
Step 1: First, we need to make the vanilla wafers into crumbs. You can use a food processor for this. It makes the job very quick and easy. Or, you can put them in a bag and crush them. Use a rolling pin to smash them up. It is a fun way to get out any extra energy!
Step 2: Now, put the crumbs in a big bowl. Pour in the sweetened condensed milk. It is that super thick, sweet milk from a can. Then, add all of those lovely chopped pecans. Stir it all together with a big spoon. It will be very thick and sticky.
Step 3: This is the fun part. Wash your hands well and dive in. Squeeze and mix the dough with your fingers. You want everything to be all one color. (My hard-learned tip: if the dough feels too sticky, just chill it for fifteen minutes. It will be much easier to shape). I still laugh at how messy my hands get.
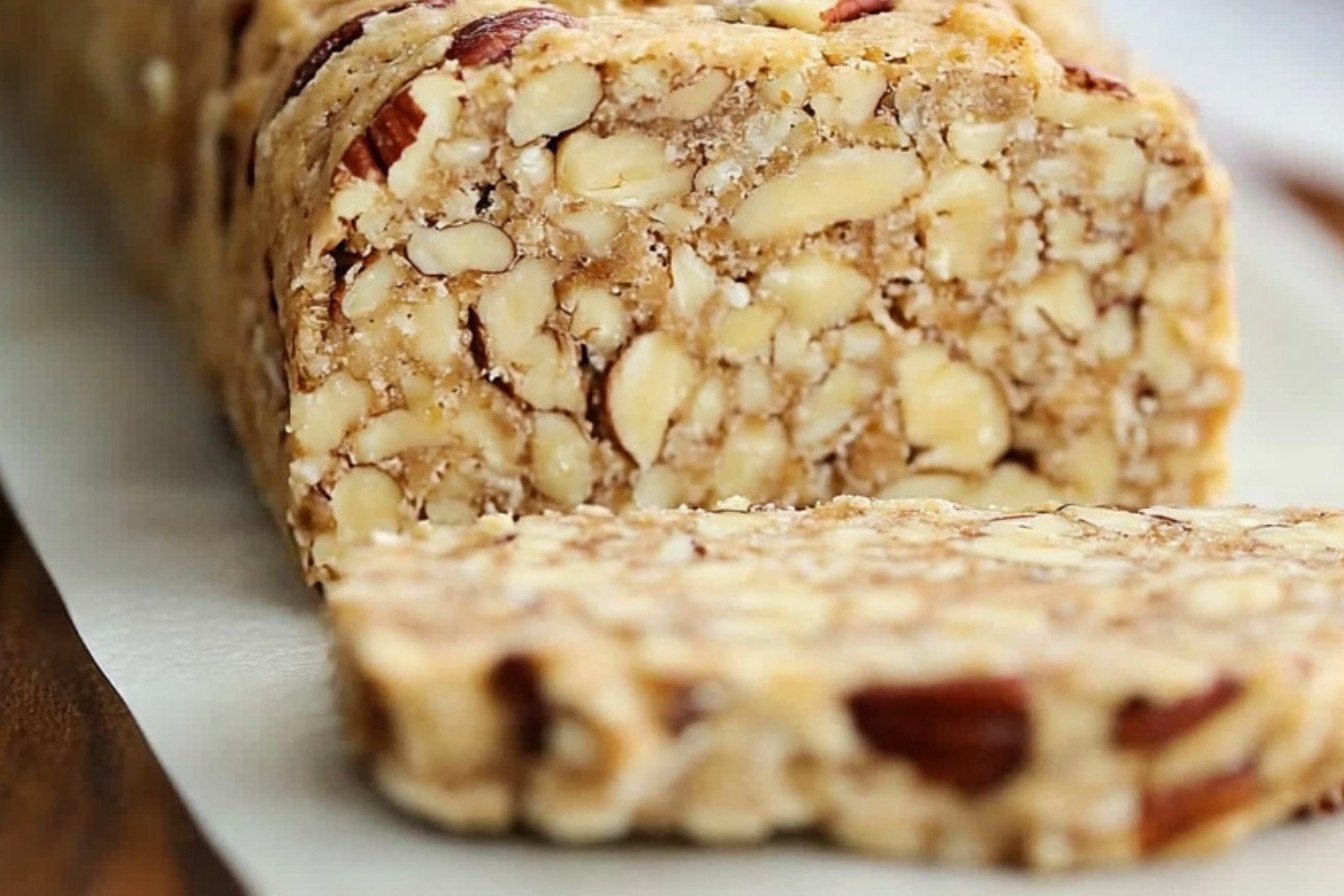
Step 4: Split the dough right down the middle. Shape each half into a log. You want it to look like a little loaf. Press it firmly so it holds its shape. Do you know what these logs remind me of? They look like little snow-covered tree trunks. It always makes me think of wintertime.
Step 5: Wrap each log tightly in wax paper. Then, the hard part is waiting. They need to chill in the fridge for two hours. This helps them get firm for slicing. What is your favorite no-bake treat? Share below! When they are firm, just unwrap and slice. You will have perfect little cookie rounds.
Cook Time: 2 hours (chilling)
Total Time: 2 hours 15 minutes
Yield: 2 logs (about 24 slices)
Category: Dessert, No-Bake
Lets Mix It Up!
This recipe is wonderful as it is. But you can also have fun with it. Try one of these simple twists next time. They add a little extra surprise. I love to experiment in my kitchen. It keeps things exciting for my family.
Chocolate Drizzle: Melt some chocolate chips. Drizzle it over the finished logs. It looks so pretty and tastes divine.
Coconut Roll: Roll the shaped logs in shredded coconut. It adds a nice, tropical flavor and texture.
Christmas Crunch: Add red and green sprinkles to the dough. It makes them perfect for a holiday party.
Which one would you try first? Comment below!
The Perfect Slice
These pecan logs are a treat all on their own. But I love to make a little occasion out of them. A special plate makes everything taste better. I always use my floral china for guests. It just feels more joyful that way.
For serving, try a small plate of sliced oranges. The bright, citrus taste is a lovely contrast. Or just add a dusting of powdered sugar. It looks like a light snowfall on a log. For a drink, a glass of cold milk is always my first choice. For the grown-ups, a sweet sherry wine pairs beautifully. Which would you choose tonight?

Keeping Your Pecan Logs Perfect
These pecan logs love a cool home. Wrap them tight in wax paper. Then tuck them into the fridge.
They will stay happy for a week. You can also freeze them for a month. Just thaw them in the fridge before slicing.
I once left a log out too long. It got a bit soft and lost its shape. Now I always chill it well.
This matters because a firm log makes neat slices. It is perfect for surprise guests. You can make a double batch ahead of time.
Batch cooking saves you time later. It means a sweet treat is always ready. Have you ever tried storing it this way? Share below!
Easy Fixes for Common Hiccups
Is your mixture too sticky to handle? Just wet your hands with cold water. The dough will not stick to you.
I remember when my first log fell apart. I did not press it firmly enough. A good, firm press holds it together.
If the logs are not firm after chilling, wait longer. The fridge needs at least two hours. This patience gives you the best texture.
Getting the texture right builds your cooking confidence. A perfect slice is so satisfying to serve. It shows you care about the little details.
These small steps make a big difference in flavor. Which of these problems have you run into before?
Your Pecan Log Questions Answered
Q: Can I make this gluten-free? A: Yes! Use gluten-free vanilla wafers. The recipe works the same way.
Q: How far ahead can I make it? A: You can make it up to three days ahead. Keep it wrapped in the fridge.
Q: Can I use different nuts? A: Walnuts are a good swap. The taste will be a little different but still yummy.
Q: Can I double the recipe? A: Absolutely. Just use a very large bowl for mixing. You will get four lovely logs.
Q: Any fun extras to add? A: A tiny pinch of cinnamon is nice. It adds a warm, cozy feeling. Which tip will you try first?
A Sweet Note From Fiona
I hope you love making this simple treat. It always reminds me of my own grandma. She taught me that the easiest recipes are often the best.
*Fun fact: The first known pecan log recipe appeared in a community cookbook in the 1950s.* Sharing food is a way to share love. I would be so happy to see your creations.
Have you tried this recipe? Tag us on Pinterest! I love seeing your kitchen adventures. It makes my day.
Happy cooking! —Fiona Brooks.

Easy 3-Ingredient Pecan Log Recipe
Description
This simple no-bake treat requires just three ingredients to create a deliciously sweet and nutty dessert. Perfect for holiday gifts or a quick sweet fix.
Ingredients
Instructions
- Finely crush the vanilla wafers, using a food processor for best results.
- In a large bowl, combine the wafer crumbs, sweetened condensed milk, and chopped pecans. Mix thoroughly until a uniform dough forms; using your hands after an initial stir with a spoon is recommended for best incorporation.
- Separate the mixture into two equal portions. Shape each portion into a log and press firmly to hold its form.
- Individually wrap the logs in wax paper and place them in the refrigerator to chill for a minimum of two hours, or until firm. Serve by slicing the chilled logs.
Notes
- For best results, ensure the logs are chilled thoroughly before slicing to maintain their shape.


Leave a Reply