My First Gluten-Free Roll
I tried gluten-free baking years ago. My first rolls were like little rocks. We used them as doorstops! I still laugh at that.
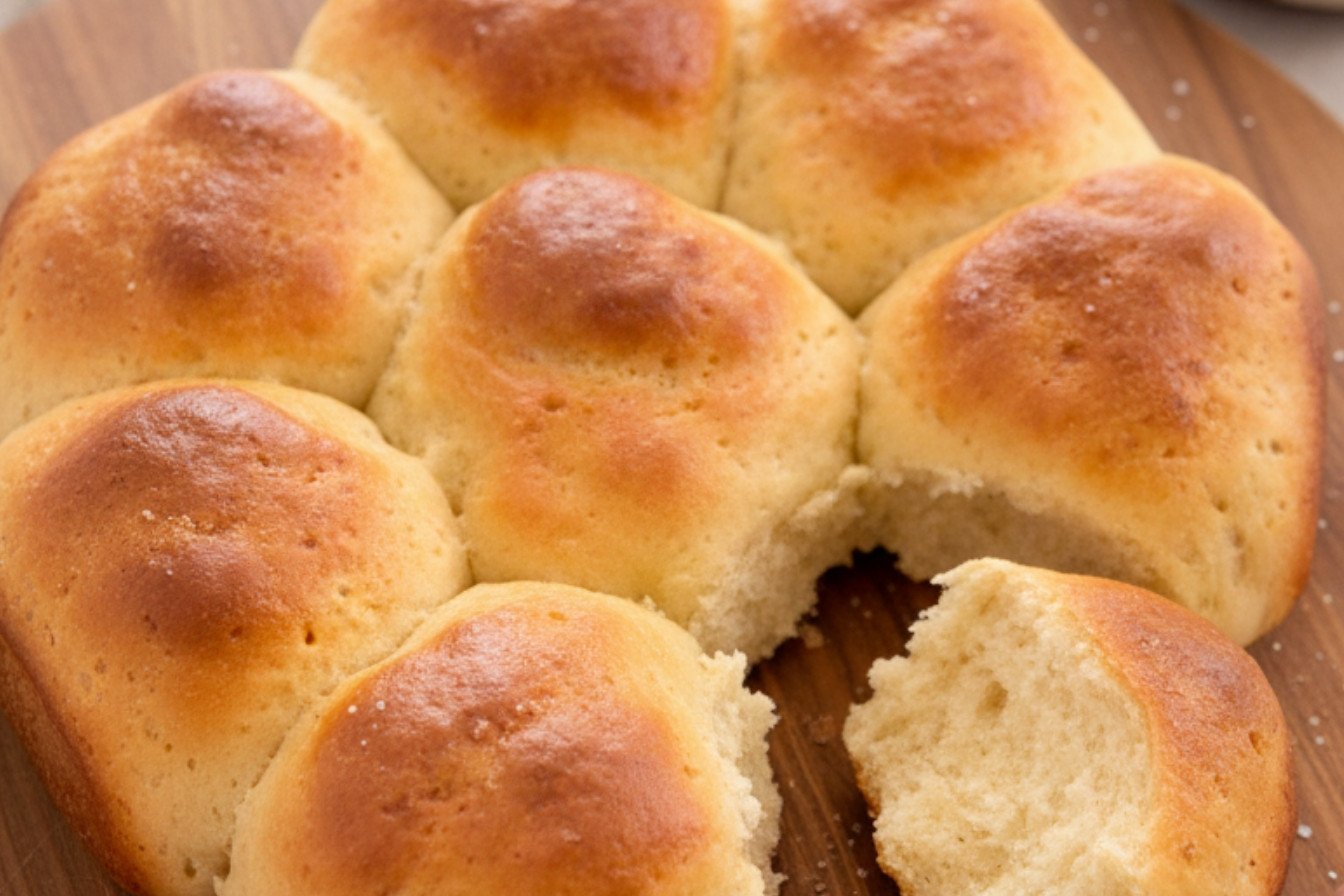
This recipe changed everything. The rolls come out soft and pull-apart perfect. It feels like a little miracle every time. That’s why this matters. Good food should be for everyone.
Your Kitchen Helper, Psyllium
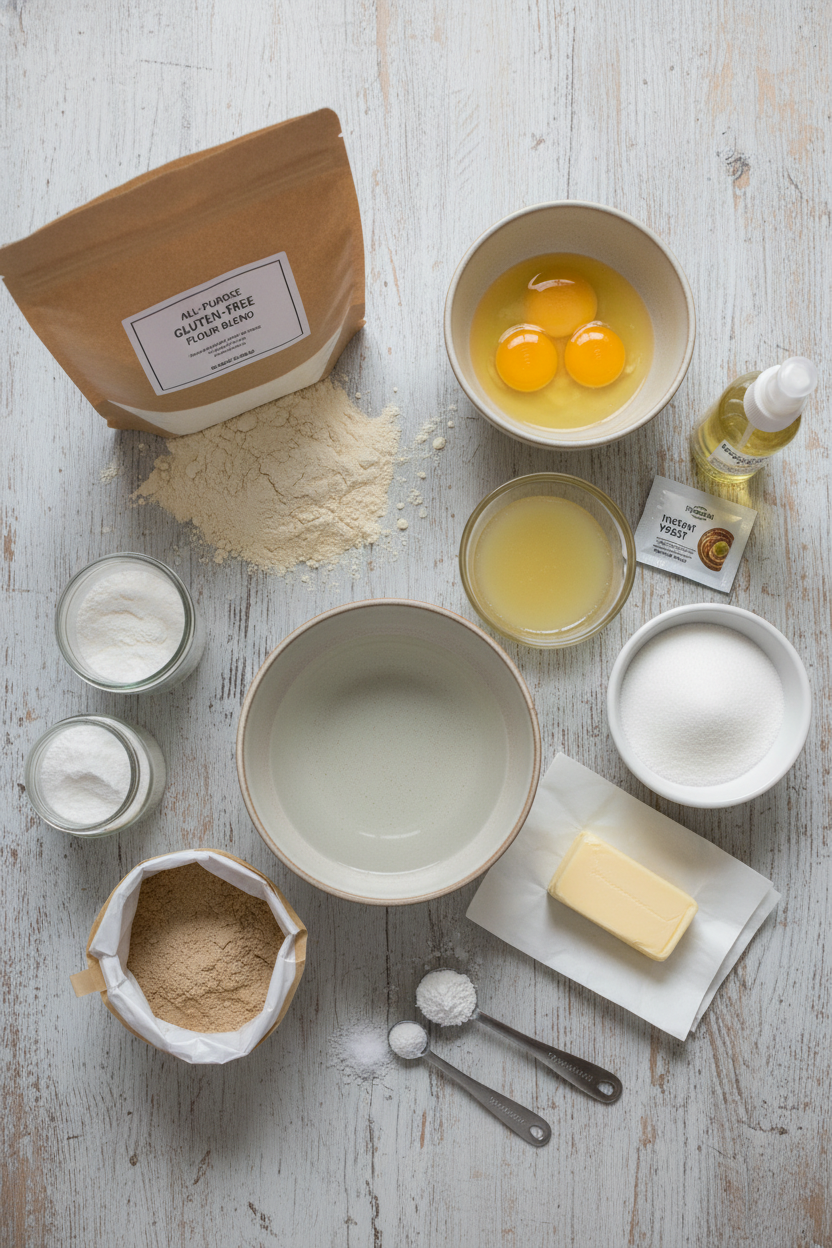
See the psyllium husk powder? It is the secret. Gluten-free flour needs a friend to hold it together. Psyllium is that friend.
It comes from a plant’s seeds. Fun fact: It makes the dough stretchy, just like gluten does! Doesn’t that smell amazing when it bakes? What’s your favorite kitchen secret ingredient?
The Joy of Getting Your Hands Wet
The dough will be sticky. Do not fear it! Wet your hands with cool water. Then shape your dough balls.
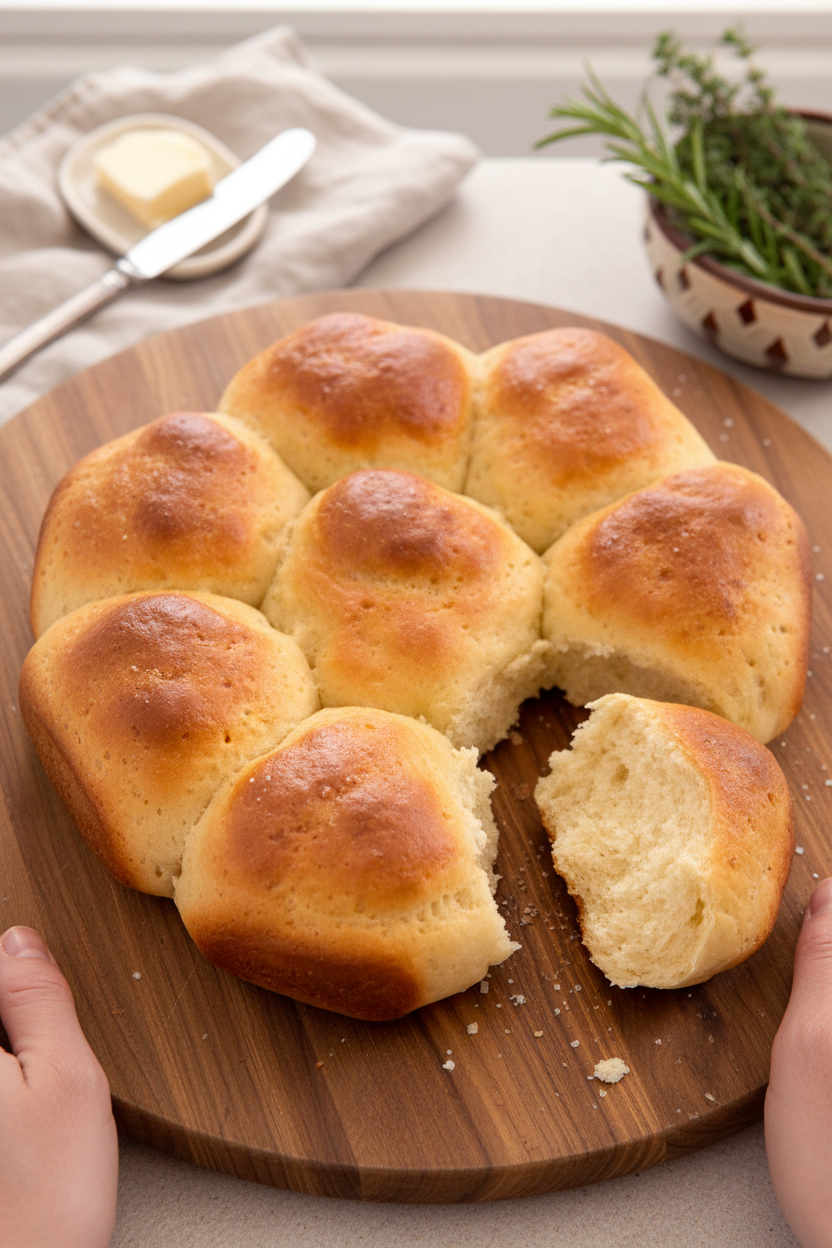
It is messy and fun. You are connecting with your food. Plop them in the pan like a family. Watch them grow into neighbors as they rise. That’s why this matters. Cooking is about touch and care.
Patience for Perfect Rolls
Waiting is the hardest part. Let them rise for a full hour. Let them cool after baking too. I know, I want to eat them right away!
But patience gives you that fluffy inside. The warm, buttery smell will fill your house. It is worth the wait. Do you find it hard to wait for baked goods?
Make It Your Own
These rolls are a blank canvas. Add herbs to the dough. Brush garlic butter on top after baking. The possibilities make me smile.
You can even make the dough ahead. Let it rise in the fridge. Bake them fresh for dinner. What would you add to make them special for your family? Share your ideas with me.
Ingredients:
| Ingredient | Amount | Notes |
|---|---|---|
| Warm water | 1 ⅓ cups (110°F) | For the dough |
| Lemon juice | 2 teaspoons | |
| Large eggs | 2 whole + 1 yolk | 1 whole + 1 yolk for dough, 1 whole for egg wash |
| Water (additional) | 1 teaspoon | For the egg wash |
| America’s Test Kitchen All-Purpose Gluten-Free Flour Blend | 15 oz (425 g / 3⅓ cups) | |
| Nonfat dry milk powder | 1 ½ oz (43 g / ½ cup) | |
| Powdered psyllium husk | 2 tablespoons | |
| Sugar | 2 tablespoons | |
| Instant or rapid-rise yeast | 2 ¼ teaspoons | |
| Baking powder | 2 teaspoons | |
| Salt | 1 ½ teaspoons + pinch | 1 ½ tsp for dough, pinch for egg wash |
| Unsalted butter | 6 tablespoons | Softened, cut into 6 pieces |
| Vegetable oil spray | as needed | For pan |
Instructions
Step 1: First, spray your cake pan. Now, grab a bowl for the wet things. Whisk your warm water, lemon juice, and eggs together. It should feel like a cozy bath. In your mixer bowl, mix all the dry ingredients. Give it a little stir on low. Slowly pour in your egg mixture. A sticky dough will form. (A quick scrape of the bowl sides helps everything mix.) Now add the soft butter. Turn the mixer to medium and let it beat for 6 minutes. The dough gets wonderfully sticky and smooth.
Step 2: Wet your hands so the dough doesn’t stick. Divide it into eight pieces. Shape each piece into a rough ball. Place one in the middle of your pan. Put the other seven around it. Cover the pan with plastic wrap. Let them rise for an hour. They will puff up and become friends, touching sides. I love watching them grow. What’s your favorite part of baking? Share below! (You can pop them in the fridge now for a few hours if you need to.)
Step 3: Heat your oven to 375°F. Make the egg wash. Beat one egg with a teaspoon of water and a tiny salt pinch. Uncover your beautiful risen rolls. Brush the tops gently with the egg wash. This gives them a gorgeous golden shine. Bake for 35 to 40 minutes. Remember to turn the pan halfway. You’ll know they’re done by their deep, golden-brown color. Doesn’t that smell amazing?
Step 4: Patience is a virtue here. Let the rolls cool in the pan for 10 minutes. Then, tip them out onto a rack. Flip them right-side up so their bottoms don’t get soggy. Let them cool a bit more, about 15 minutes. Now, the best part. Pull them apart while they’re still warm. The steam and smell are just heavenly. I still laugh at how fast these disappear in my house.
Creative Twists
These rolls are a perfect blank canvas. You can make them your own so easily. Try mixing in some fun flavors before you shape the dough.
Garlic & Herb: Add a teaspoon of garlic powder and two tablespoons of chopped fresh rosemary.
Everything Spice: Roll each dough ball in “everything bagel” seasoning before placing in the pan.
Cinnamon Sugar: Mix a tablespoon of sugar with a teaspoon of cinnamon. Sprinkle generously on top after the egg wash.
Which one would you try first? Comment below!
Serving & Pairing Ideas
These rolls deserve a lovely spot on your table. For a simple supper, serve them with a big pot of soup or a hearty stew. They are perfect for sopping up the last delicious drops. You can also split them and make tiny sandwiches with leftover roast chicken. A little honey butter on the side is never a wrong choice.
For drinks, a cold glass of apple cider is just right. It’s sweet and cozy. For the grown-ups, a light, crisp white wine pairs beautifully. It cuts through the rich, buttery roll. Which would you choose tonight?
Keeping Your Rolls Fresh and Warm
These rolls are best the day you bake them. But leftovers are a treat. Let them cool completely first. Then store them in a bag at room temperature for two days.
To freeze them, wrap each roll tightly in plastic. Pop them all into a freezer bag. They will keep for one month. I once froze a batch for my grandson’s surprise visit. He was so happy.
Reheat frozen rolls in a 350°F oven for 10 minutes. This brings back their soft inside. You can also warm day-old rolls this way. Batch cooking matters because it saves time for busy days.
You can shape the dough balls and freeze them before the rise. Thaw them in the pan overnight. Then let them rise and bake. Have you ever tried storing rolls this way? Share below!
Simple Fixes for Common Roll Troubles
Sometimes baking can be tricky. Do not worry. Here are easy fixes. First, if your rolls did not rise, check your yeast. Your water must be warm, not hot. Hot water will hurt the yeast.
I remember when my first batch stayed flat. My water was too hot. This matters because live yeast makes the rolls light. Second, if the dough is too sticky, wet your hands. This prevents a big mess.
Third, if the tops brown too fast, tent them with foil. This lets the inside cook without burning. Getting this right builds your cooking confidence. It also makes the flavor perfect. Which of these problems have you run into before?
Your Quick Questions, Answered
Q: Can I use a different gluten-free flour?
A: I only recommend the one listed. Other blends may not work the same.
Q: Can I make the dough ahead?
A: Yes. After the first rise in the pan, cover and refrigerate. Bake within four hours.
Q: What if I don’t have psyllium husk?
A: You must use it. It gives the rolls their bread-like texture. There is no good swap.
Q: Can I double the recipe?
A: Yes. Simply make two separate batches. Mixing one huge batch is hard on your mixer.
Q: Is the egg wash necessary?
A: It gives a lovely shiny, golden top. But you can skip it if needed. Your rolls will still taste great. Which tip will you try first?
A Final Word From My Kitchen
I hope you love making these rolls. There is nothing like warm bread at your table. *Fun fact: The smell of baking bread is one of the most comforting scents in the world.*
Sharing food is sharing love. I would love to hear about your baking adventure. Tell me all about it. Have you tried this recipe? Please leave a comment below and let me know.
Happy cooking!
—Fiona Brooks.
Perfect Gluten Free Dinner Rolls
Description
Soft, fluffy, and perfectly risen gluten-free dinner rolls that are ideal for any meal.
Ingredients
Instructions
- Prepare a 9-inch round cake pan by coating it with vegetable oil spray. In a separate bowl, combine 1 ⅓ cups of warm water, the lemon juice, and one whole egg plus the yolk, whisking them together. In the bowl of a stand mixer with the paddle attachment, blend the gluten-free flour blend, dry milk powder, psyllium husk, sugar, yeast, baking powder, and 1 ½ teaspoons of salt on a low setting. Gradually pour in the water and egg mixture, mixing until a dough forms, which should take about a minute; pause to scrape the sides of the bowl as necessary. Incorporate the softened butter, raise the mixer speed to medium, and continue beating for approximately 6 minutes until the dough is cohesive and sticky.
- With wet hands, portion the dough into roughly ⅓-cup amounts and shape each into a ball. Place one roll in the center of the prepared pan and the remaining seven around the perimeter. Cover the pan loosely with plastic wrap and allow the rolls to rise at room temperature until they have doubled in size and are touching, about 1 hour. (If desired, the risen rolls can be refrigerated for up to four hours before baking.)
- Preheat your oven to 375°F with a rack in the center position. Create an egg wash by lightly beating the remaining whole egg with one teaspoon of water and a pinch of salt. Uncover the rolls and gently brush the tops with the egg wash. Bake for 35 to 40 minutes, rotating the pan halfway through, until the rolls are a deep golden brown.
- After baking, let the rolls cool in the pan on a wire rack for 10 minutes. Then, carefully turn them out onto the rack and flip them right-side up. Allow them to cool for an additional 10 to 15 minutes before pulling them apart. Serve while still warm.
Notes
- For best results, use the specified gluten-free flour blend. The dough will be sticky; wetting your hands makes shaping much easier. The rolls can be made ahead through the rise step and refrigerated.


Leave a Reply